Getting Started
This will guide you in enabling a passwordless login to your OpenShift cluster
TABLE OF CONTENTS
- What You Need From RedHat
- What You Need From TraitWare
- Creating the TraitWare OpenID Identity Provider in RedHat
- Creating an Application in TraitWare
- Completing the Setup in Your OpenShift Cluster
- Passwordless Login to Your Cluster
- Creating the TraitWare OpenID Identity Provider in RedHat
- Creating an Application in TraitWare
- Completing the Setup in Your OpenShift Cluster
- Passwordless Login to Your Cluster
- Creating the TraitWare OpenID Identity Provider in RedHat
- Creating an Application in TraitWare
- Completing the Setup in Your OpenShift Cluster
- Passwordless Login to Your Cluster
What You Need From RedHat
You need a RedHat OpenShift cluster deployed with administrator access.
What You Need From TraitWare
You need an active TraitWare account with administrator access.
Creating the TraitWare OpenID Identity Provider in RedHat
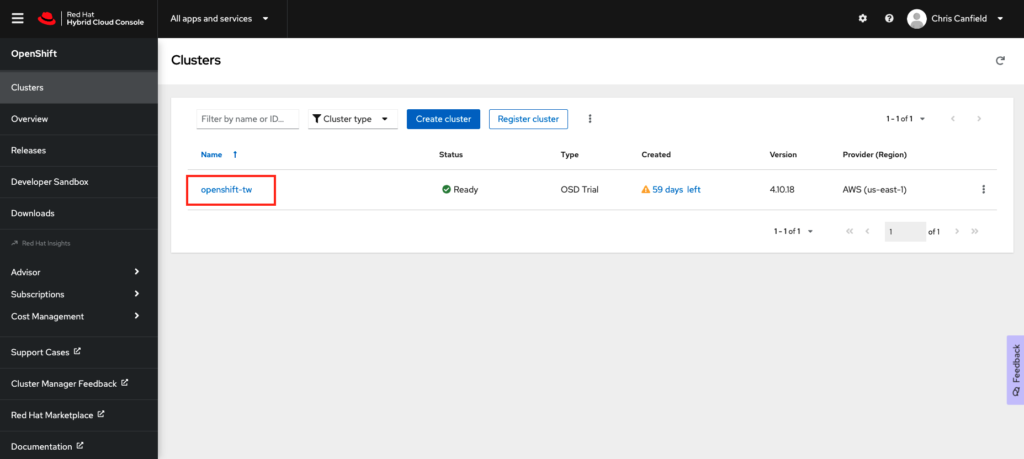
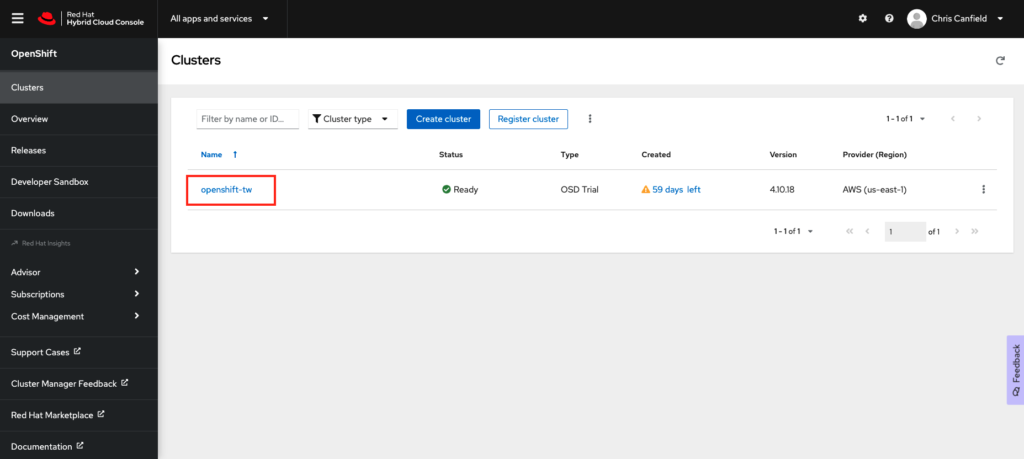
In your RedHat Cloud Console, select the cluster where you would like to add passwordless login.
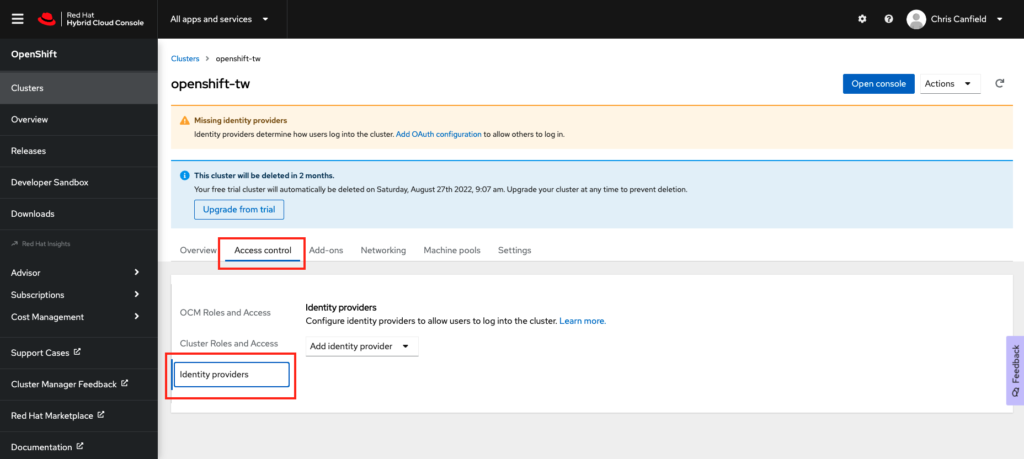
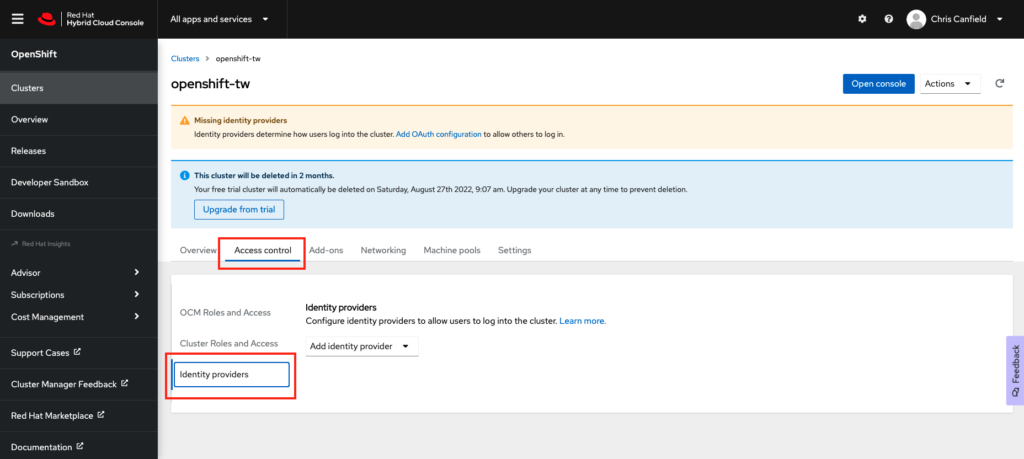
Choose Access Control and select Identity Providers.
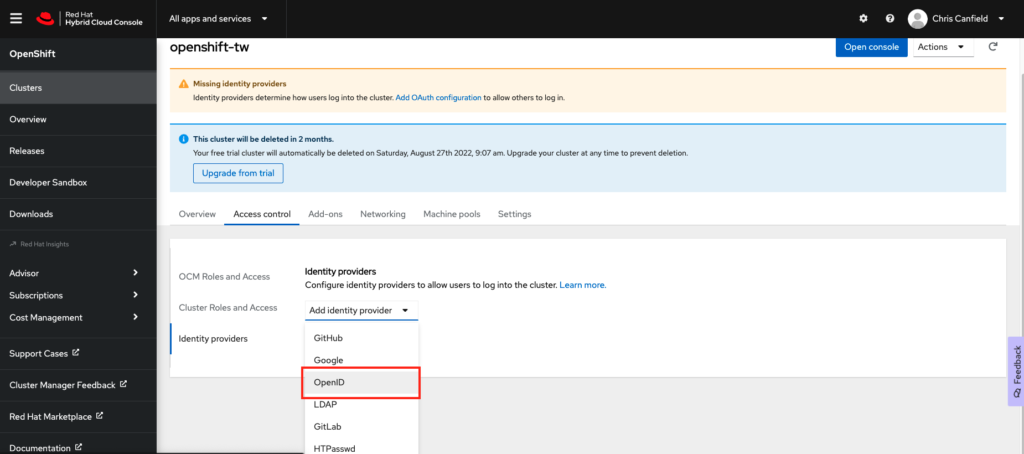
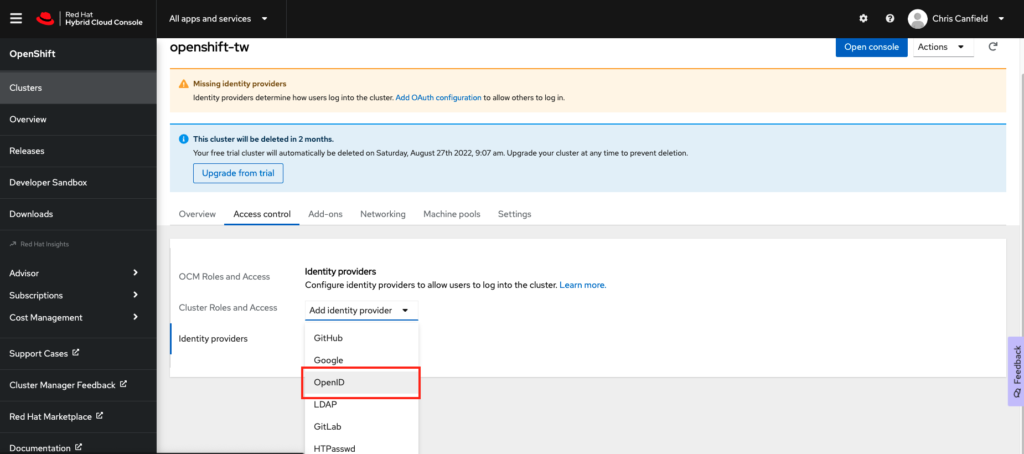
From the ‘Add Identity Provider’ dropdown, select OpenID.
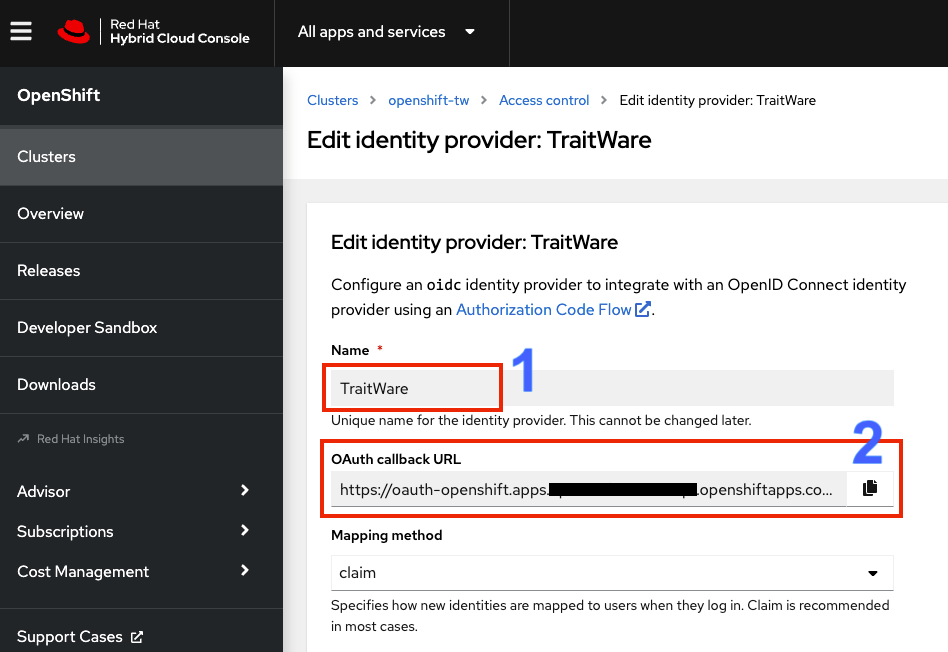
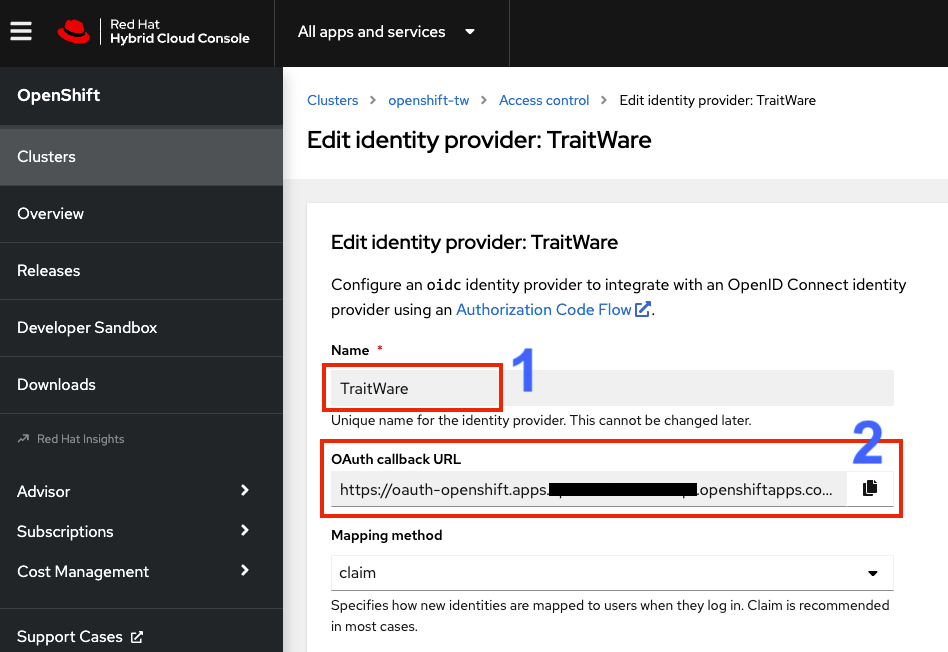
- Create a Name for the identity provider. We suggest TraitWare.
- Copy the OAuth callback URL. You will need to paste this into the TraitWare application we create next.
Creating an Application in TraitWare
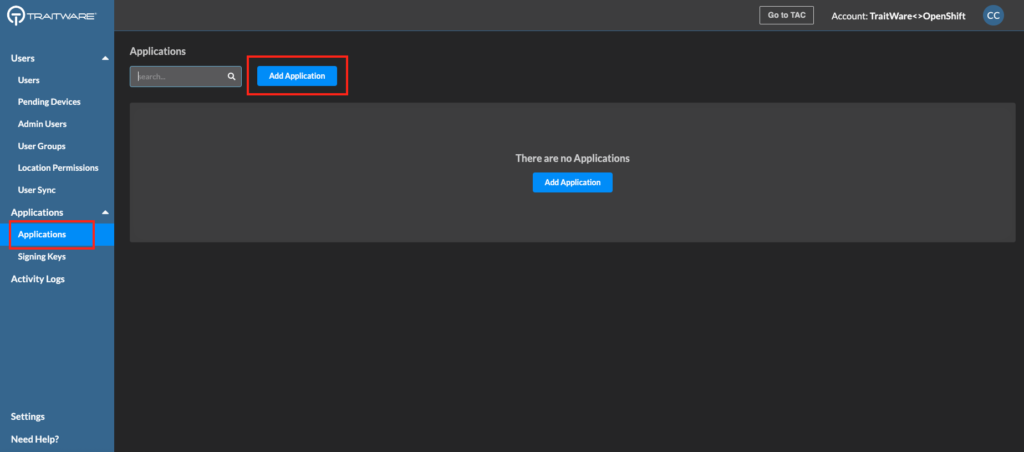
Login to your TraitWare Admin Console (admin.traitware.com). Click Applications and Add Application.
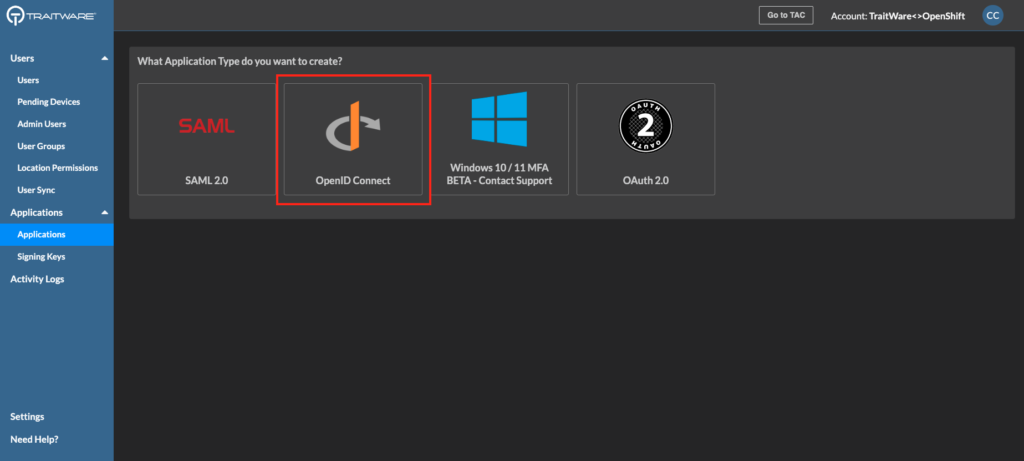
Select OpenID Connect.
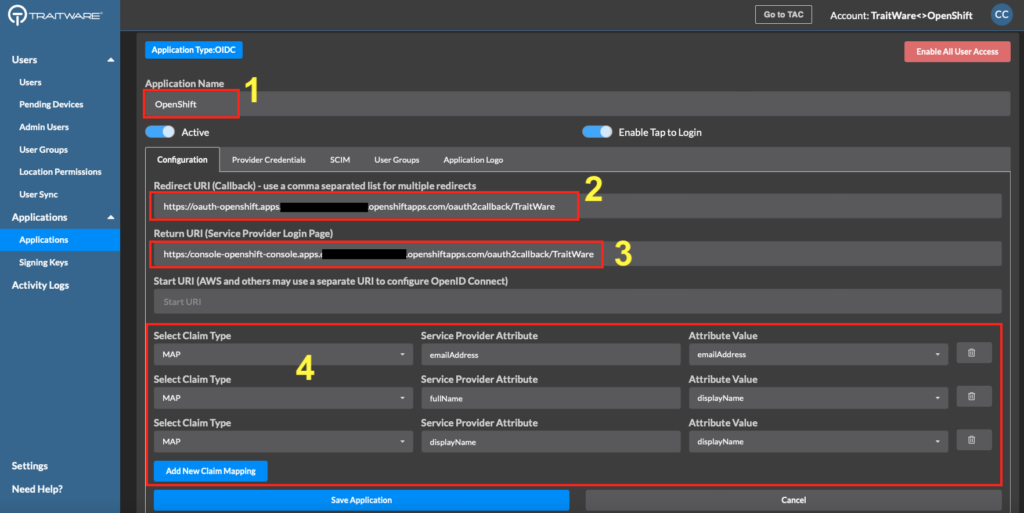
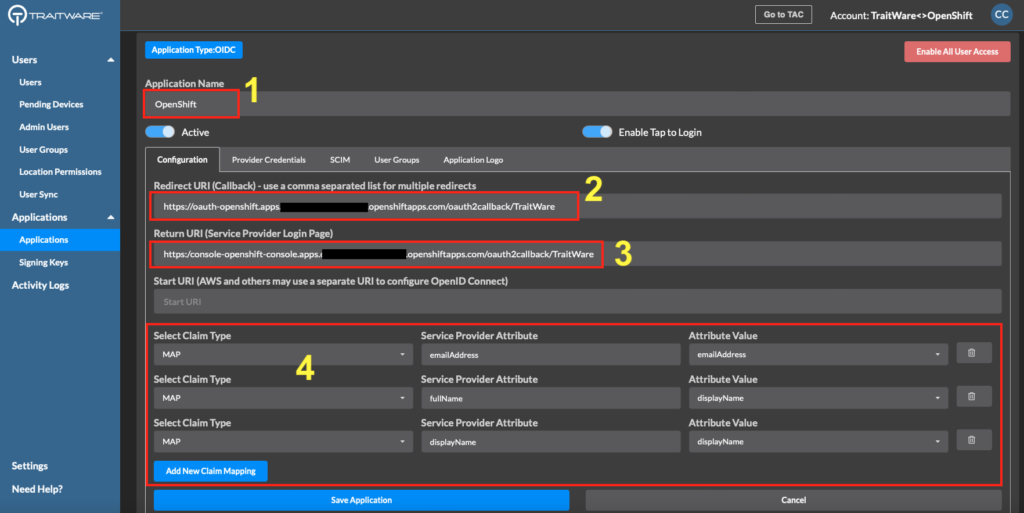
Next, you will need to fill out information in the application.
- Name your application.
- Paste the Redirect URI from the OpenID setup in your Cluster (OAuth callback URL).
- Set the Return URI. Note that it is very similar to the Redirect URI. (https://console-openshift-console…)
- Add the three Claim Mappings as you see in the screenshot. They are all MAP types.
- Save the application.
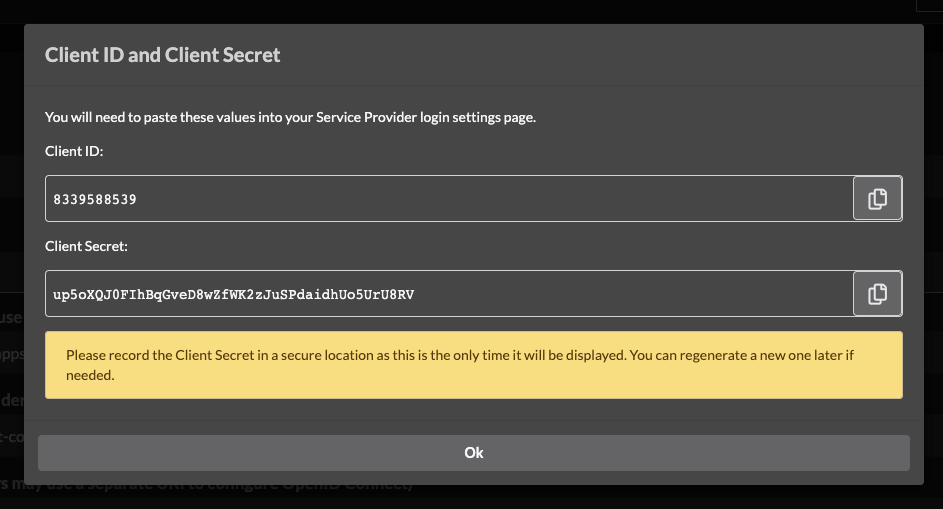
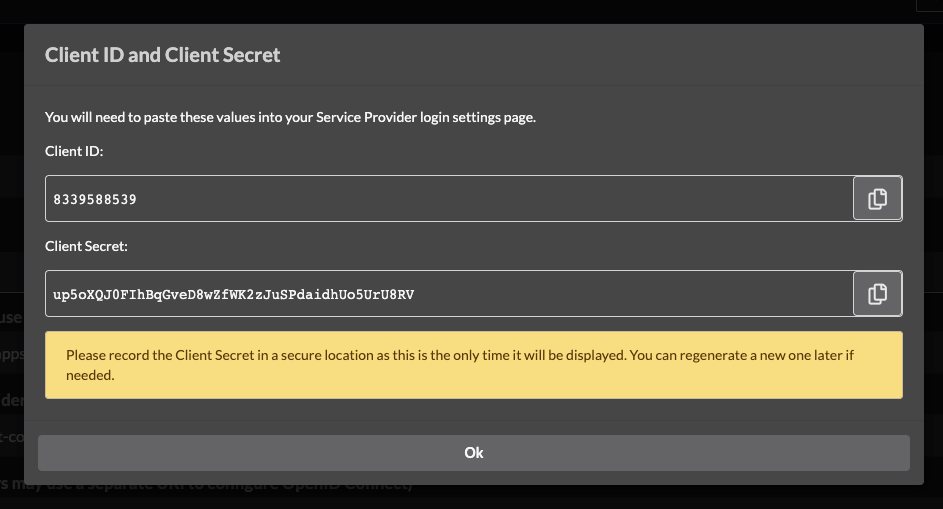
You will see two values, the Client ID and the Client Secret (different from those shown here). Copy these and paste them into your OpenShift configuration. Note: If you accidentally click ‘Ok’ you can regenerate your Client Secret again.
Completing the Setup in Your OpenShift Cluster
Paste the the Client ID and the Client Secret into your OpenShift identity provider configuration.
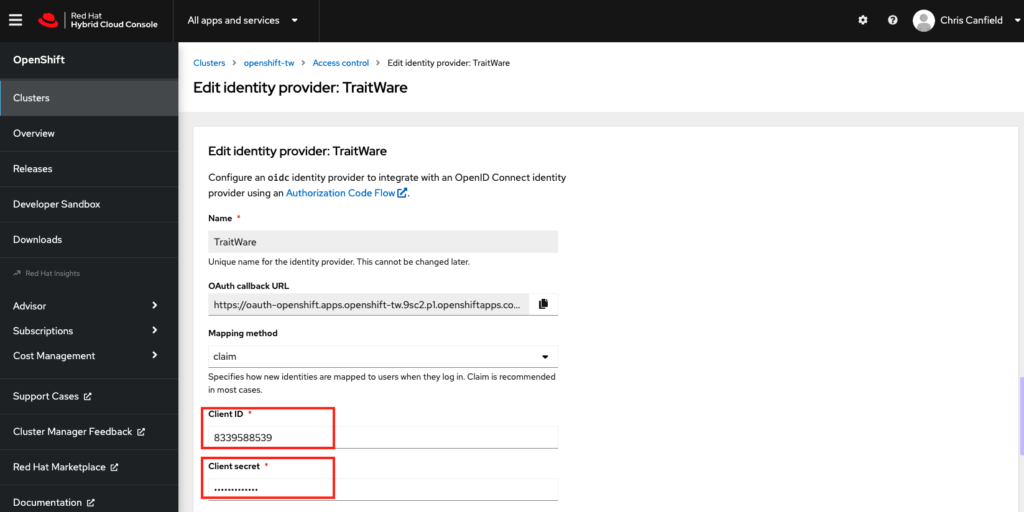
Scroll down and fill in the remaining fields.
- For the Issuer URL use https://api.traitware.com.
- For Email use emailAddress.
- For Name use fullName.
- For Preferred username use userName.
- Click Save.

Your setup is complete!
Passwordless Login to Your Cluster
Make sure your users are registered in TraitWare and have access to the OpenShift application you created in TraitWare. You can add and remove them as needed.


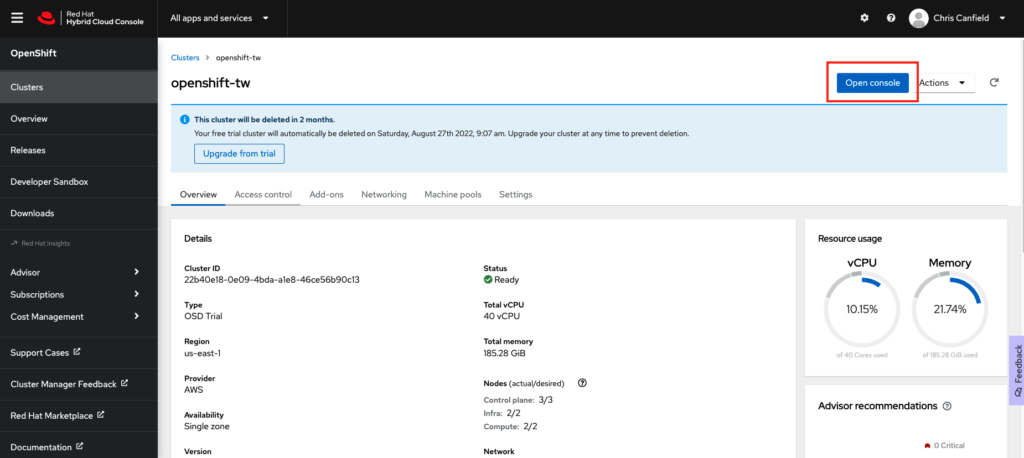
In your RedHat cluster, click Open console.
Click on TraitWare.
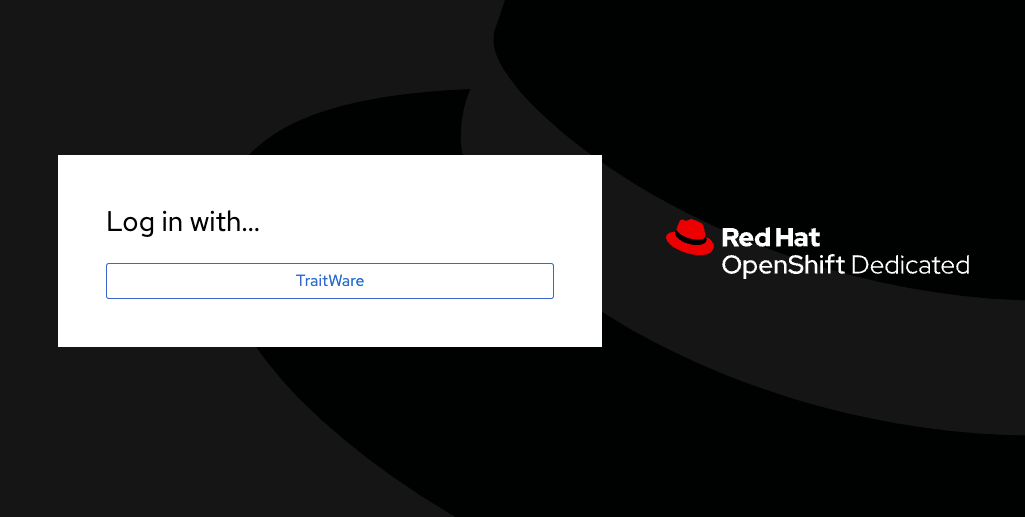
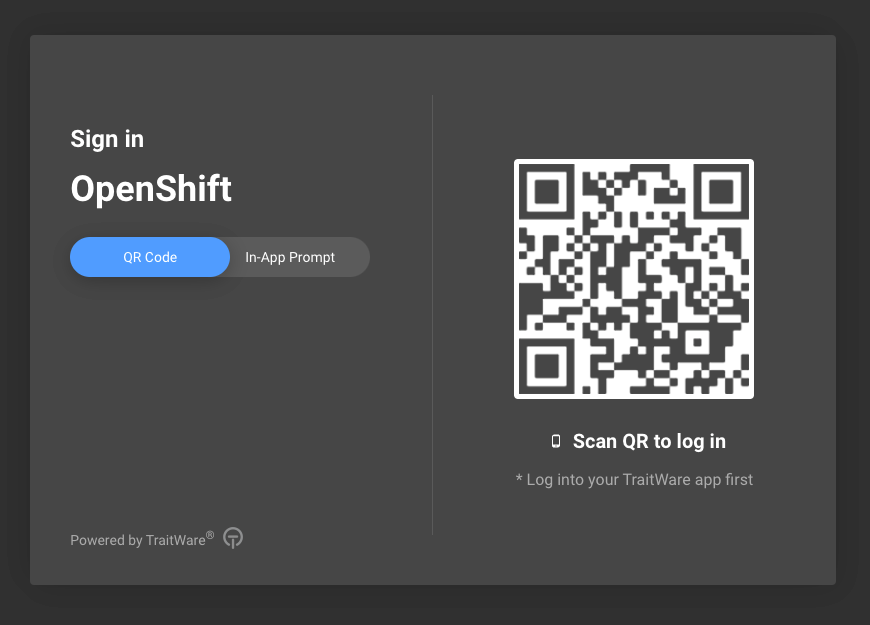
You will see the TraitWare QR login screen. Scan the QR with you mobile TraitWare Authentication app.

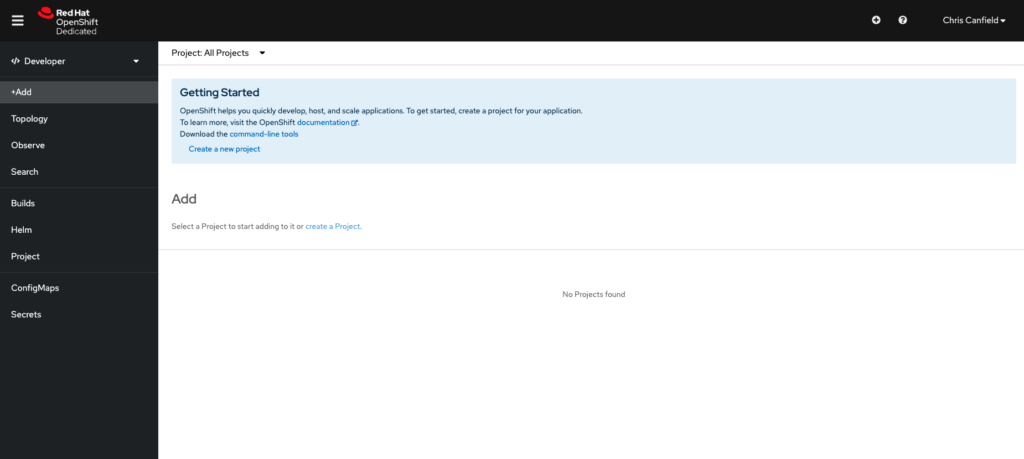
You are now logged into your OpenShift Cluster!

If you have any questions about your setup we are here to help. Email support@traitware.com.
Getting Started
This will guide you in enabling a passwordless login to your OpenShift cluster.
What You Need From RedHat
You need a RedHat OpenShift cluster deployed with administrator access.
What You Need From TraitWare
You need an active TraitWare account with administrator access.
Creating the TraitWare OpenID Identity Provider in RedHat
In your RedHat Cloud Console, select the cluster where you would like to add passwordless login.
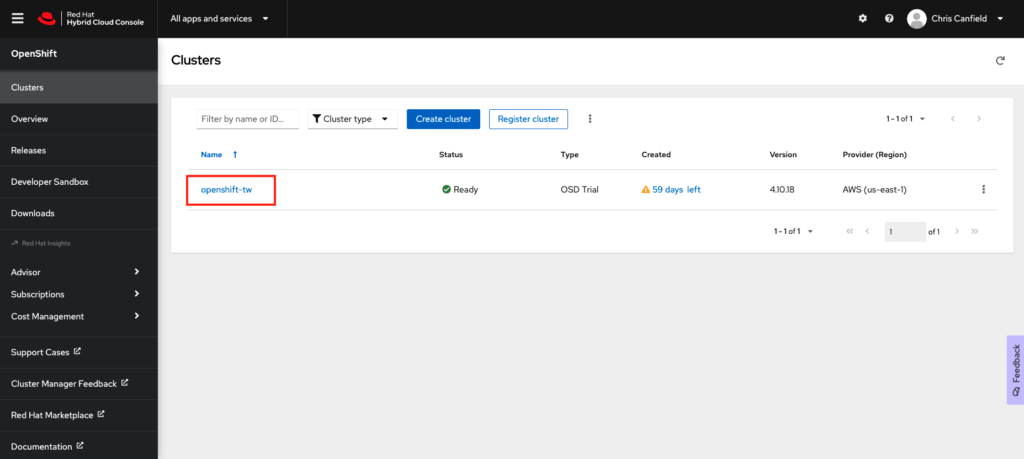
Choose Access Control and select Identity Providers.
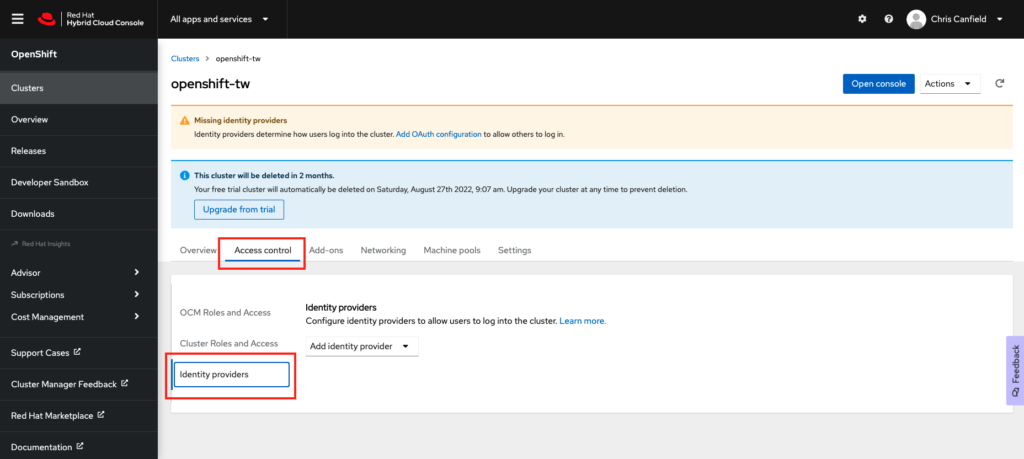
From the ‘Add Identity Provider’ dropdown, select OpenID.
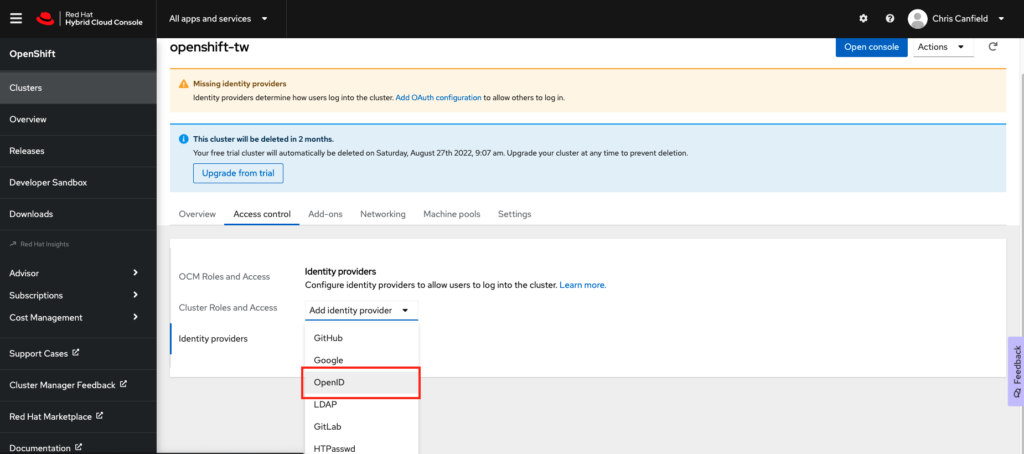
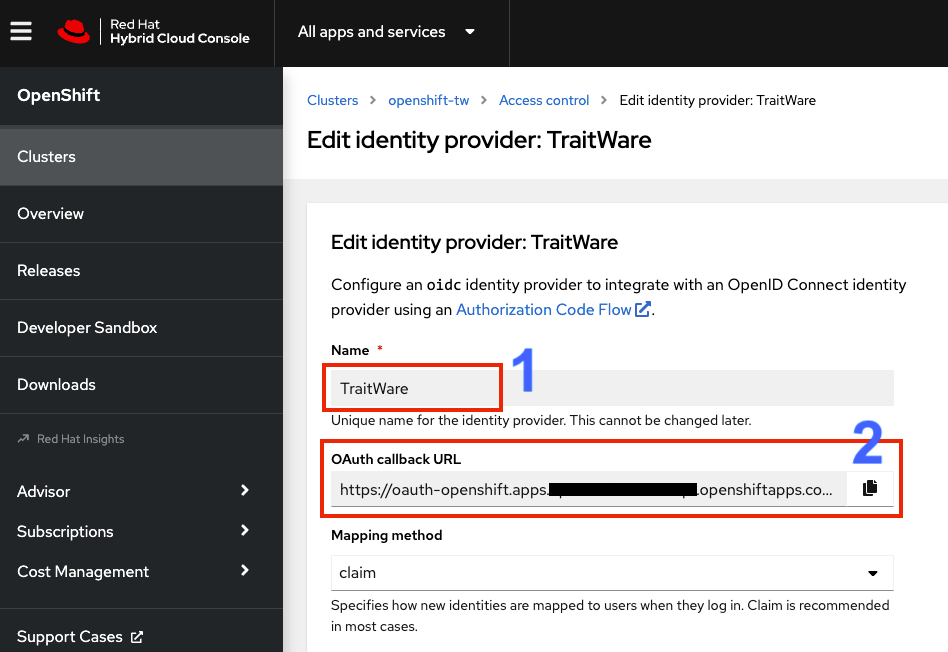
- Create a Name for the identity provider. We suggest TraitWare.
- Copy the OAuth callback URL. You will need to paste this into the TraitWare application we create next.
Creating an Application in TraitWare
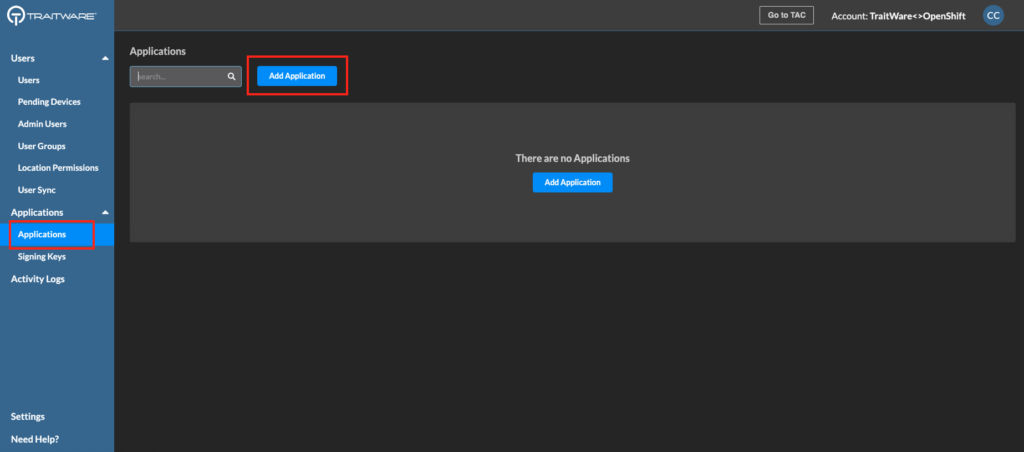
Login to your TraitWare Admin Console (admin.traitware.com). Click Applications and Add Application.
Select OpenID Connect.
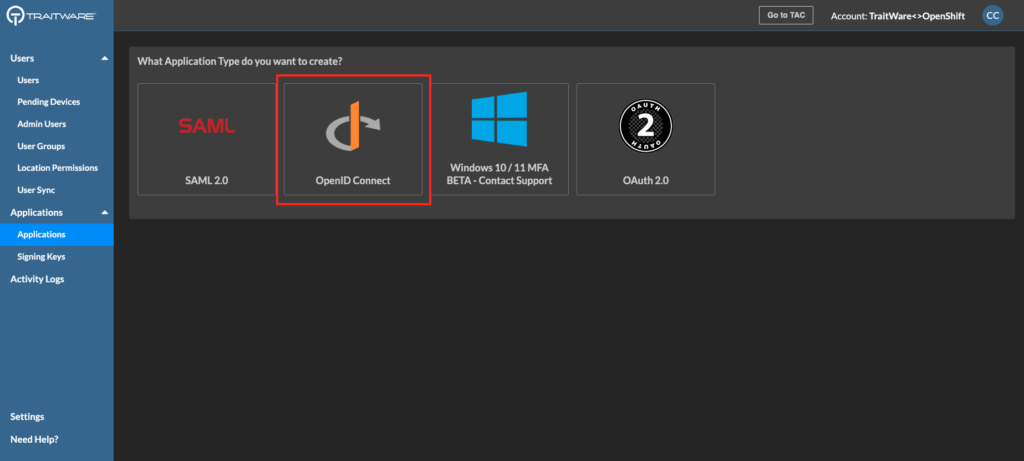
Next, you will need to fill out information in the application.
- Name your application.
- Paste the Redirect URI from the OpenID setup in your Cluster (OAuth callback URL).
- Set the Return URI. Note that it is very similar to the Redirect URI. (https://console-openshift-console…)
- Add the three Claim Mappings as you see in the screenshot. They are all MAP types.
- Save the application.
You will see two values, the Client ID and the Client Secret (different from those shown here). Copy these and paste them into your OpenShift configuration. Note: If you accidentally click ‘Ok’ you can regenerate your Client Secret again.
Completing the Setup in Your OpenShift Cluster
Paste the the Client ID and the Client Secret into your OpenShift identity provider configuration.
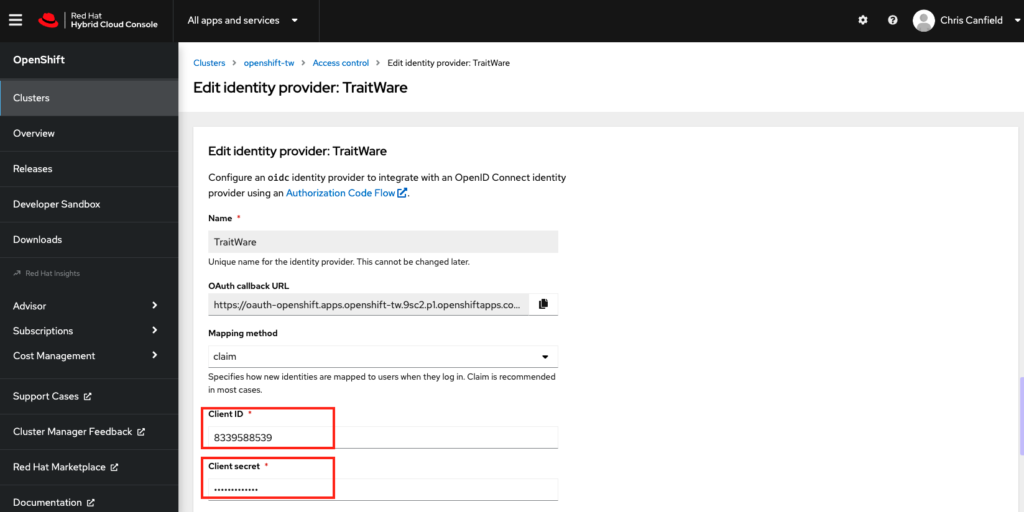
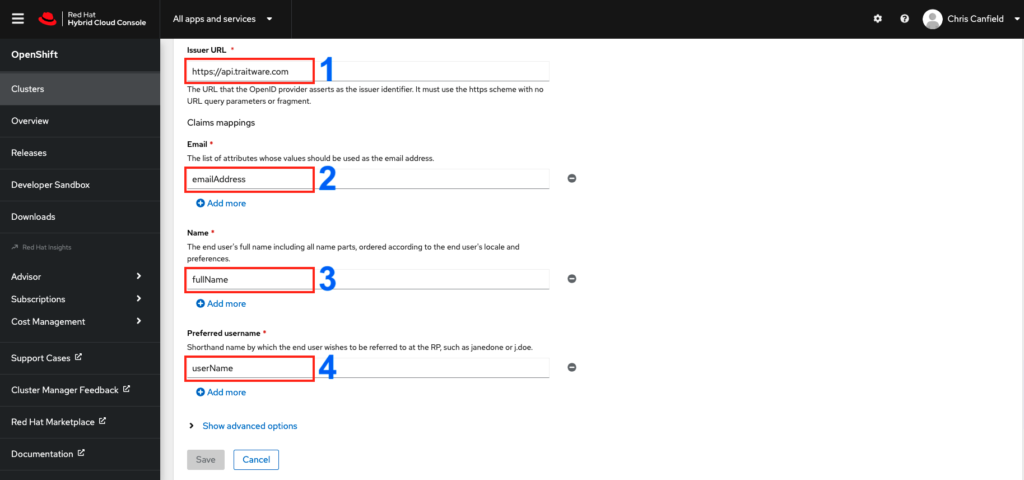
Scroll down and fill in the remaining fields.
- For the Issuer URL use https://api.traitware.com.
- For Email use emailAddress.
- For Name use fullName.
- For Preferred username use userName.
- Click Save.
Your setup is complete!
Passwordless Login to Your Cluster
Make sure your users are registered in TraitWare and have access to the OpenShift application you created in TraitWare. You can add and remove them as needed.


In your RedHat cluster, click Open console.
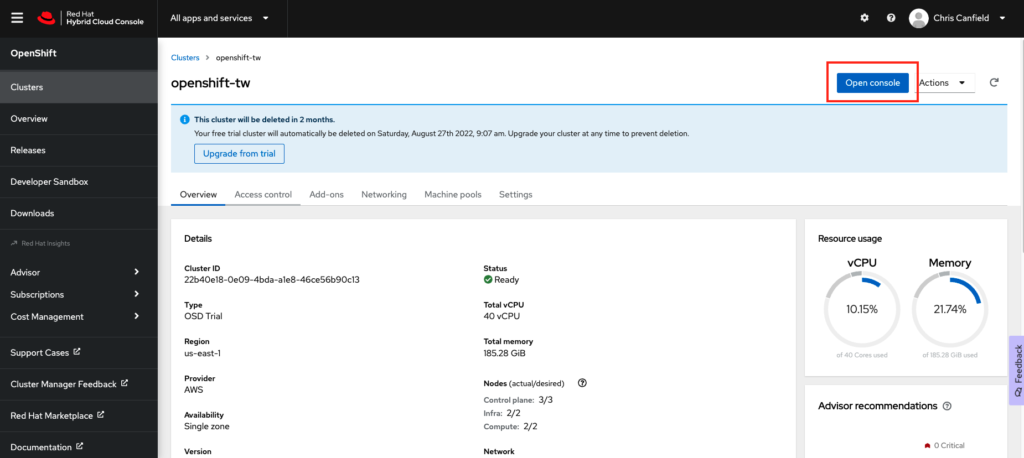
Click on TraitWare.

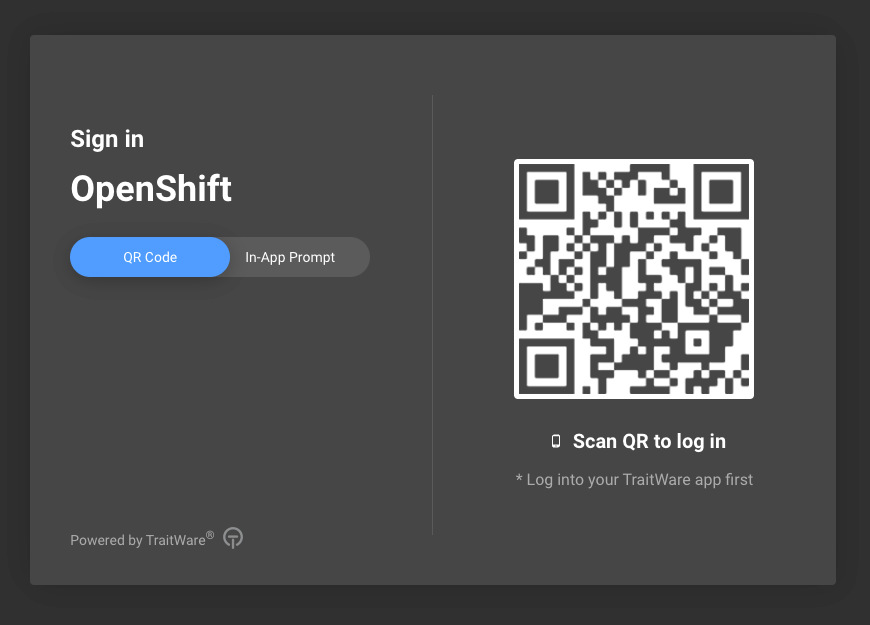
You will see the TraitWare QR login screen. Scan the QR with you mobile TraitWare Authentication app.
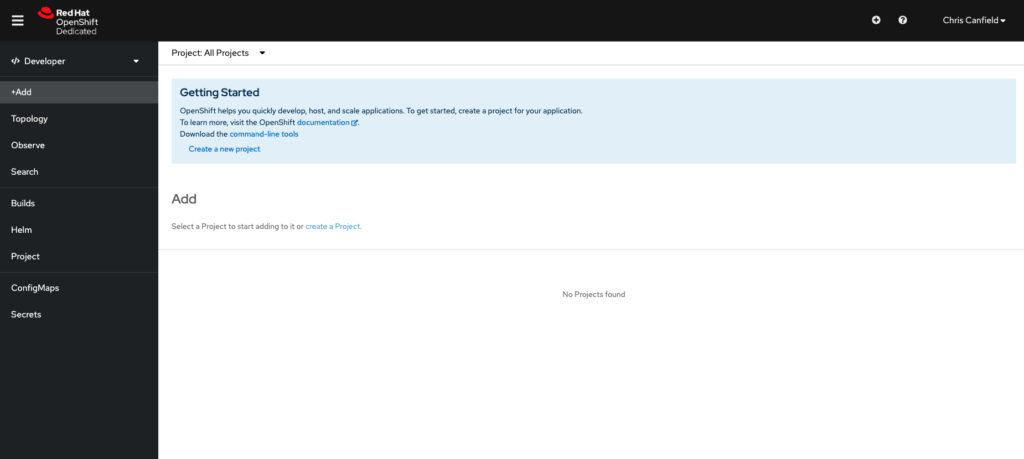
You are now logged into your OpenShift Cluster!
If you have any questions about your setup we are here to help. Email support@traitware.com.
Getting Started
This will guide you in enabling a passwordless login to your OpenShift cluster.
What You Need From RedHat
You need a RedHat OpenShift cluster deployed with administrator access.
What You Need From TraitWare
You need an active TraitWare account with administrator access.
Creating the TraitWare OpenID Identity Provider in RedHat
In your RedHat Cloud Console, select the cluster where you would like to add passwordless login.
Choose Access Control and select Identity Providers.
From the ‘Add Identity Provider’ dropdown, select OpenID.
- Create a Name for the identity provider. We suggest TraitWare.
- Copy the OAuth callback URL. You will need to paste this into the TraitWare application we create next.
Creating an Application in TraitWare
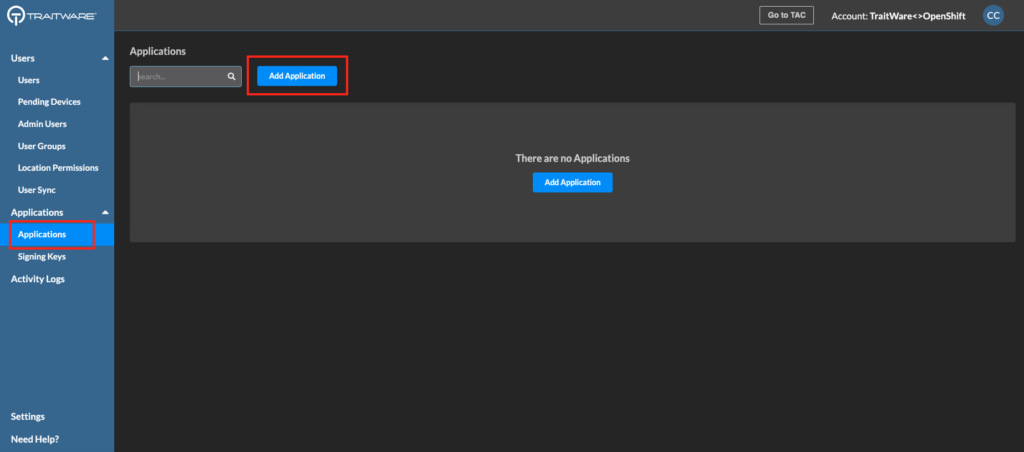
Login to your TraitWare Admin Console (admin.traitware.com). Click Applications and Add Application.
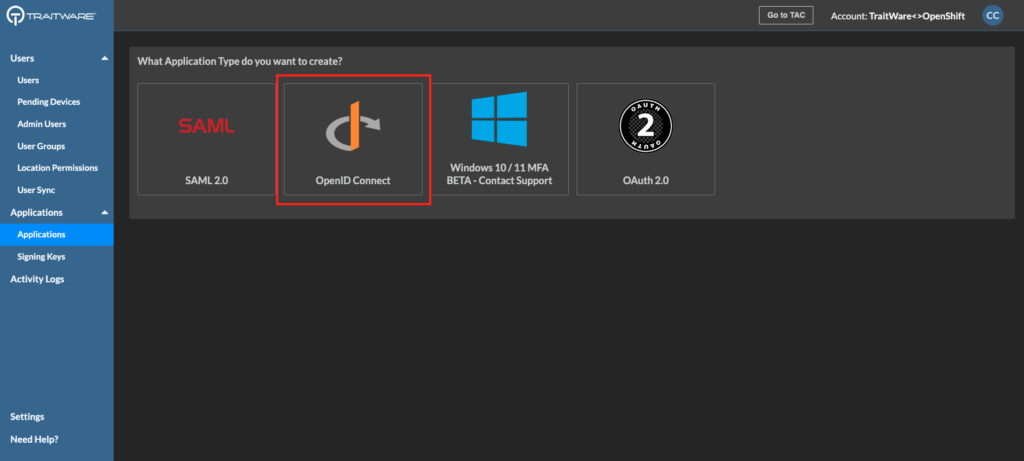
Select OpenID Connect.
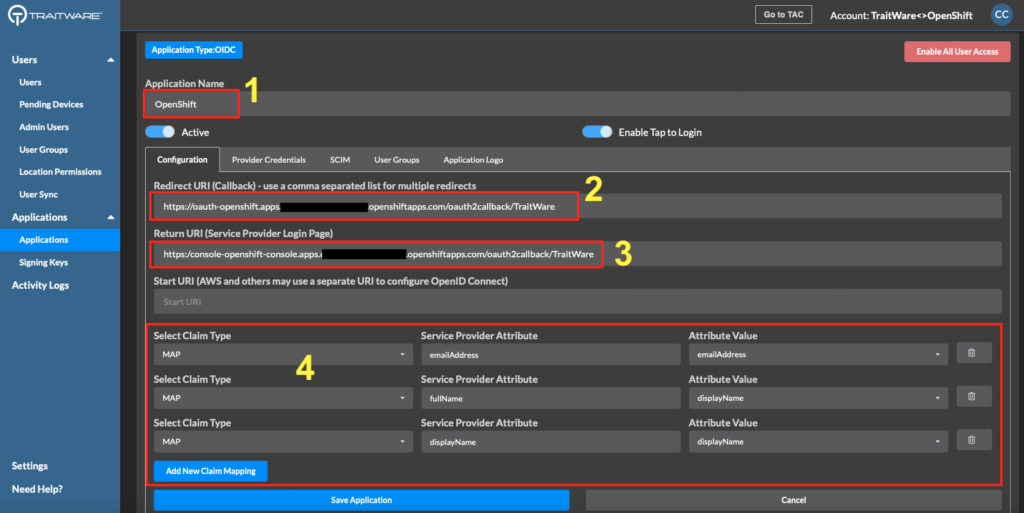
Next, you will need to fill out information in the application.
- Name your application.
- Paste the Redirect URI from the OpenID setup in your Cluster (OAuth callback URL).
- Set the Return URI. Note that it is very similar to the Redirect URI. (https://console-openshift-console…)
- Add the three Claim Mappings as you see in the screenshot. They are all MAP types.
- Save the application.
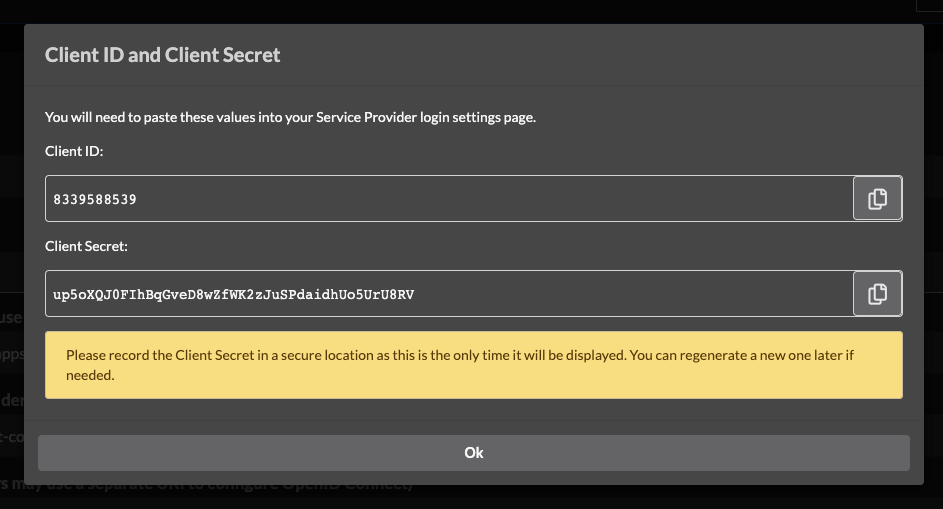
You will see two values, the Client ID and the Client Secret (different from those shown here). Copy these and paste them into your OpenShift configuration. Note: If you accidentally click ‘Ok’ you can regenerate your Client Secret again.
Completing the Setup in Your OpenShift Cluster
Paste the the Client ID and the Client Secret into your OpenShift identity provider configuration.
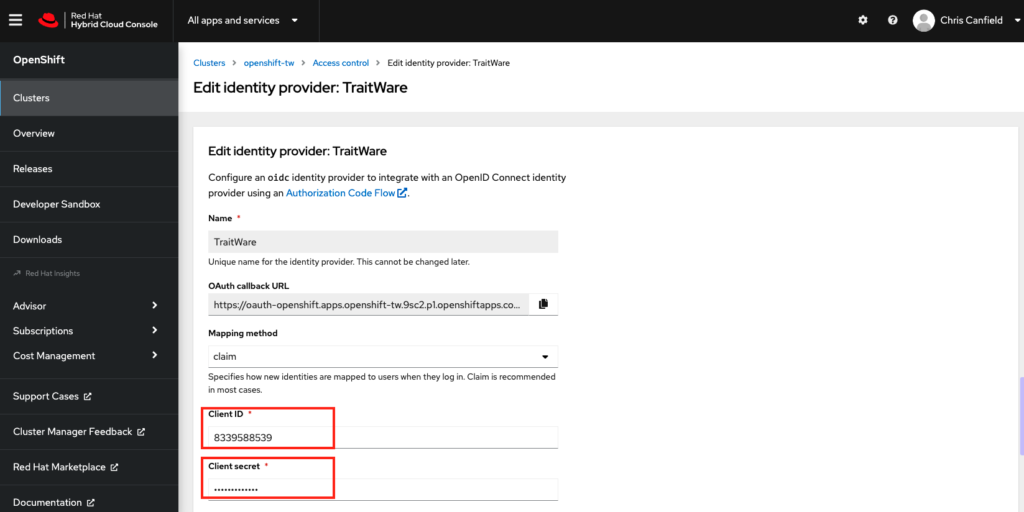
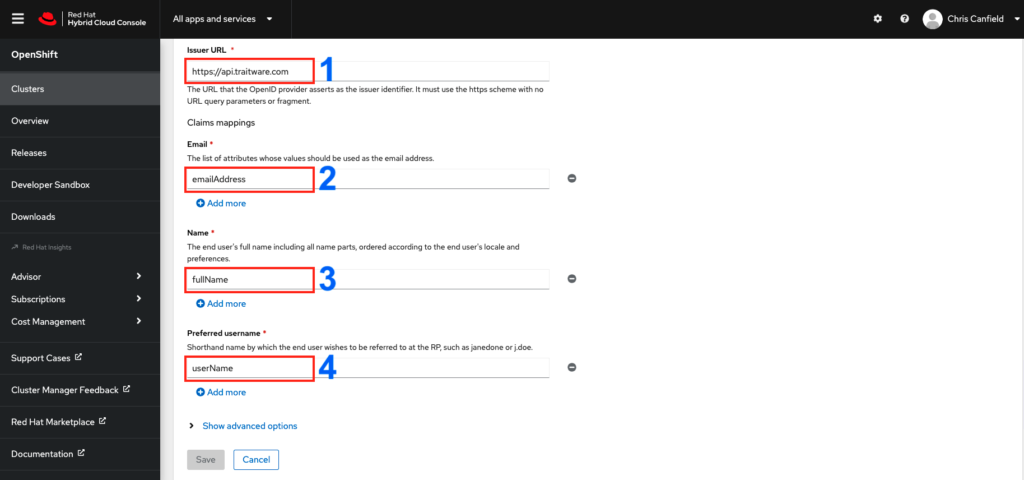
Scroll down and fill in the remaining fields.
- For the Issuer URL use https://api.traitware.com.
- For Email use emailAddress.
- For Name use fullName.
- For Preferred username use userName.
- Click Save.
Your setup is complete!
Passwordless Login to Your Cluster
Make sure your users are registered in TraitWare and have access to the OpenShift application you created in TraitWare. You can add and remove them as needed.


In your RedHat cluster, click Open console.
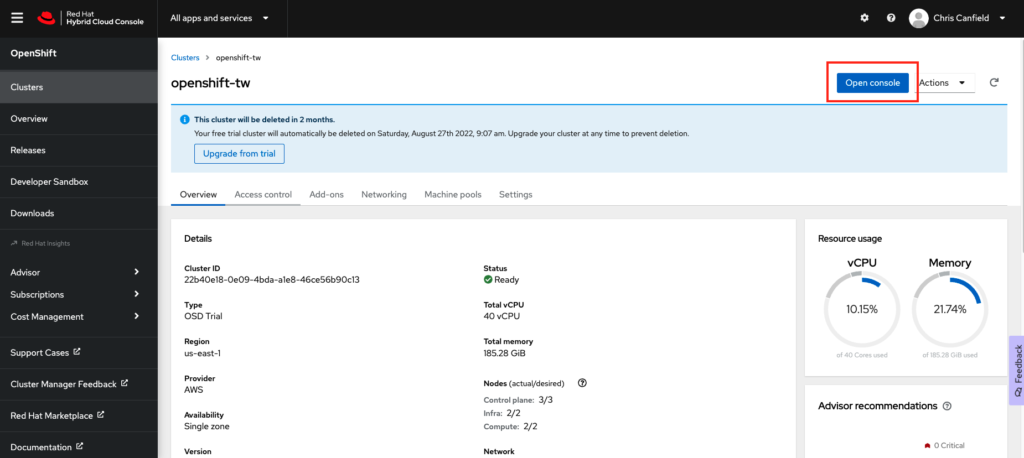
Click on TraitWare.
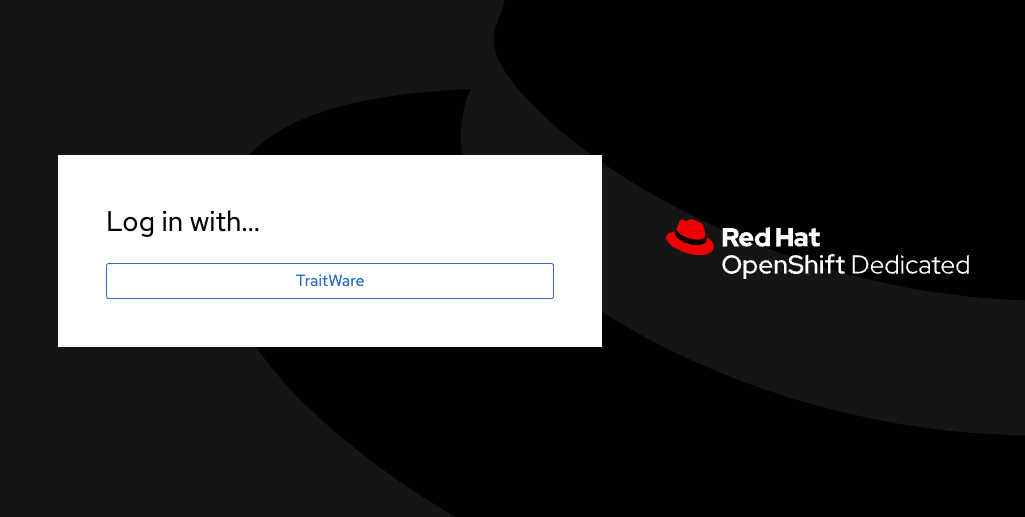
You will see the TraitWare QR login screen. Scan the QR with you mobile TraitWare Authentication app.
You are now logged into your OpenShift Cluster!
If you have any questions about your setup we are here to help. Email support@traitware.com.
Was this article helpful?
That’s Great!
Thank you for your feedback
Sorry! We couldn't be helpful
Thank you for your feedback
Feedback sent
We appreciate your effort and will try to fix the article