Getting Started
Both TraitWare and GitHub require certain information to be able to communicate securely with each other.
What You Need From GitHub
- A paid Enterprise plan (~$21/user/month)
- Your Organization/Custom login (the login created by the owner ex: https://github.com/orgs/business)
- Please note that SSO is only available for Organization access. Individual user logins (personal accounts) will not be able to use SSO to sign in to their account.
What You Need From TraitWare
You will obtain the following when you create your TraitWare application
- SAML Endpoint/Sign on URL
- TraitWare Issuer: https://traitware.com
- Public Verification Certificate
Setting Up TraitWare
In order for TraitWare to communicate with GitHub, an application will need to be created. Once you have access from TraitWare, navigate to https://admin.traitware.com and use your TraitWare app to sign in.
If you do not have access to login to https://admin.traitware.com, please setup a trial account, or contact us at support@traitware.com
Adding a SAML Application
- Select Applications in the menu on the left.
- Select Add Application to add a new application.
- Enter an Application Name that will make sense when you see it (ex: GitHub TraitWare).
- Select SAML as your Application Type.

- Choose Use a Template.

- In the SAML Applications template list, select GitHub.

- Enter your Organization name in the requested field and click Submit.
- Select Save Application.
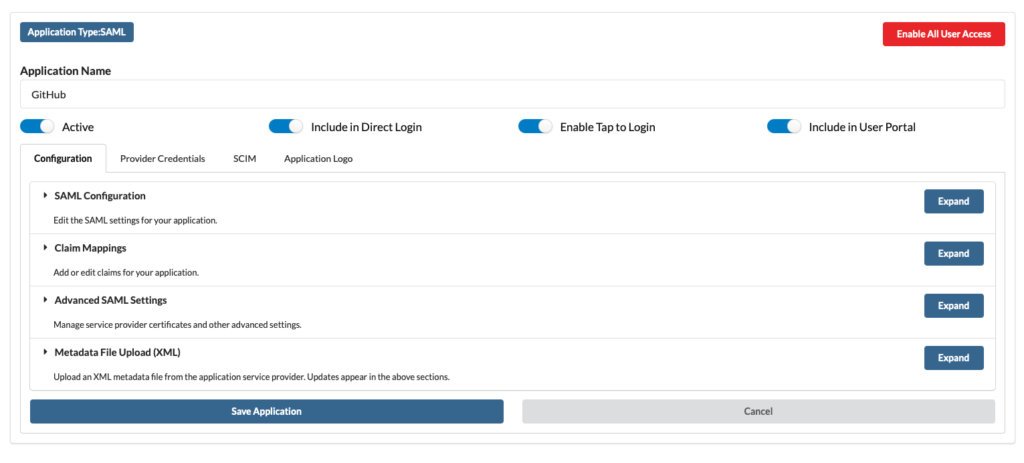
- Once your application is saved, it will populate the information required by your service provider
- Next, create an application signing key. You can either create a new key or assign an existing one. TraitWare recommends creating a unique key for each application for the most security.

- Assign the created signing key to your GitHub application. Click Edit Signing Key.
- Select the key you created for the application. In this case, GitHub.
- You’ll see the key is now assigned to the application.
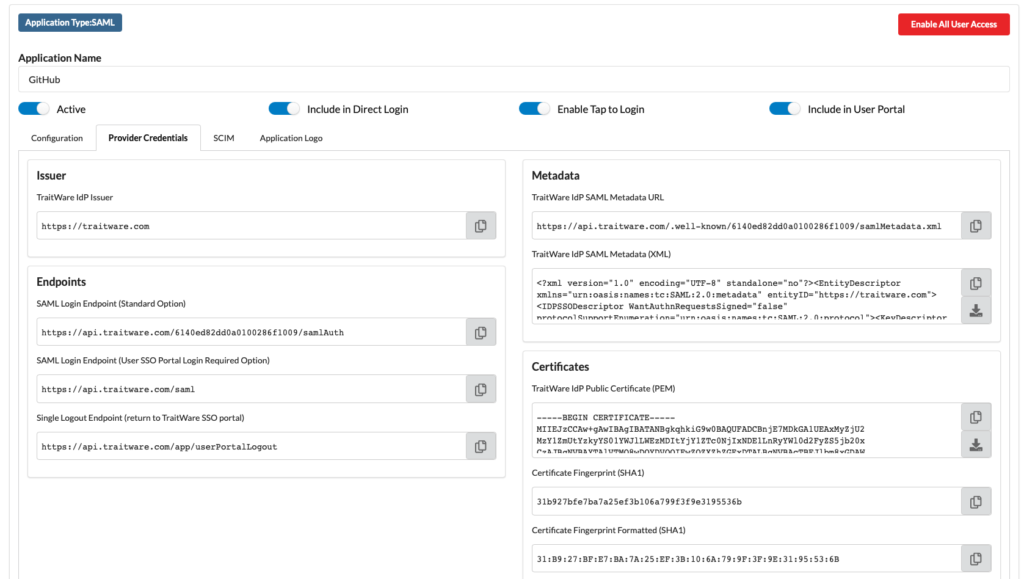
- Navigate to the Provider Credentials tab, and you will then be able to copy the information required into the GitHub SSO fields (see steps below).
Turning on Application Access for User
- Select Users from the menu on the left.
- Select a user. Their User Profile will open.
- Find the GitHub Application name under Applications, and select the application to enable access for that user.

Setting Up GitHub
- Navigate to https://github.com/organizations/YOURORG/settings/security and sign in using an Organization Owner account.
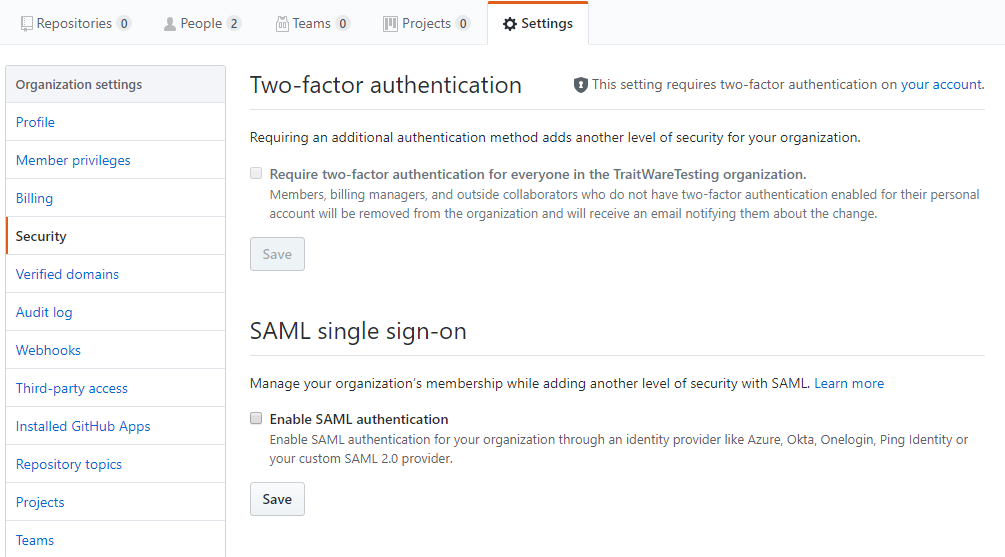
- Select Enable SAML authentication and the options will expand.
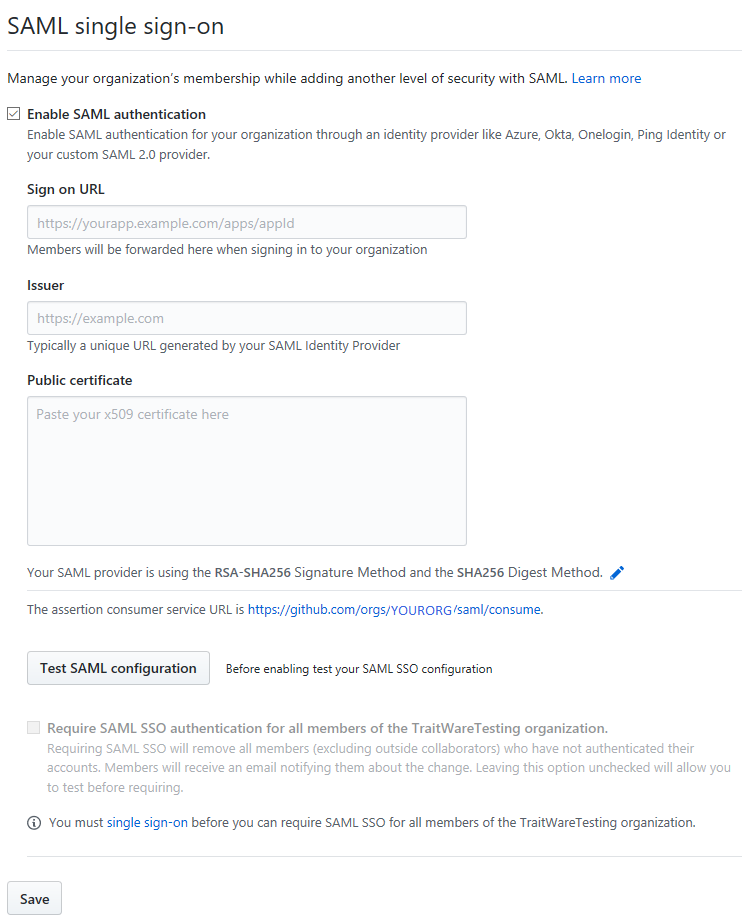
- Enter the information provided by TraitWare into the Sign On URL, Issuer and Public certificate fields. You’ll find these in the Provider Credentials menu mentioned above.
- Select the Test SAML configuration button to test your settings before moving on.
- To test the configuration, select the Continue button.

- Scan the QR with your TraitWare app using the appropriate account.
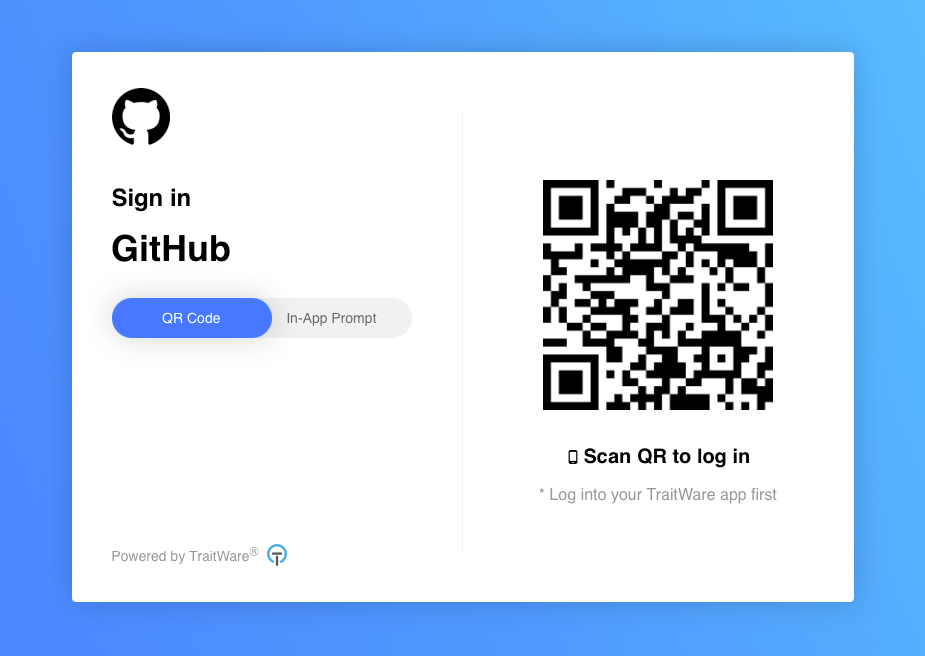
- Upon a successful test, you will be returned to the Security Settings page. There will be a message informing you that the test was successful. If it was not, please make sure that all information is correct in TraitWare and GitHub.
- TraitWare strongly suggests checking the Require SAML SSO authentication for all members of the YOURORG organization option once members have been notified. However, please make sure that you do not enable this option until you have successfully tested SAML. Please note that if users have not yet authenticated with SAML, they will be removed from the organization.
- Select Save once you are satisfied with your information. You can go back and require SAML SSO at any time.

Additional Information
If you do not see an application in the dropdown list during the Application setup, you can fill in the fields with your generic information. If you have issues, please contact us at support@traitware.com, and we will work with you to see if the application can be added.
Was this article helpful?
That’s Great!
Thank you for your feedback
Sorry! We couldn't be helpful
Thank you for your feedback
Feedback sent
We appreciate your effort and will try to fix the article


