Getting Started
Both TraitWare and Slack require certain information to be able to communicate securely with each other
TABLE OF CONTENTS
- What You Need From Slack
- What You Need From TraitWare
- Setting Up TraitWare
- Adding a SAML Application
- Turning on Application Access for Users
- Setting Up Slack
- Additional Information
What You Need From Slack
- At least a paid Plus plan ($15/user/month)
- Your Organization/Custom login (the log in created by the owner ex: business.slack.com)
- All Owner level accounts will still have the option to go around SSO and use their username and password, so adjust roles as necessary for security.
What You Need From TraitWare
You will obtain the following when you create your TraitWare application.
- SAML Endpoint/Sign-in URL
- Public Verification Certificate
Setting Up TraitWare
In order for TraitWare to communicate with Slack, an application will need to be created. Once you have access from TraitWare, navigate to https://admin.traitware.com and use your TraitWare app to sign in.
If you do not have access to login to https://admin.traitware.com, please setup a trial account, or contact us at support@traitware.com
Adding a SAML Application
- Select the Applications menu item on the left.
- Select Add Application.
- Select SAML from list of application types.

- Select Use a Template and search for Slack. Click on the Slack application.

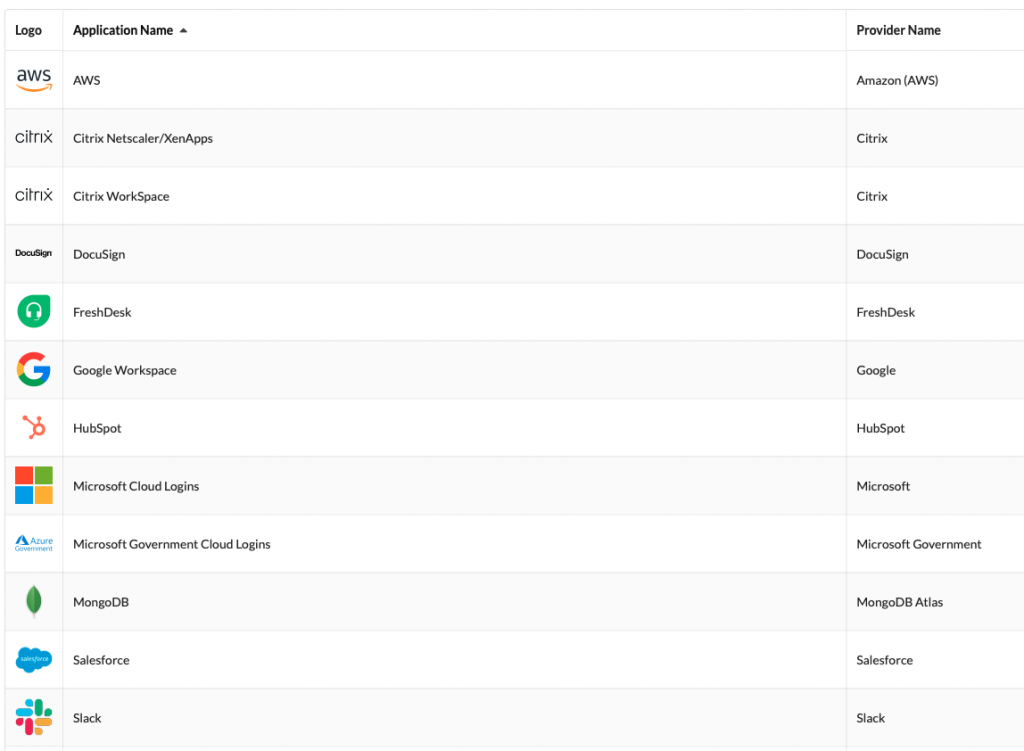
- Enter your Slack Organization name and click Submit.

Click on the Provider Credentials tab. You’ll come back to this later when you set up TraitWare in Slack.

Turning on Application Access for Users
- Select Slack from the application list.
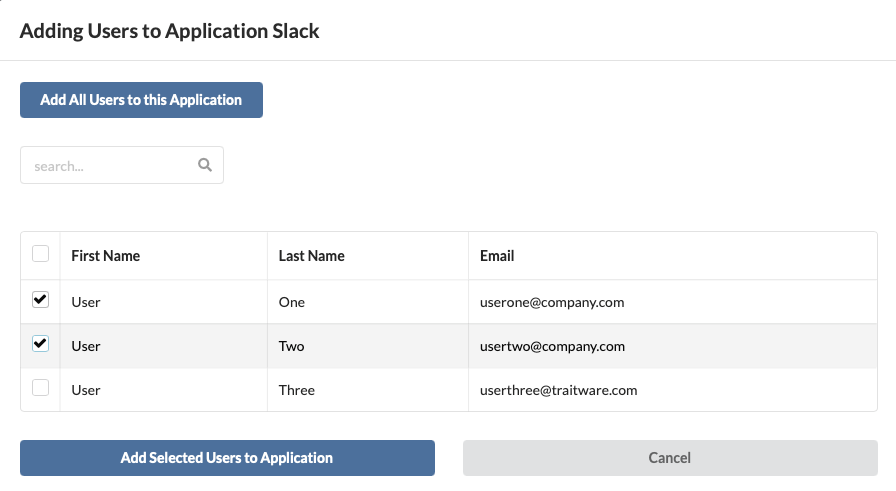
- Select Add/Remove Users from the menu.

- Select Add Users to bring up the user selection screen.
- Add individual users to the application or ‘Add all Users…’
Setting Up Slack
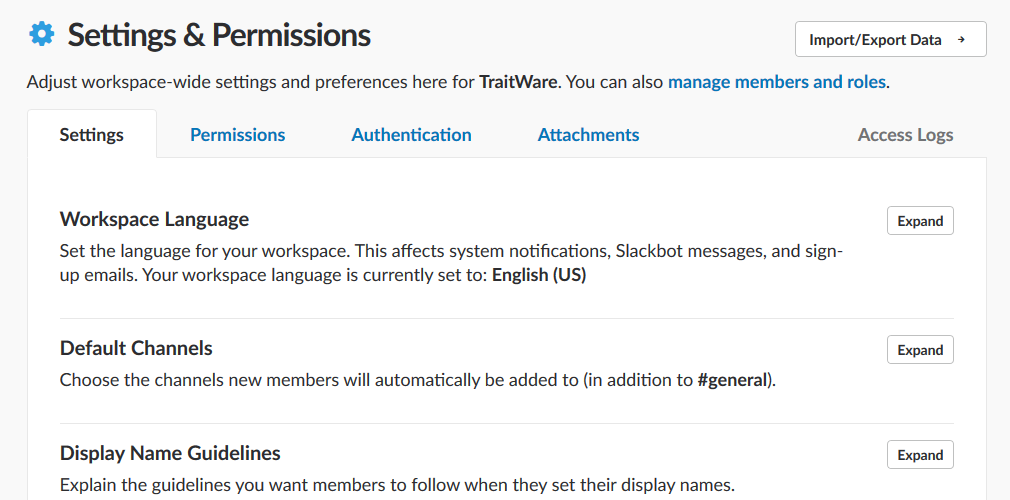
- Navigate to https://YOURORG.slack.com/admin/settings and sign in using an Owner account.
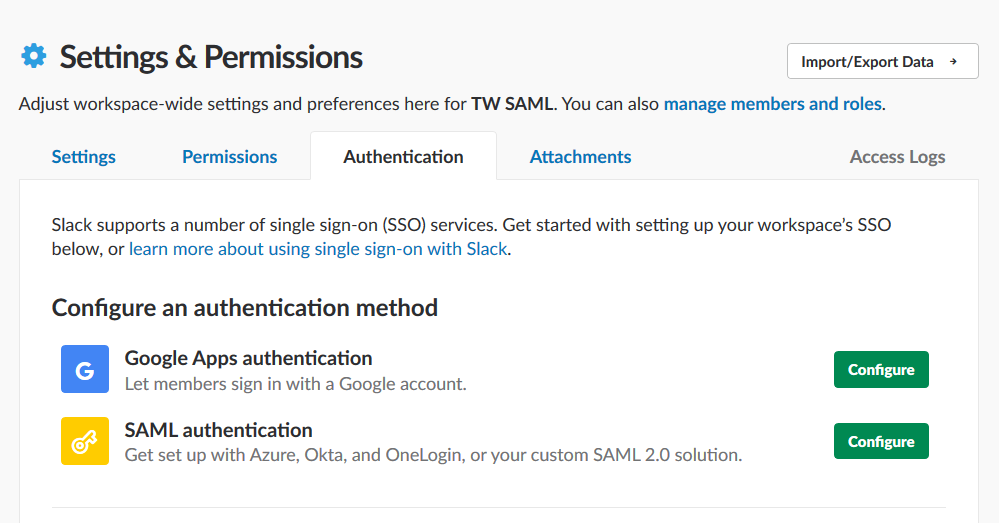
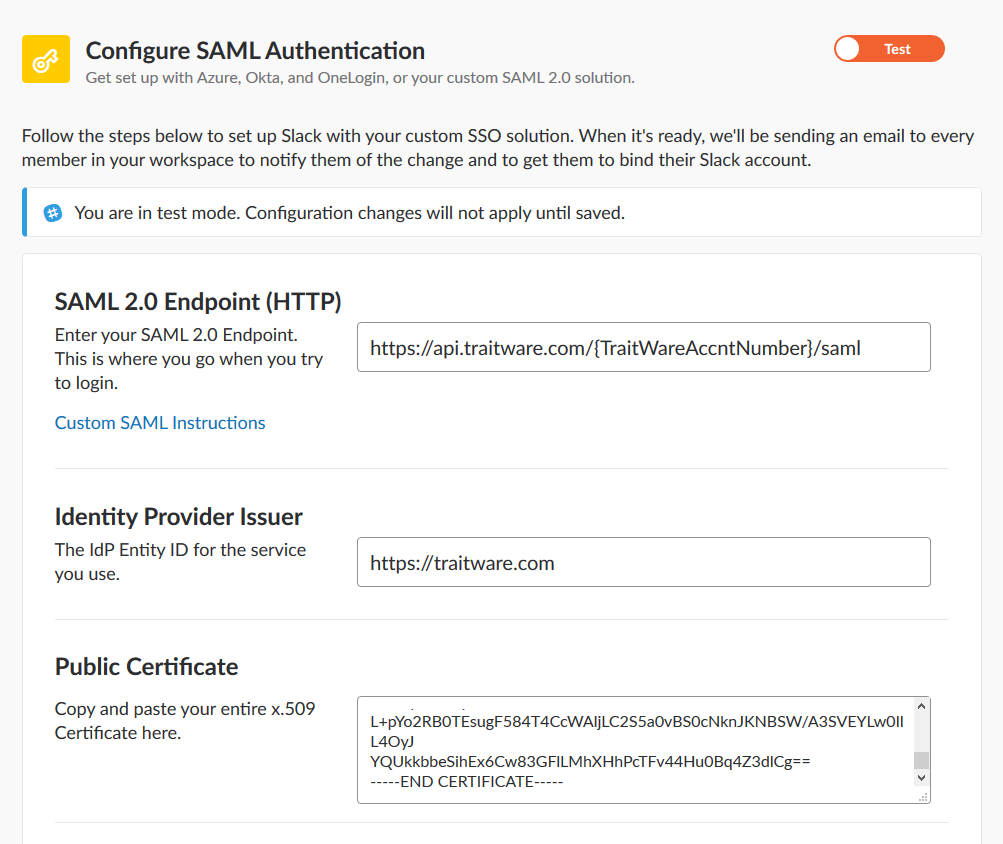
- On the Settings and Permissions page, select the Authentication tab.
- Select Configure next to SAML authentication.
- Select Configure in the top right to change it to Test mode.
- Enter the information provided by TraitWare (remember that Provider Credentials tab above?) into the SAML 2.0 Endpoint, Identity Provider Issuer, and Public Certificate fields. It’s just a copy/paste from our console to Slack.
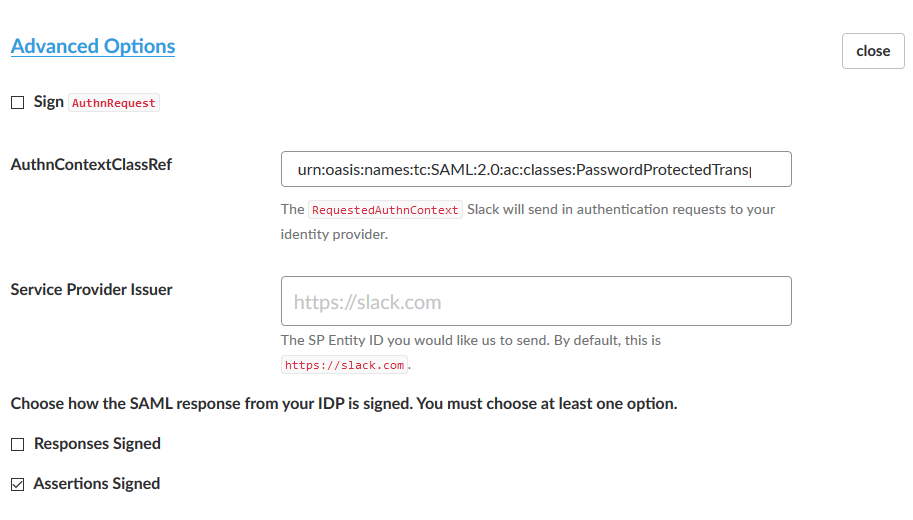
- expand the Advanced Options.
- Check Sign to sign the requests (this improves security)
- Uncheck Responses Signed.
- Select Test Configuration

- Scan the QR with your TraitWare App.
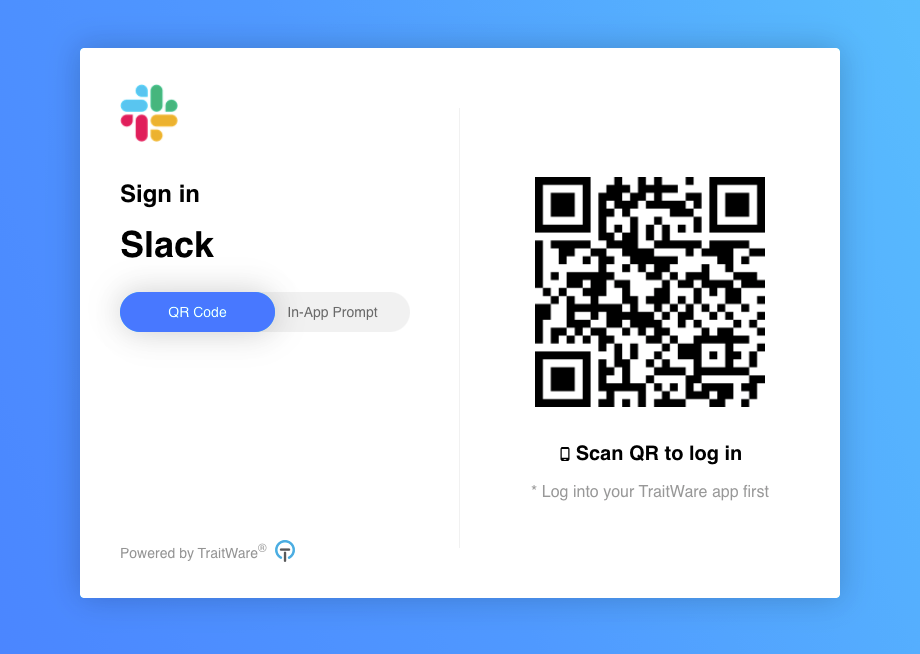
- If the test was successful (there will be a message at the top of the page), select Save Configuration.

- If you would like to limit the network which SSO is required, fill in the Network masks, otherwise, all networks will be required to use SSO.
- Select SAVE once you have completed the above
Additional Information
If you do not see an application in the dropdown list during the Application setup, you can fill in the fields with your generic information. If you have issues, please contact us at support@traitware.com, and we will work with you to see if the application can be added.
Was this article helpful?
That’s Great!
Thank you for your feedback
Sorry! We couldn't be helpful
Thank you for your feedback
Feedback sent
We appreciate your effort and will try to fix the article