Overview
The purpose of this guide is to show process of integrating Okta with TraitWare through SAML
TABLE OF CONTENTS
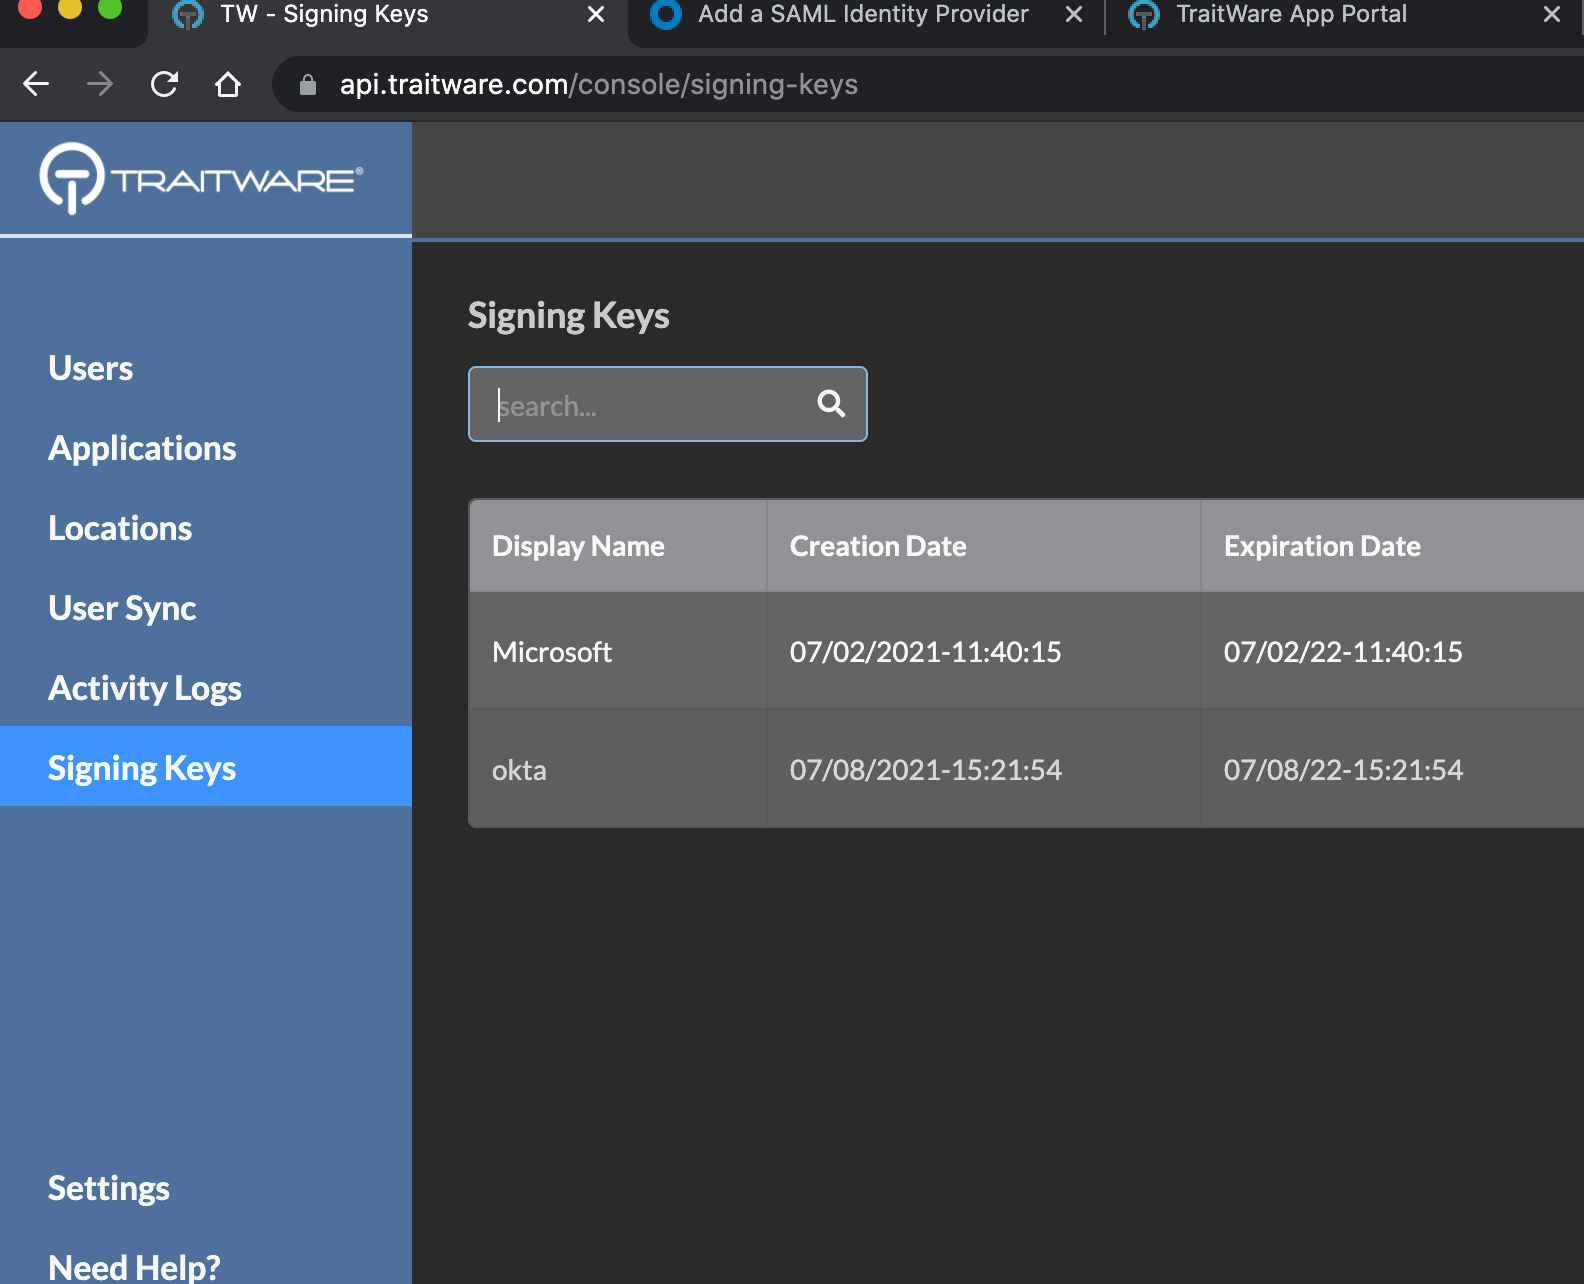
Generate Signing Key
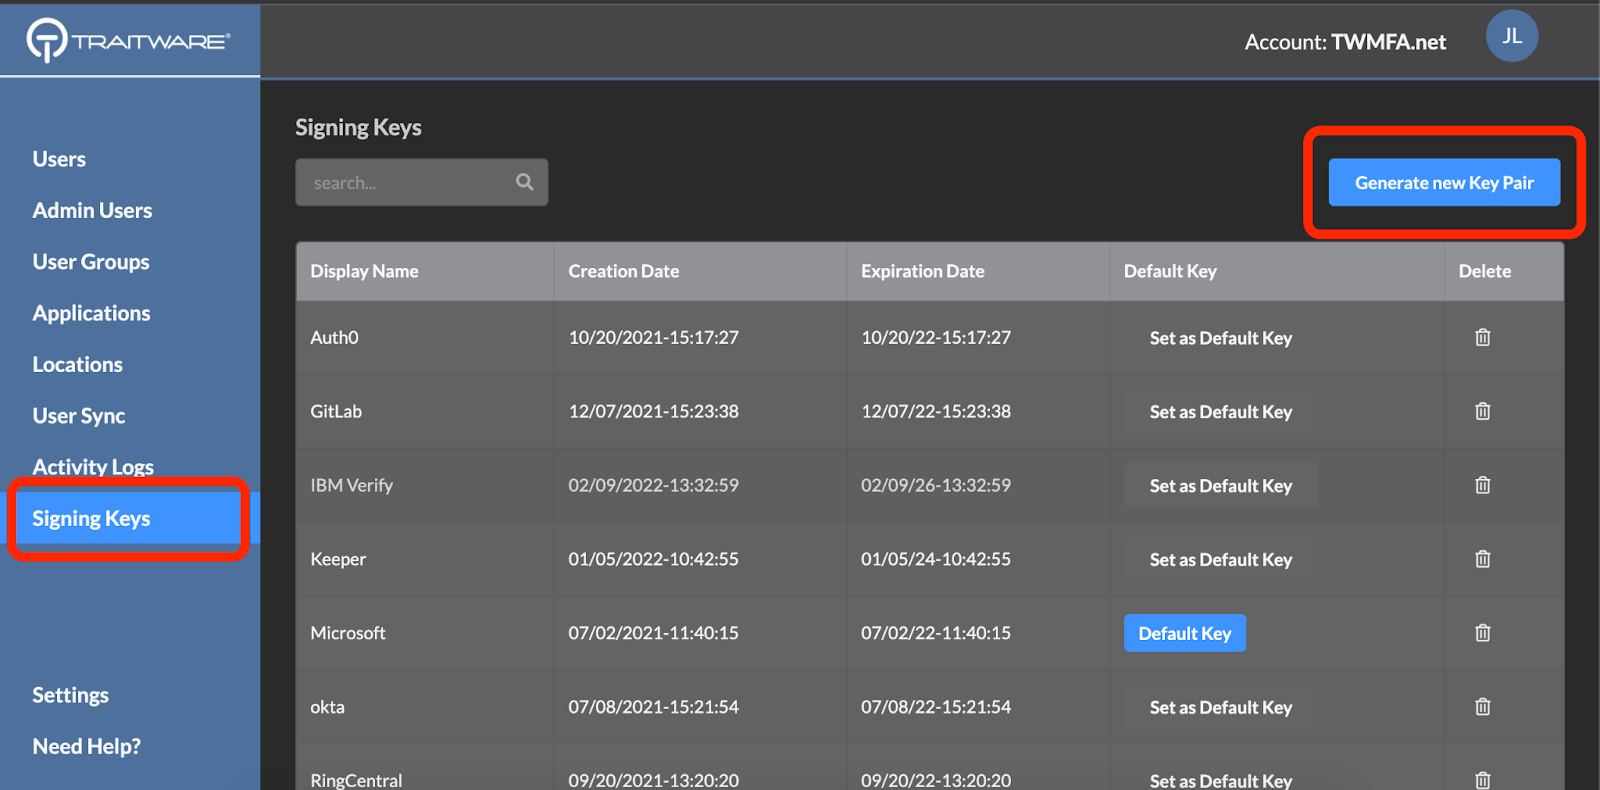
Navigate to the TraitWare administrative panel. Select Signing Keys then select Generate new Key Pair.

Enter a Display Name, and Lifetime in Years. Select Generate Key.
Okta Console
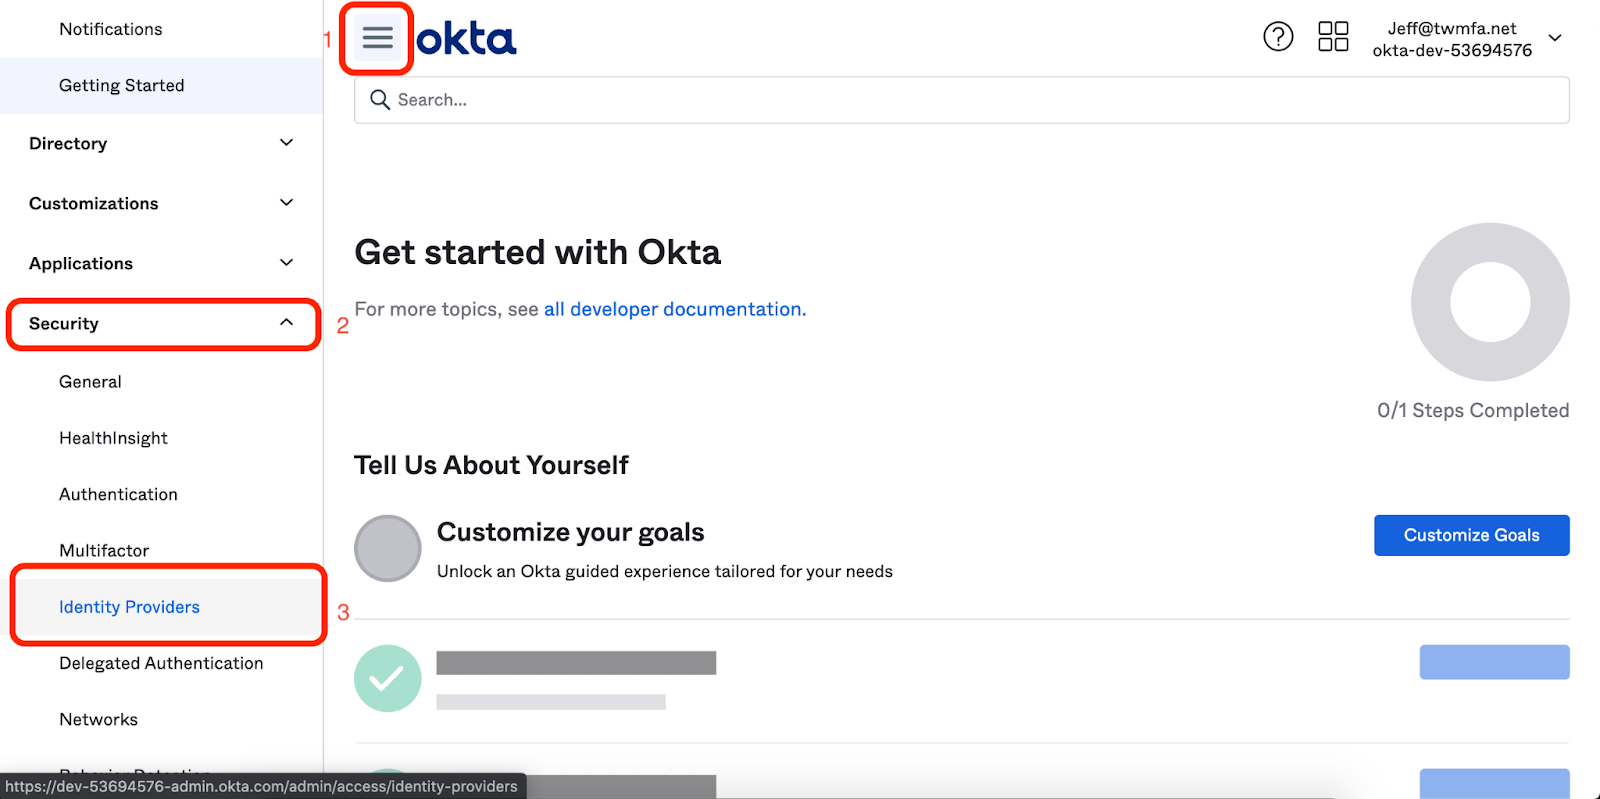
- Select on the Menu Icon in the top left corner.
- Select the Security drop down.
- Select Identity Providers.
Add Identity Provider
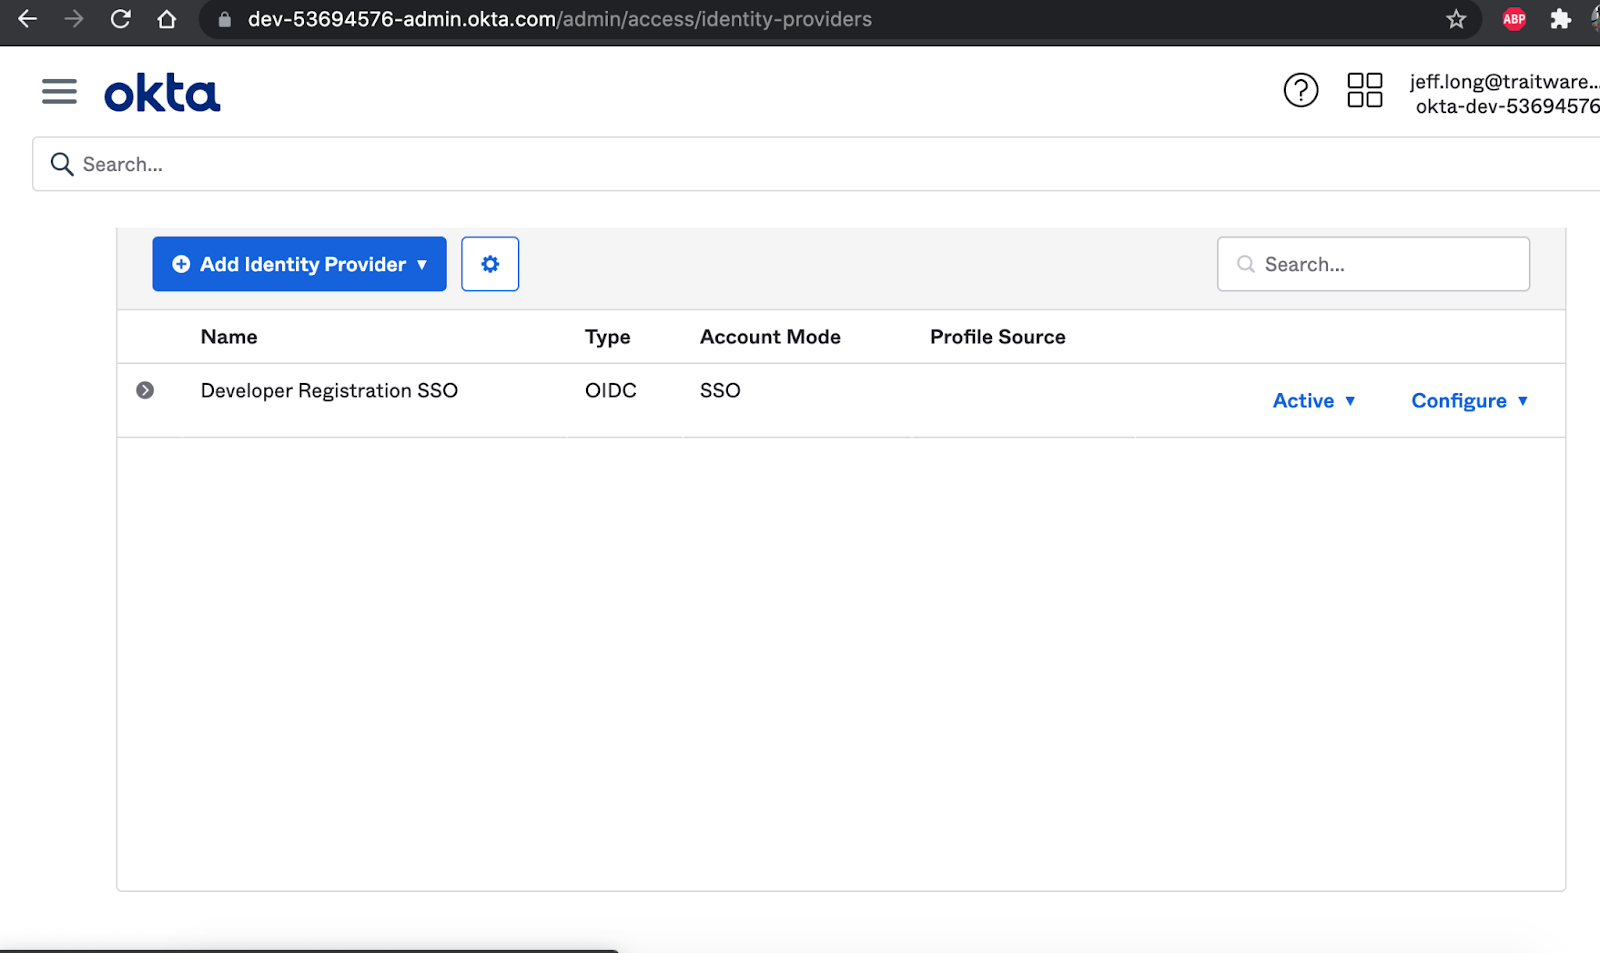
Select Add Identity Provider.

Select Add SAML 2.0 IdP.

Fill in the name
Select idpuser.subjectNameId in the IdP Username dropdown
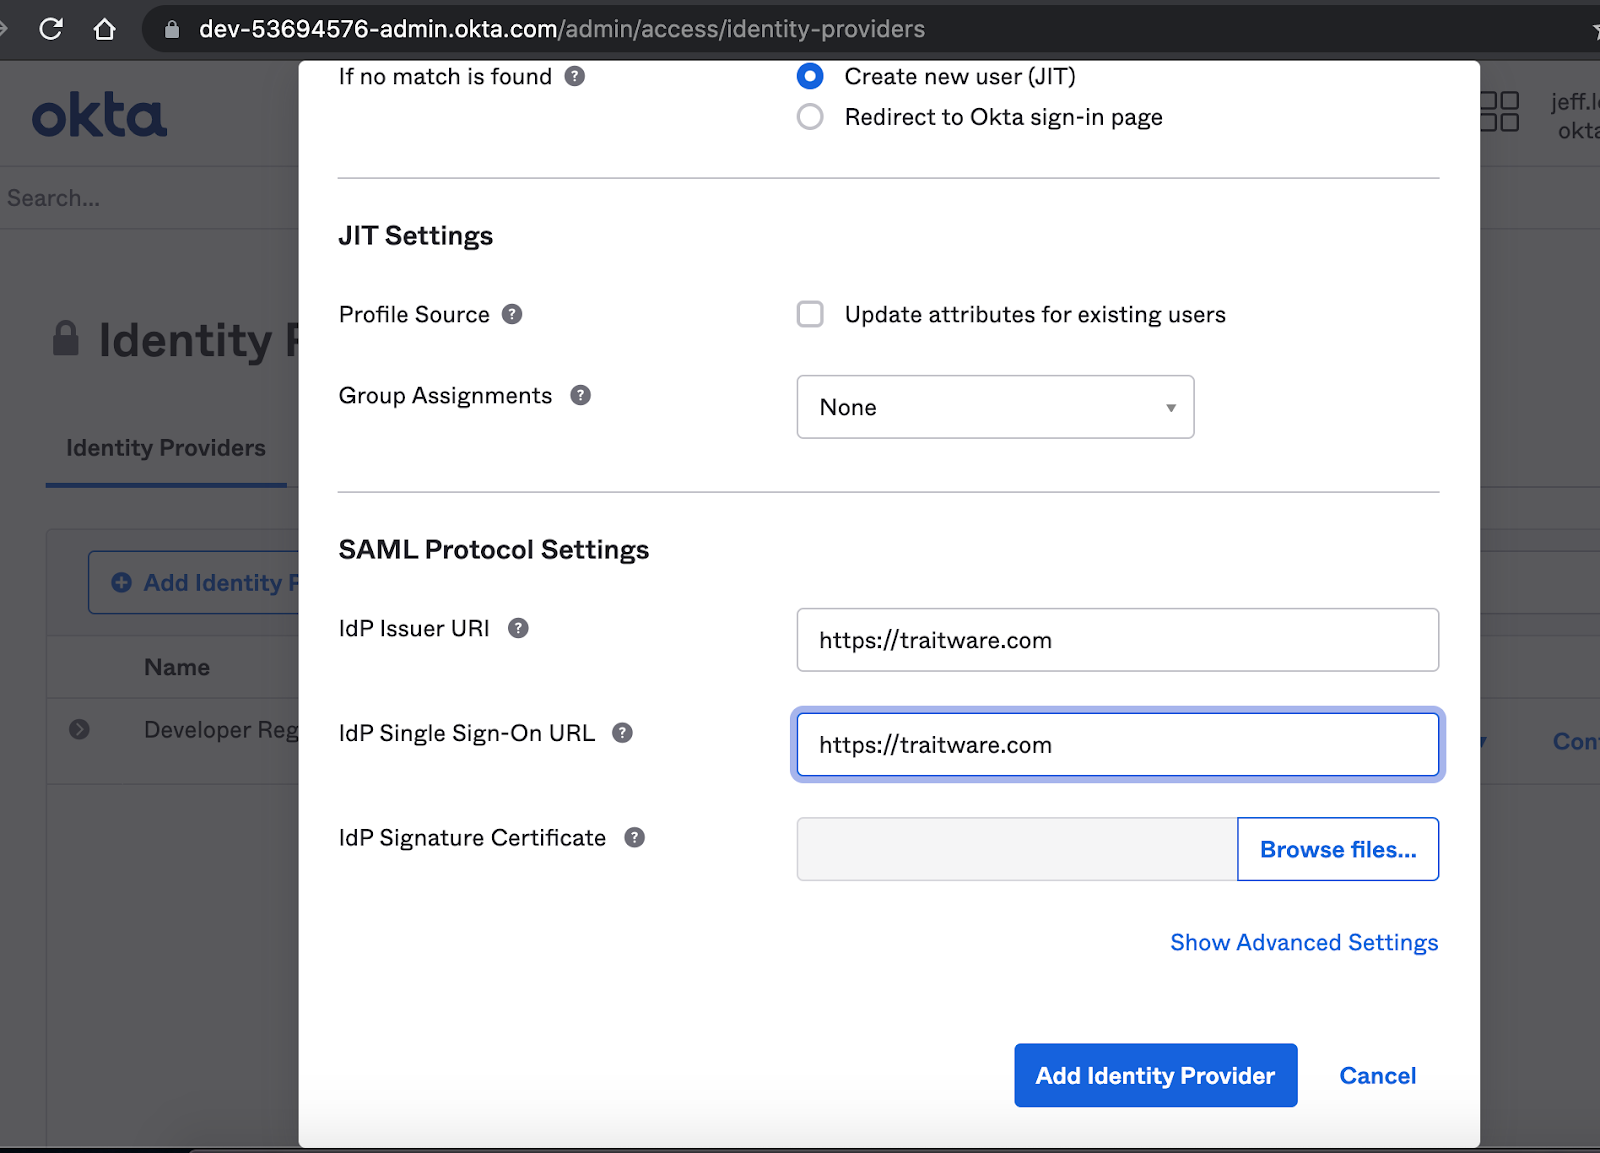
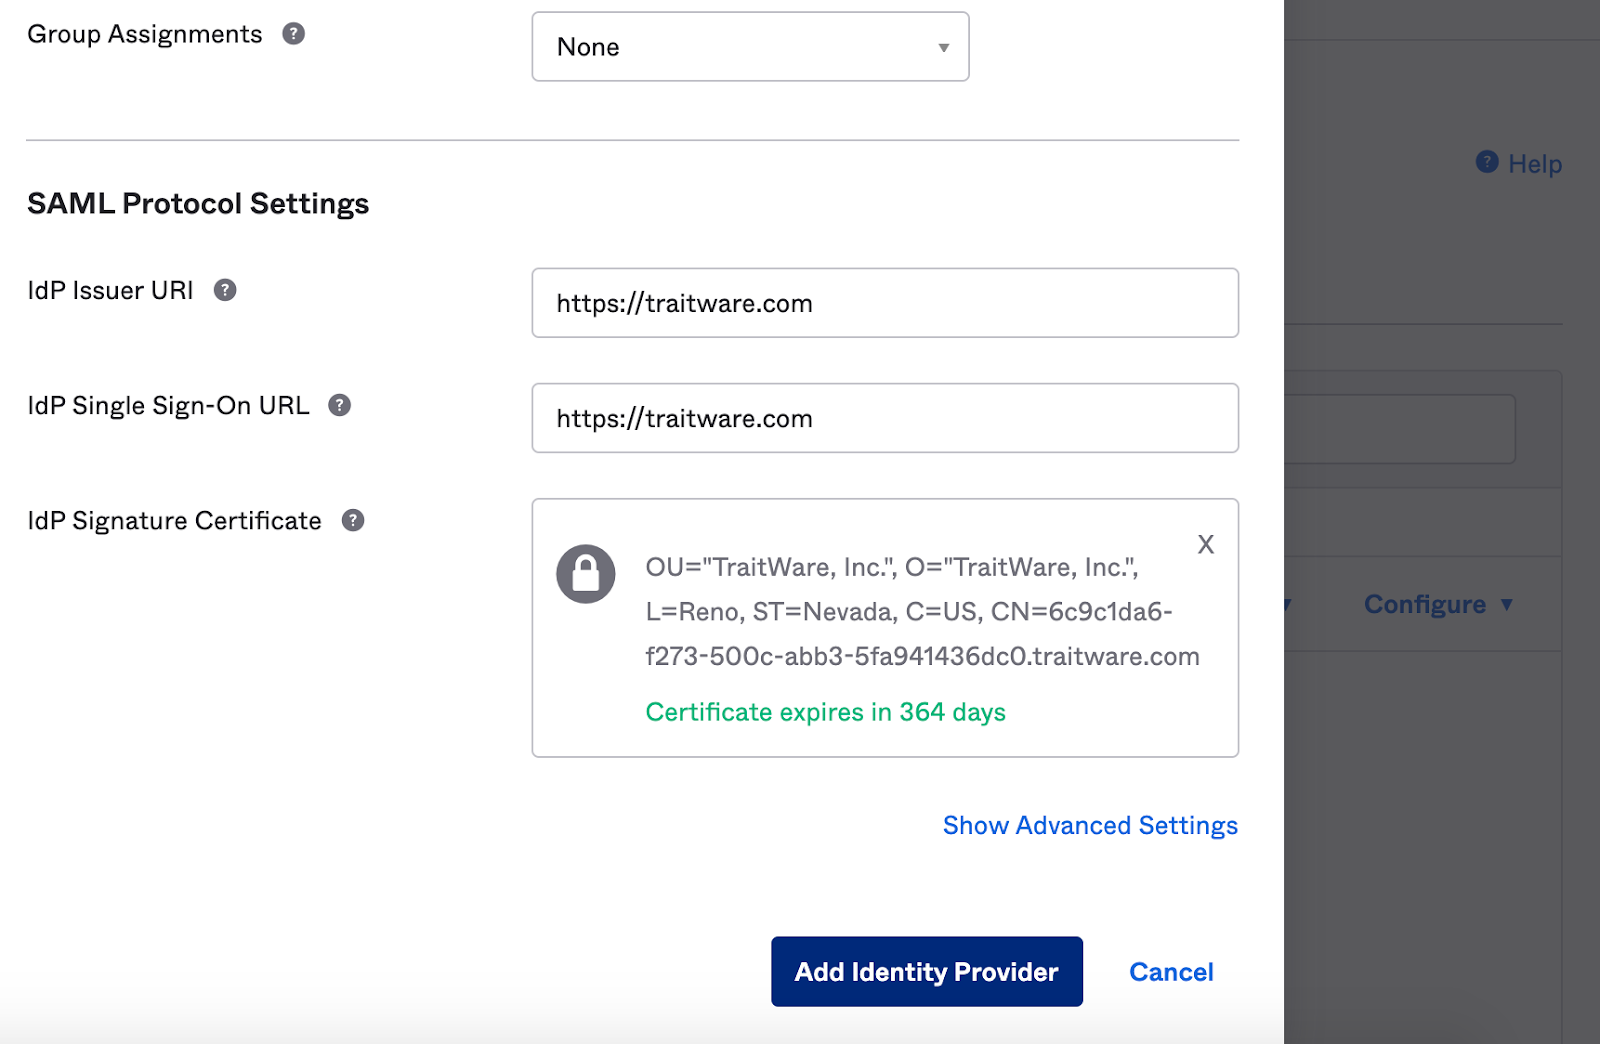
Under SAML protocol settings, enter “https://traitware.com” – you will have a chance to change these settings later.
Select the Browse files button in IdP Signature Certificate.

Upload the TraitWare Signing Key .pem file to Okta.
Select Add Identity Provider.

Select Download Metadata. This will be the XML file that will be uploaded to the TraitWare Admin console.
TraitWare Console
Create Application

Select Add Application.
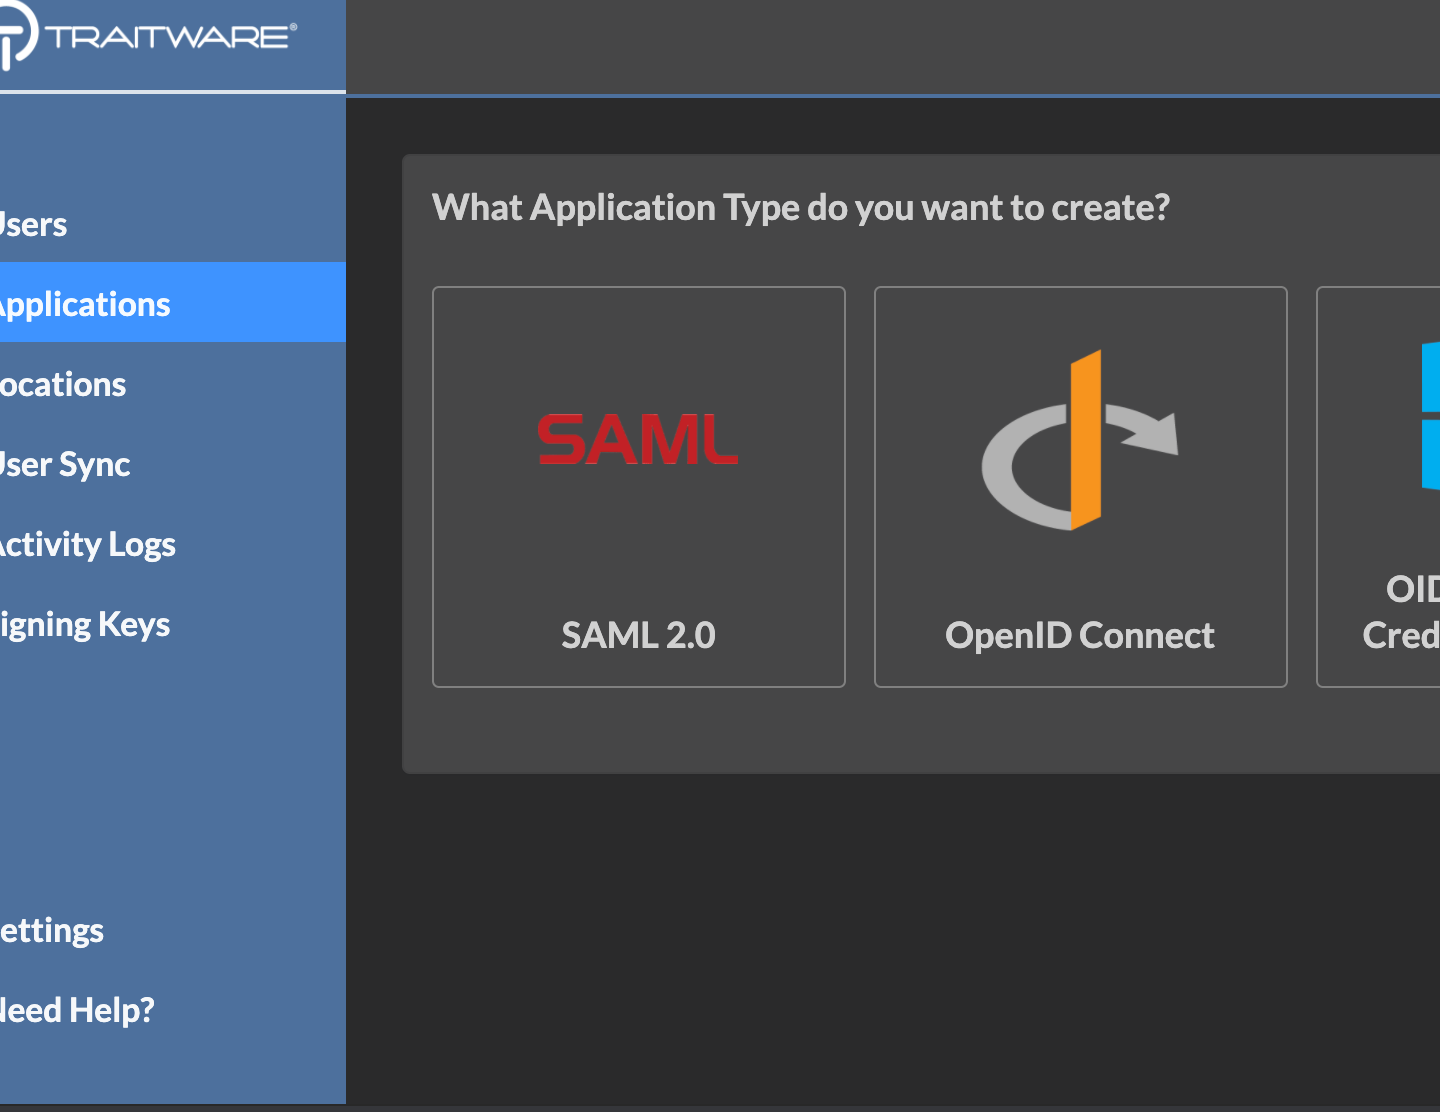
Select SAML 2.0.
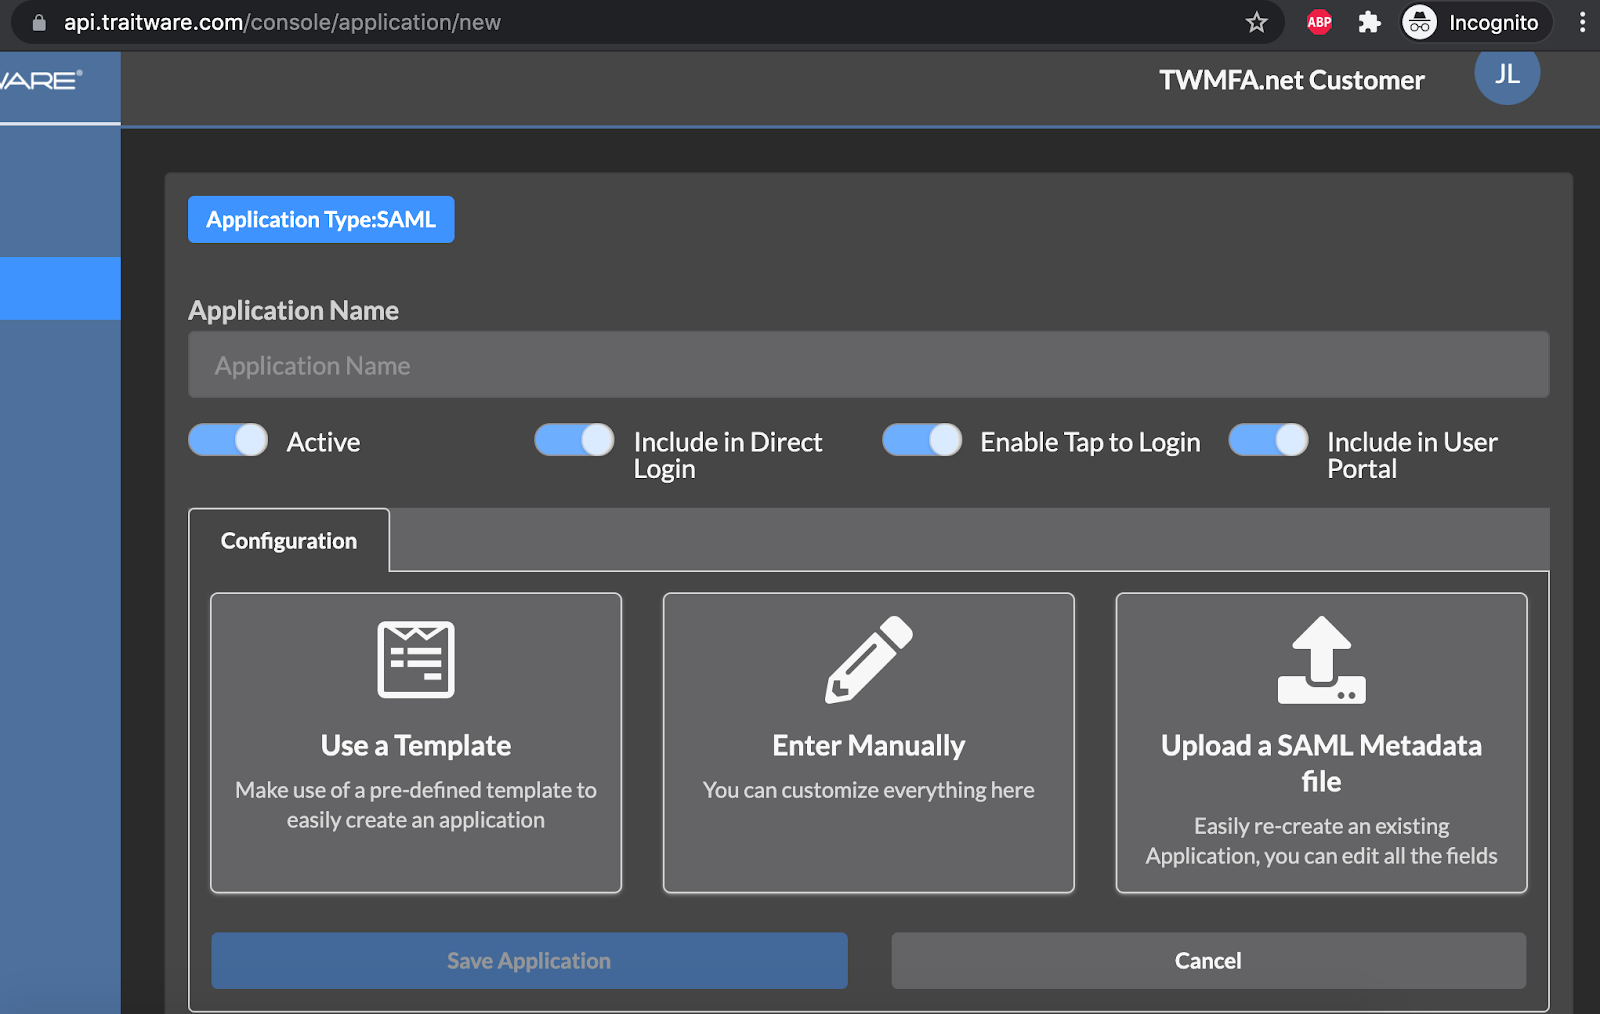
Select Upload a SAML Metadata file.
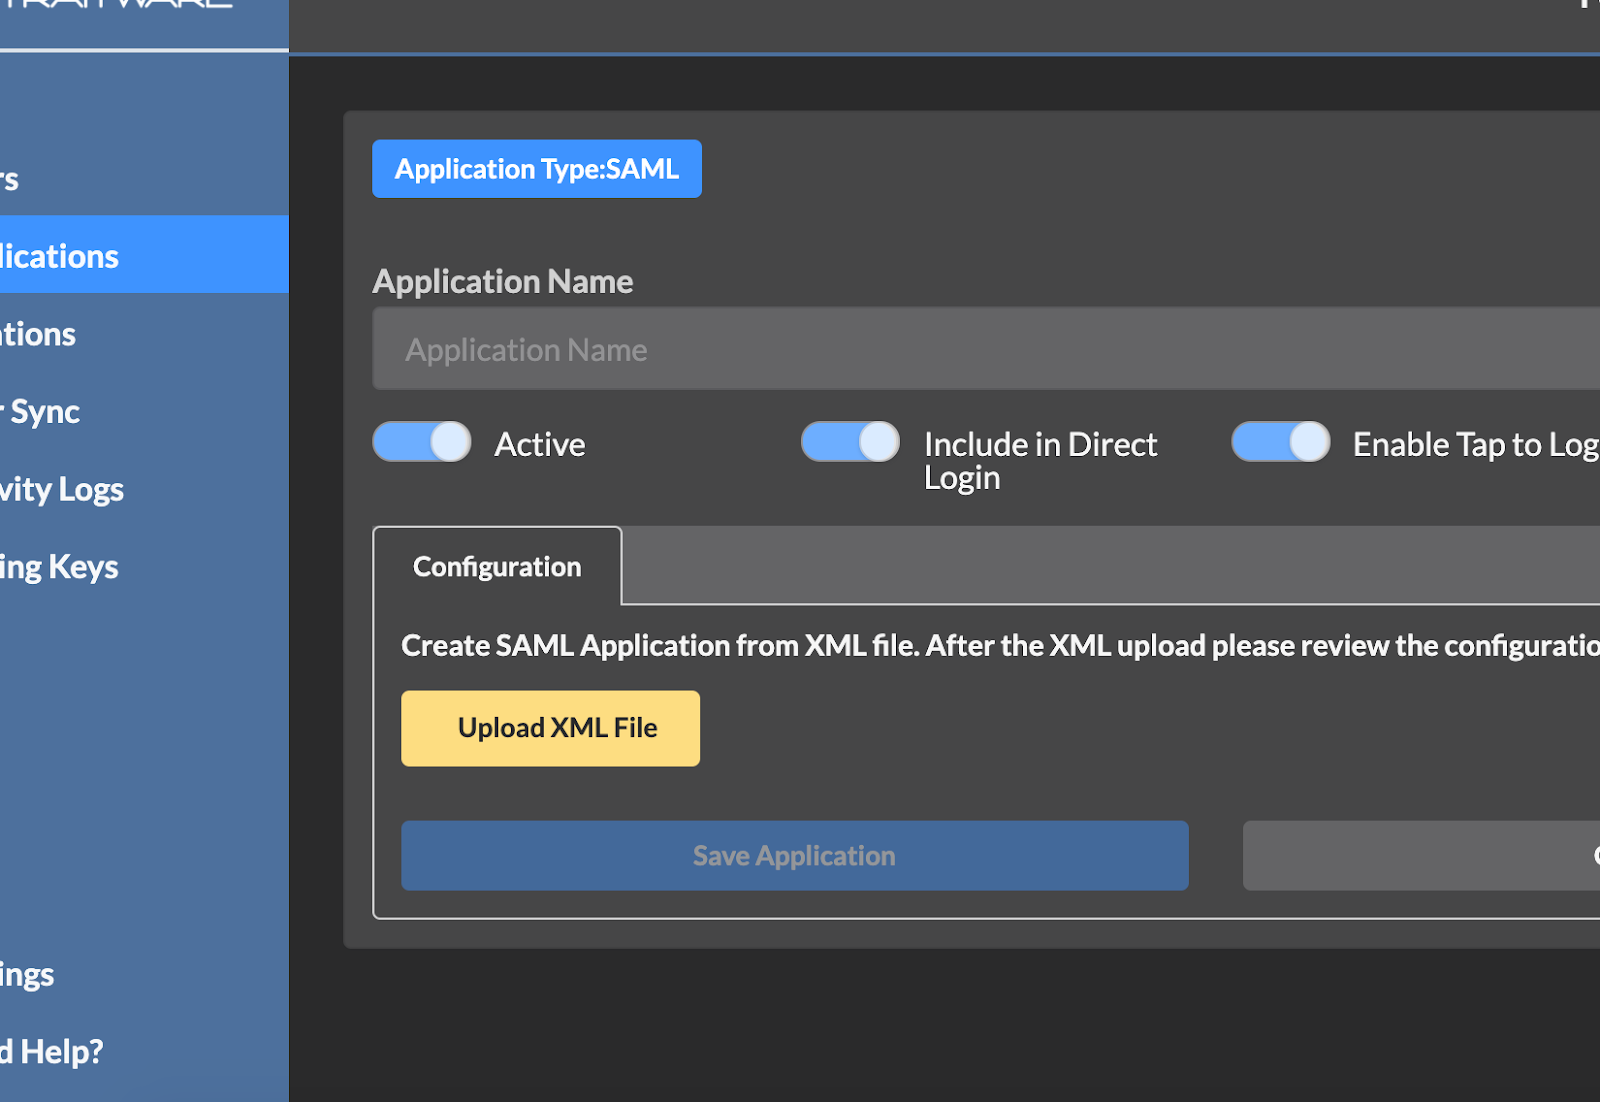
Select Upload XML File.
Select the metadata.xml file.
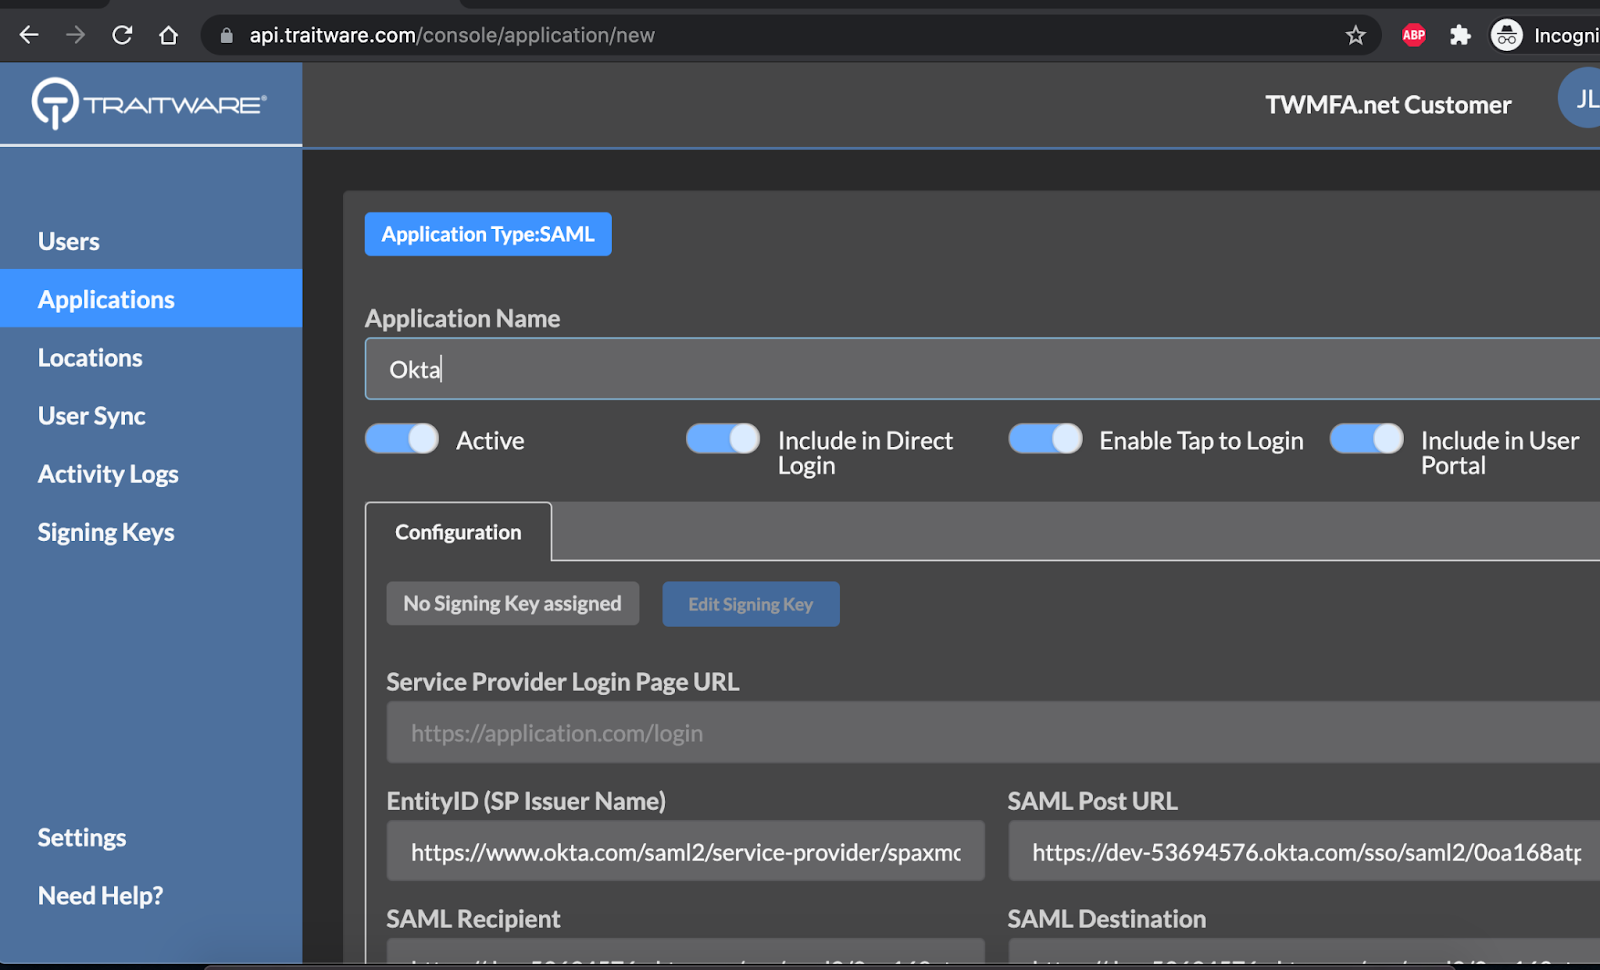
Enter a name for the application and select Save Application.

Select Edit Signing Key.

Select the Okta signing key.

Click Save Application.
 Select Applications and then select Okta.

 Under the Provider Credential tab, select copy under TraitWare IdP Issuer and SAML Login Endpoint.
Add Users
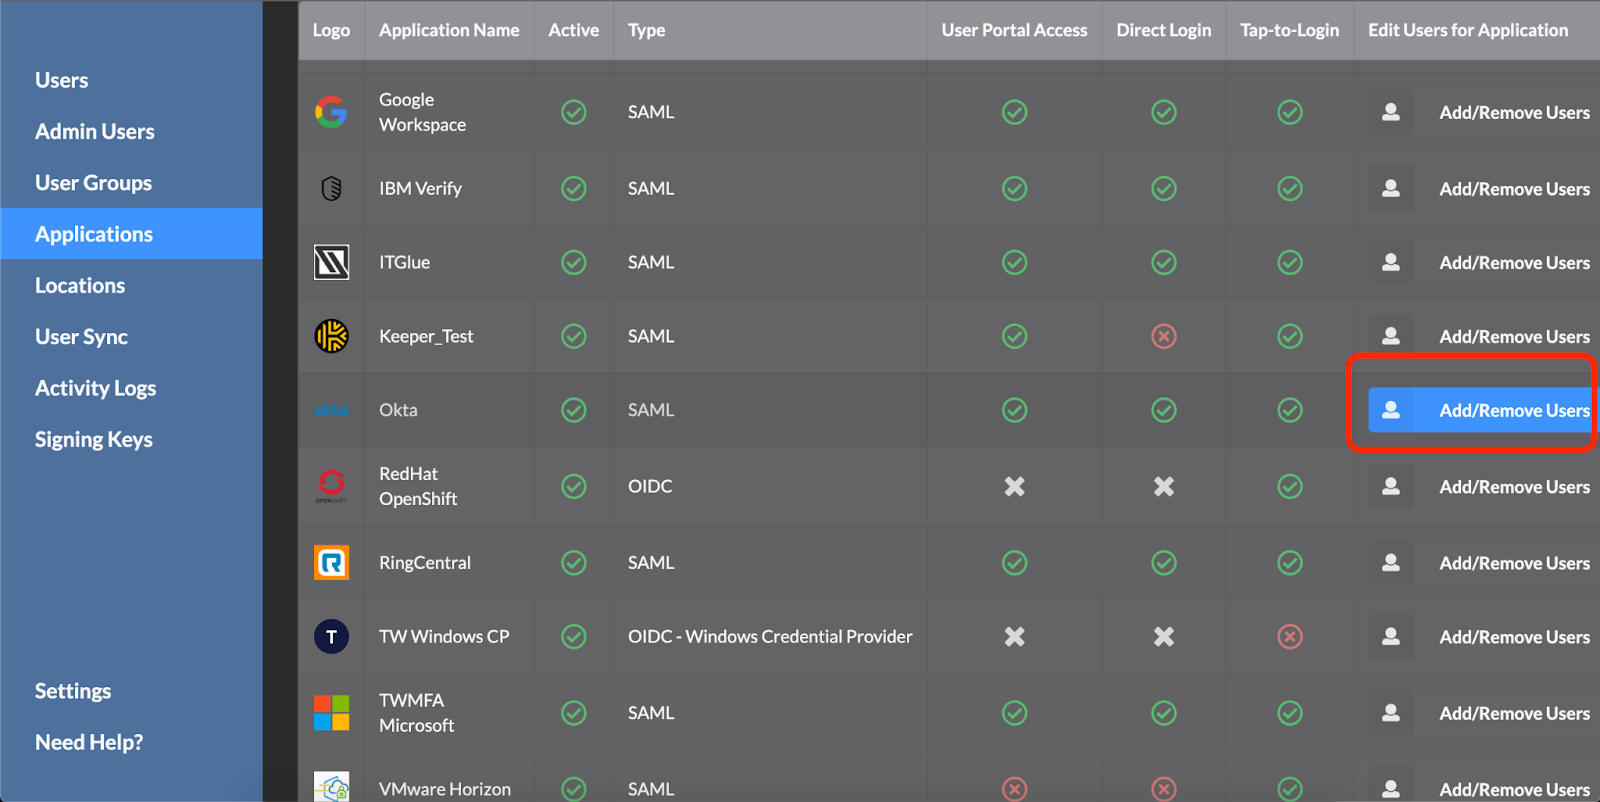
Under Applications, select Add/Remove Users in the Okta application.

Select Manager Users.
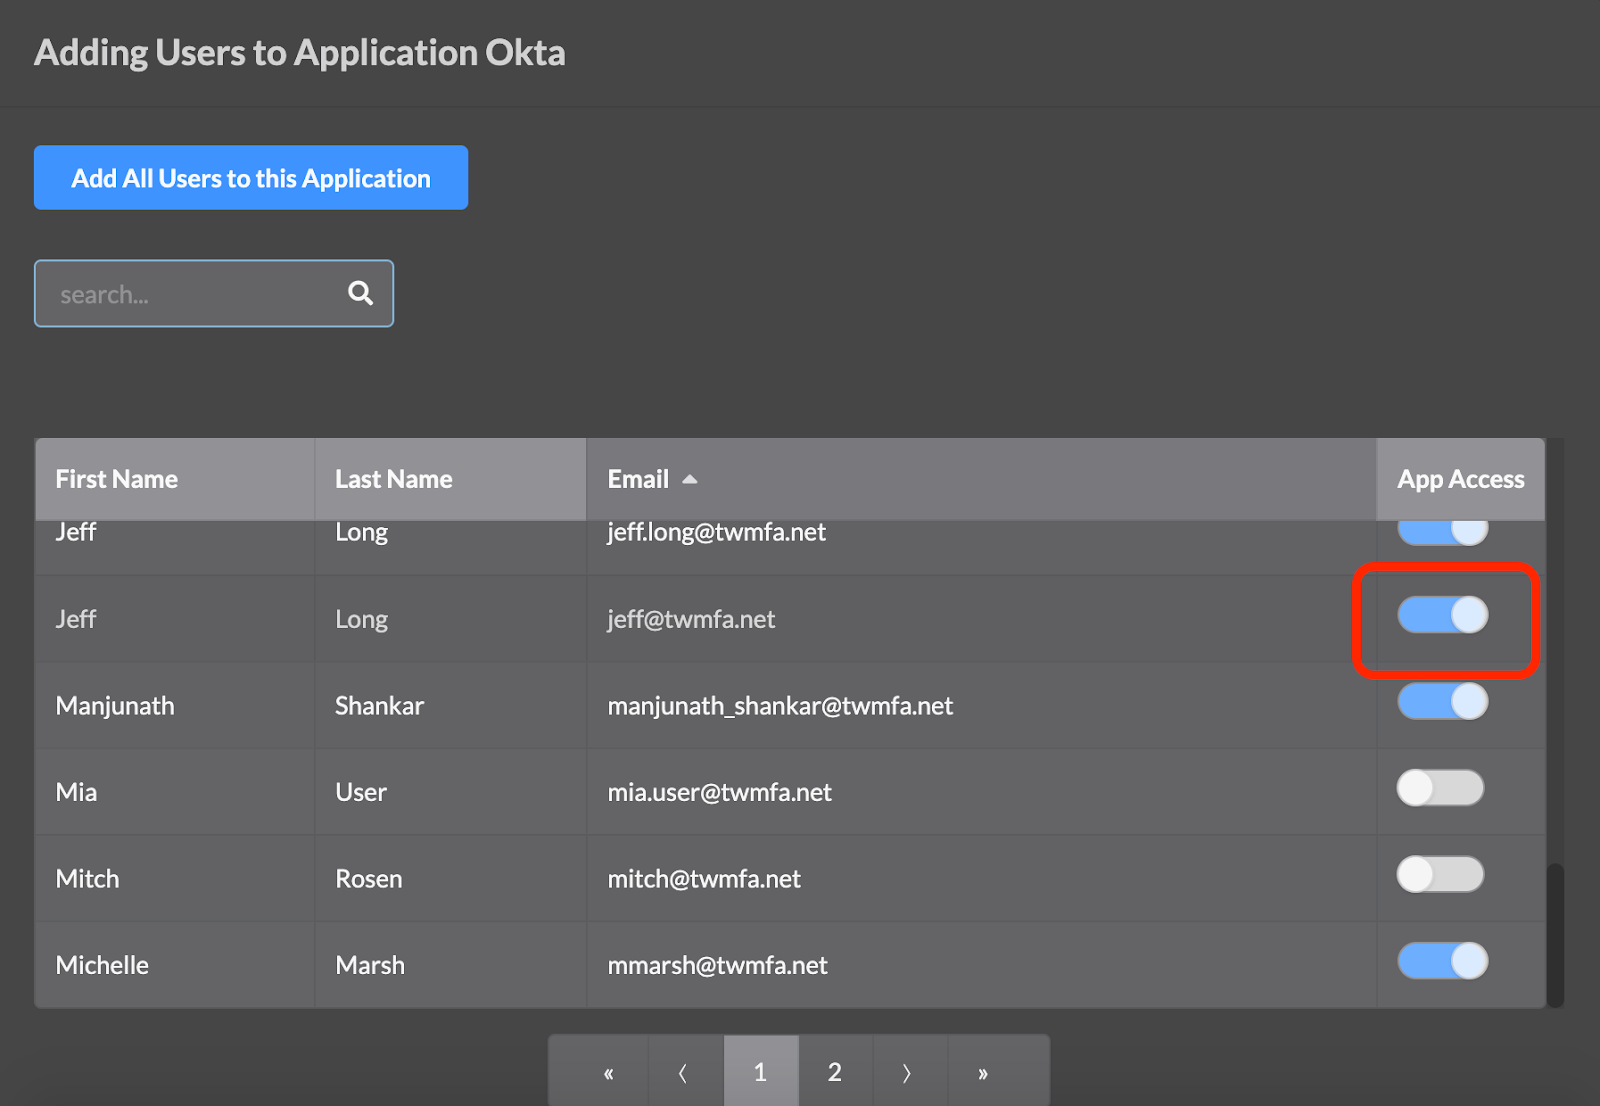
Enable App Access for users. When finished click Exit.
Okta Console
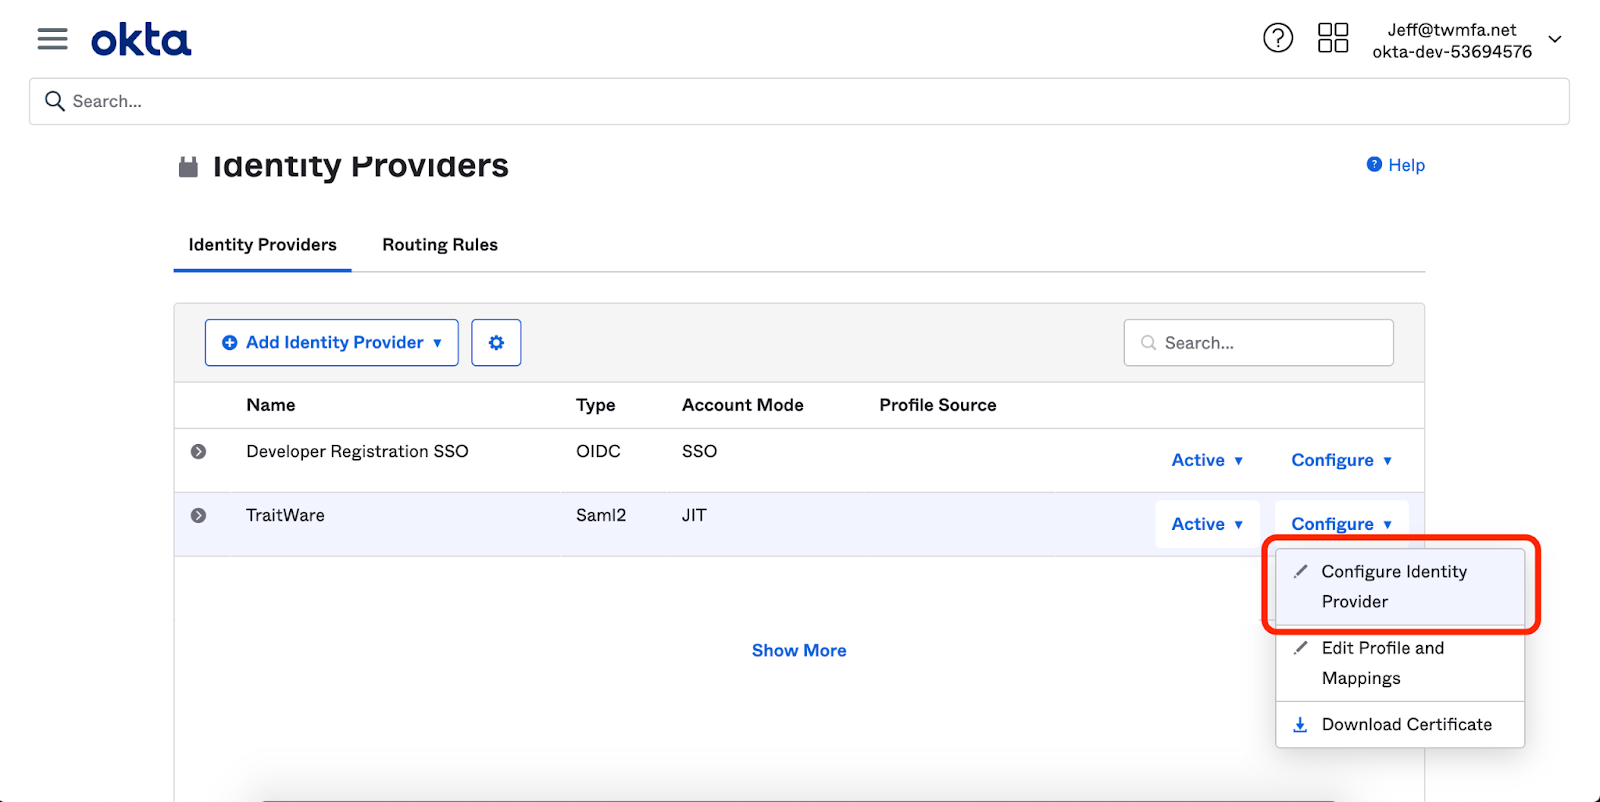
Select Configure Identity Provider under the TraitWare IdP.
IdP Issuer URI
IdP Single Sign-On URI
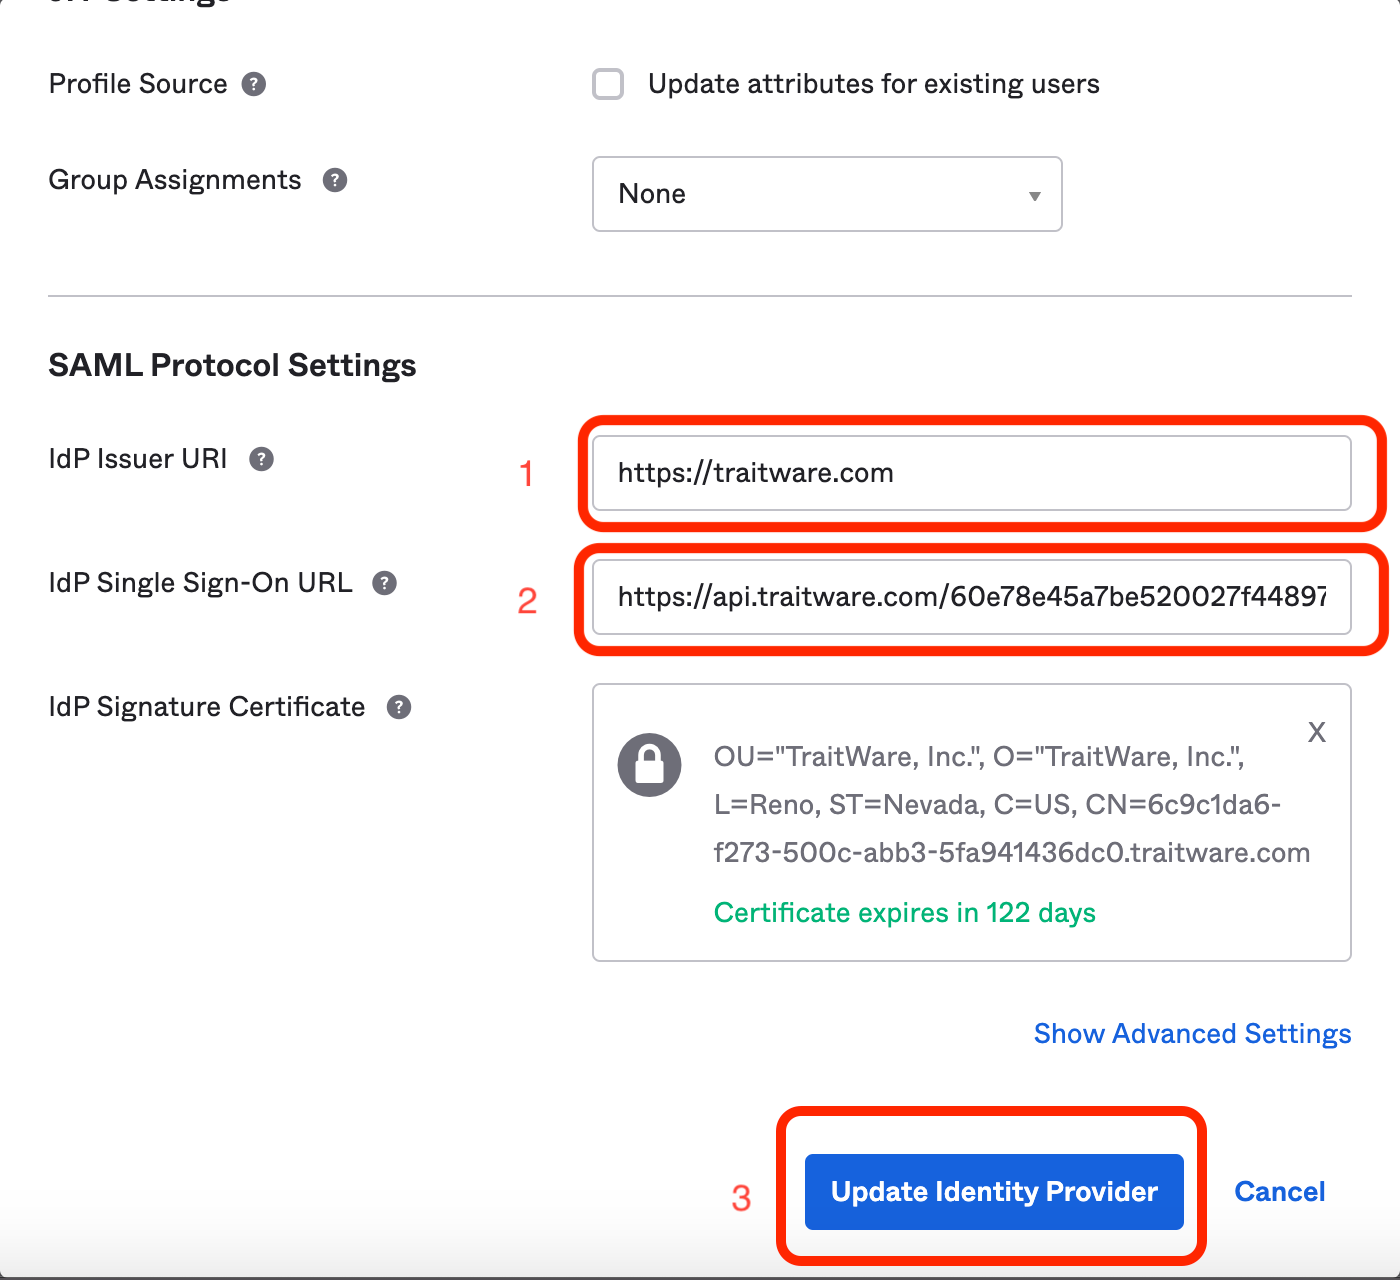
- Paste TraitWare IdP Issuer to Okta IdP Issuer URI line.
- Paste the TraitWare SAML Login Endpoint to Okta IdP Single Sign-On URL line.
- Select Update Identity Provider.
TraitWare is now configured as an Identity Provider for Okta.
Okta Routing Rules
More detail can be found Okta’s documentation site: https://help.okta.com/en/prod/Content/Topics/Security/Identity_Provider_Discovery.htm
TraitWare is configured as an IdP in Okta, it’s time to designate TraitWare as the IdP for users.
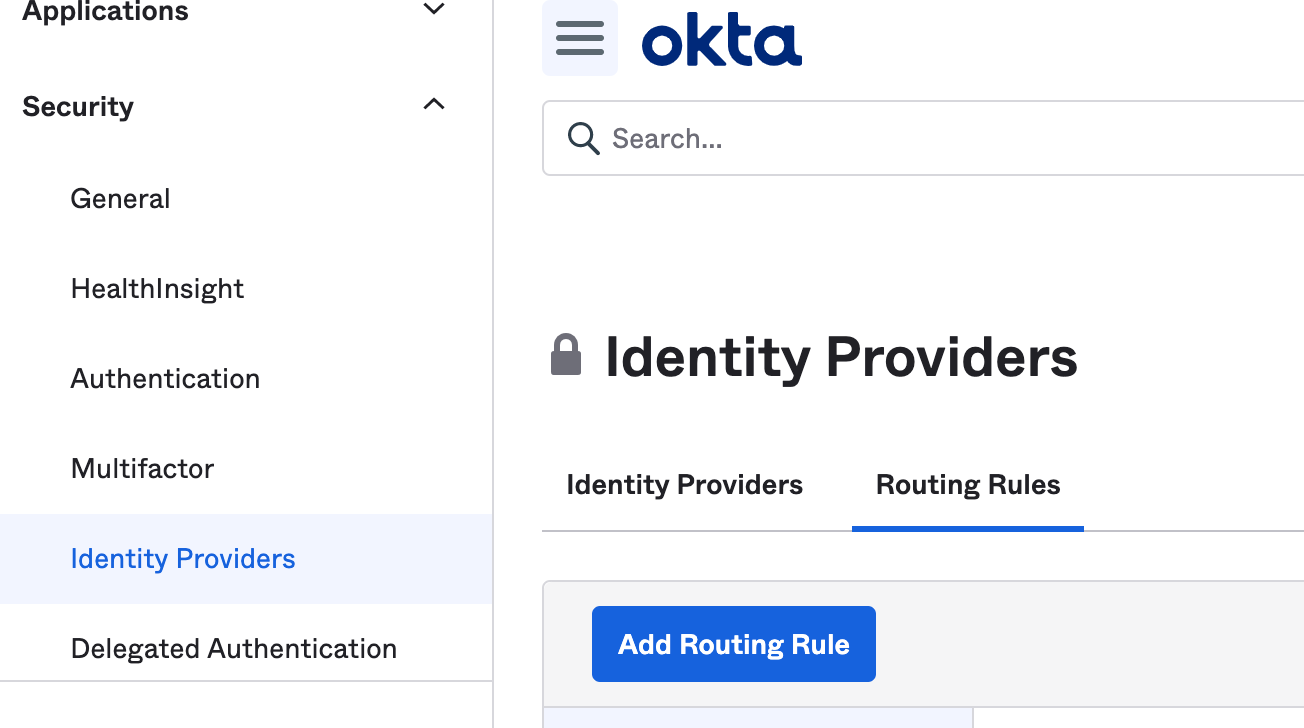
Under Security, select Identity Providers. Next to Identity Providers, select Routing Rules.
Select Add Rule.

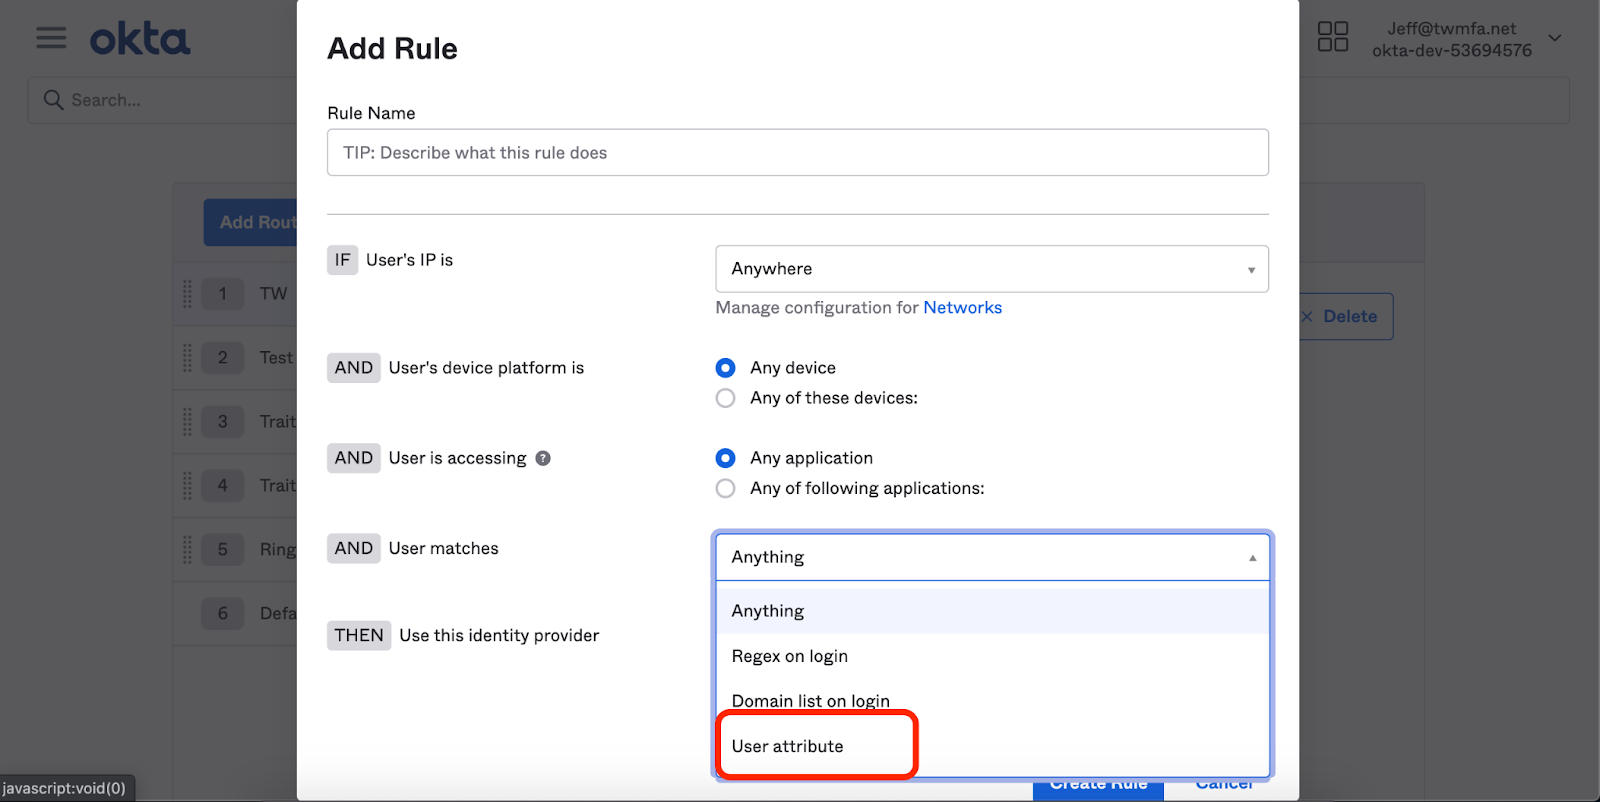
Under the Rule area, select User Attribute
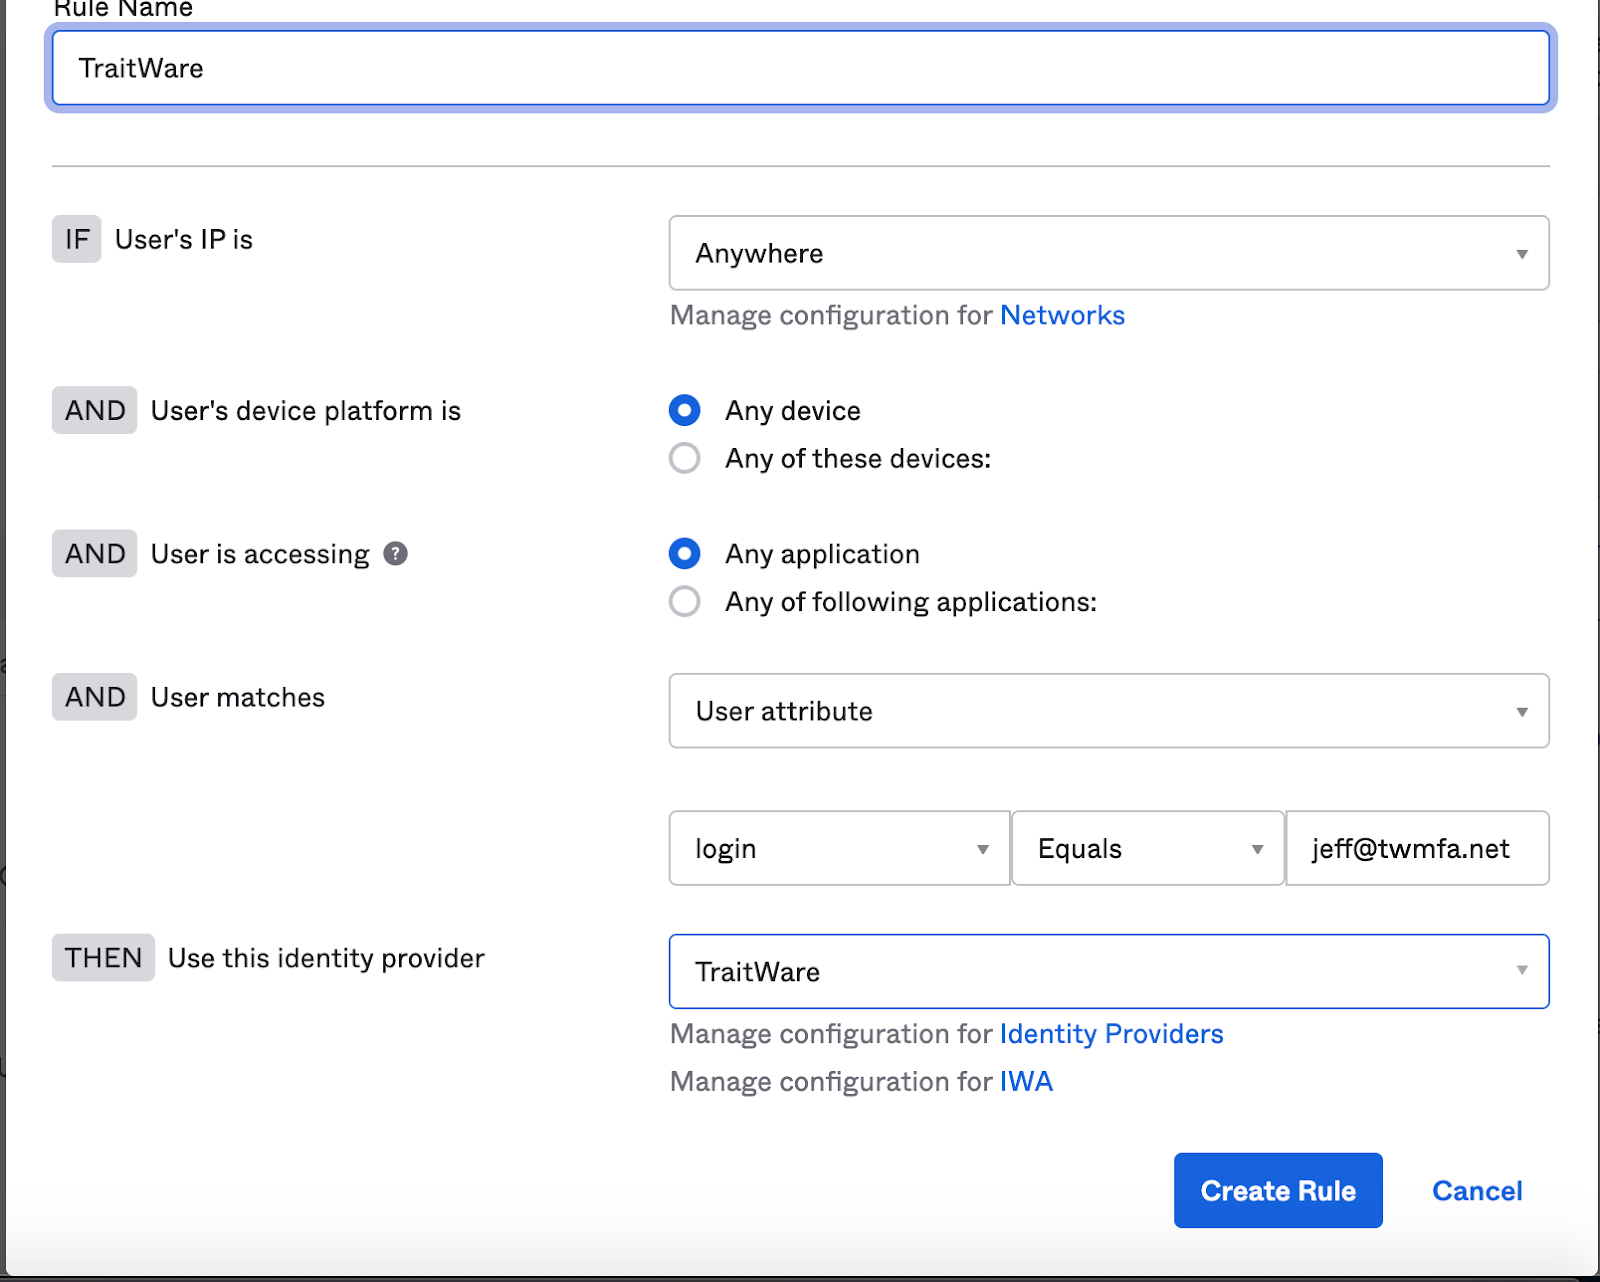
For this demonstration, we will select login, equals Jeff@twmfa.net.
Under Identity Provider select TraitWare.
Click Create Rule.
Note: The user attribute field can be customized to parse organizations, domain name, user group, etc. …
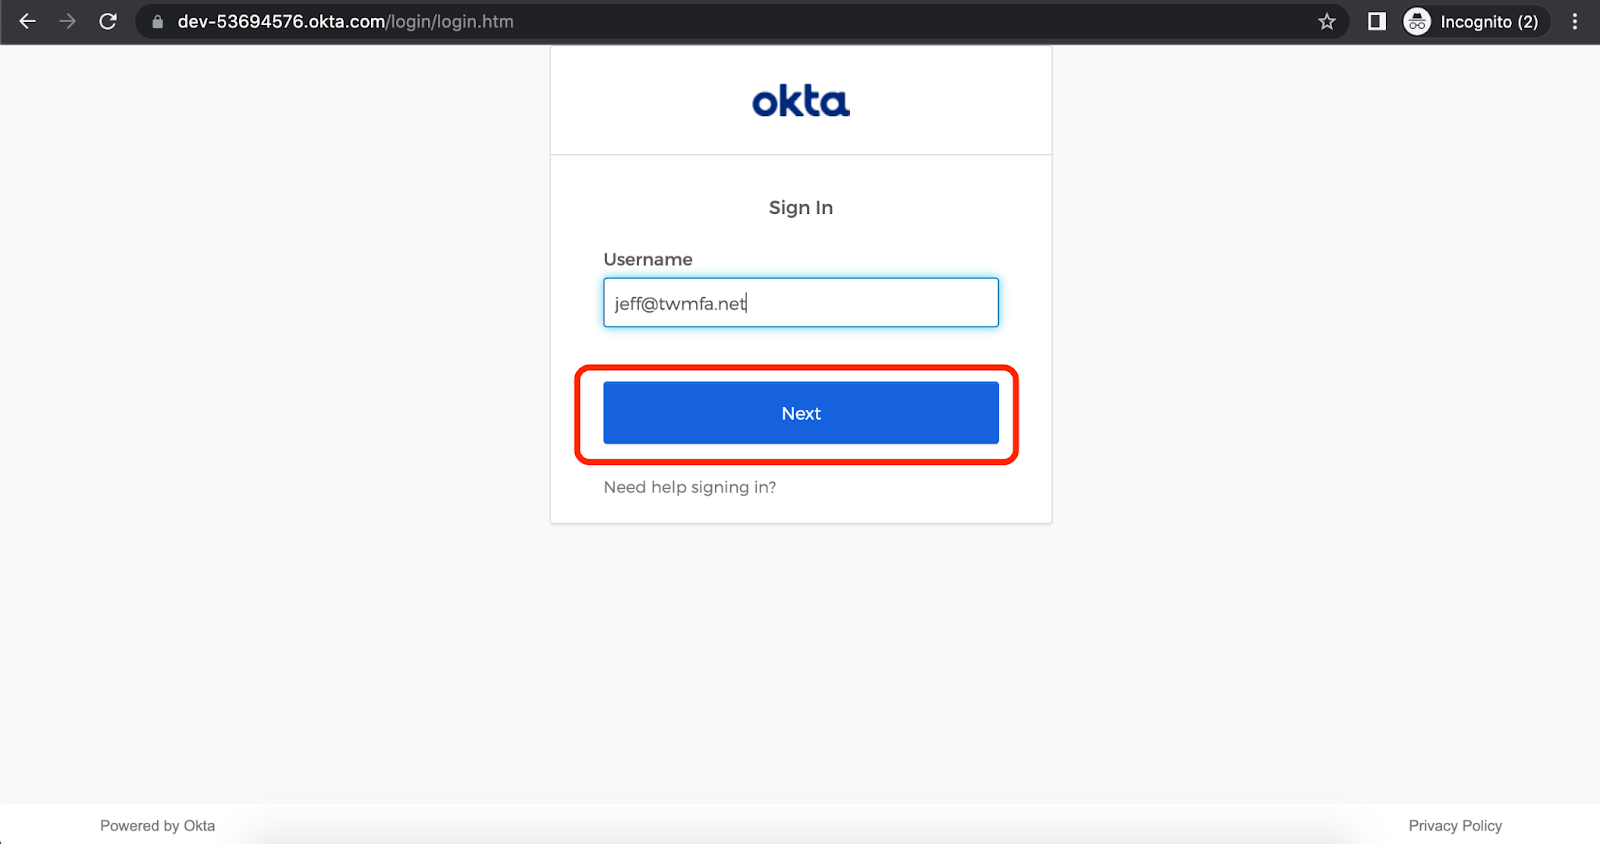
Navigate to the Okta domain. Enter Username and select Next.
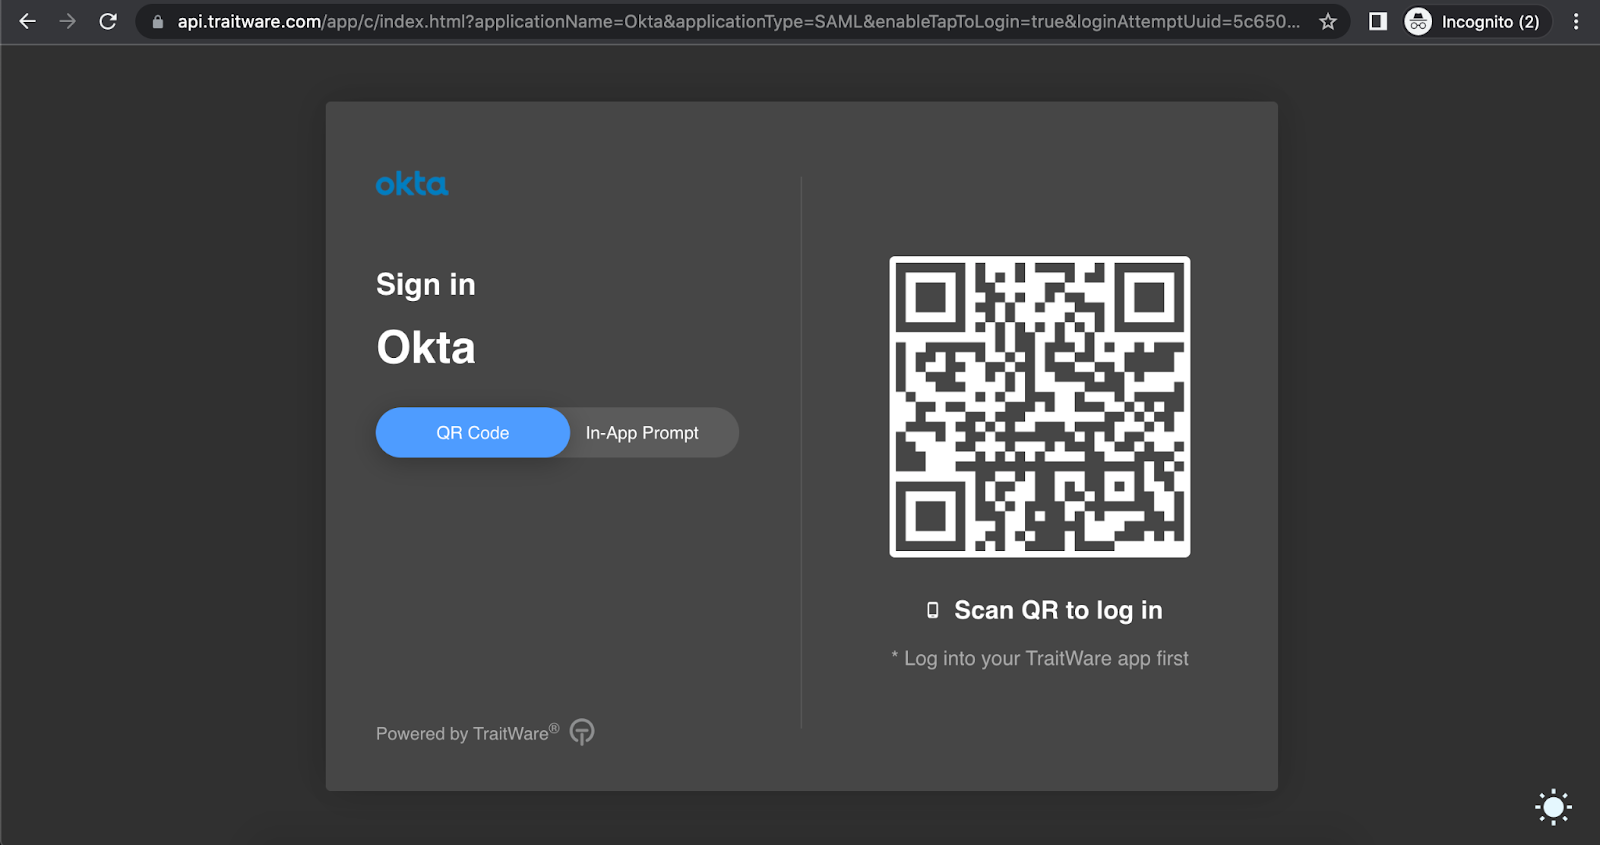
The user will be redirected to the TraitWare login screen. Scan the QR code with the TraitWare app on your mobile device.
Disable Okta Verify (Required for TraitWare Authentication)
When using TraitWare as an Identity Provider, users authenticate with passwordless, phishing-resistant MFA.
If Okta Verify or other MFA factors remain enabled, users may be prompted for an additional authentication step, which can cause login failures or timeouts.
This section will guide you through disabling Okta Verify for users authenticating with TraitWare.
Update Sign-On Policy
In the Okta Admin Console:
Select the Security dropdown.
Select Authentication.
Select Sign-on Policies.
Locate the policy assigned to users authenticating with TraitWare.
Select Add Rule or edit an existing rule.
Configure the Rule
Under the Rule settings:
- Set User's group membership includes → (TraitWare Users or desired group)
- Set AND User authenticates via → Identity Provider
Under THEN Access is:
- Set User must authenticate with → 1 factor
OR - Select Identity Provider only
Ensure the following settings are NOT enabled:
- Do NOT require Additional factor
- Do NOT require Okta Verify
Select Save.
Update Authenticator Enrollment Policy
Even if Okta Verify is not required during login, users may still be prompted to enroll unless it is disabled.
In the Okta Admin Console:
Select the Security dropdown.
Select Authenticators.
Select Enrollment.
Locate the policy assigned to TraitWare users.
Disable Okta Verify
Within the policy:
- Find Okta Verify
- Set it to Disabled
Select Save.
(Optional) Remove Existing Okta Verify Enrollments
If users were previously enrolled in Okta Verify, you may remove it:
Navigate to Directory → People
Select a user
Go to the Authenticators or Factors tab
Remove Okta Verify
Test Authentication Flow
Navigate to the Okta domain.
Enter Username and select Next.
The user should:
- Be redirected to TraitWare
- Complete authentication
- Be logged into Okta
The user should NOT be prompted for Okta Verify.
Note
If Okta Verify is not disabled:
- Users may receive additional MFA prompts
- Authentication may time out while completing TraitWare login
- This results in a failed login experience
Security Consideration (Optional Fallback)
Some organizations may choose to allow fallback authentication methods (such as Okta Verify or passwords) for emergency access.
⚠️ Allowing fallback authentication introduces potential security risks, including susceptibility to phishing and credential compromise.
If fallback is required:
- Limit access to a small administrative group
- Exclude that group from TraitWare routing rules
- Monitor access closely
Additional Information
If you do not see an application in the dropdown list during the Application setup, you can fill in the fields with your generic information. If you have issues, please contact us at support@traitware.com, and we will work with you to see if the application can be added.
Was this article helpful?
That’s Great!
Thank you for your feedback
Sorry! We couldn't be helpful
Thank you for your feedback
Feedback sent
We appreciate your effort and will try to fix the article