Rotate/Change the Signing Key
At some point the signing key for SAML applications will expire as set when the key was originally created. It is a best security practice to have a limited lifespan for signing keys. TraitWare sends out notification emails alerting administrators that keys are expiring. The signing key needs to be changed before it expires to ensure uninterrupted service.
Most Service Providers
The process of rotating keys can be different for each service provider but typically uses one of two methods:
- Upload a new SAML metadata file from TraitWare to the SSO/SAML configuration page of the service provider
- Paste/Upload a new signing key into the SSO/SAML configuration page of the service provider
We suggest searching the service provider documentation on their website for 'SAML settings', 'SSO settings', 'security settings', or similar for the most up to date service provider documentation as it can change frequently.
Microsoft
For rotating keys for Microsoft integrations, see our documentation: Rotate Microsoft Signing Key.
Suggestion for Rotation Steps
We suggest coordinating the steps below relatively quickly in succession to minimize any downtime. There will be downtime between the time when the key is updated on the TraitWare application and when the service provider is updated with the new key. If planned accordingly with the steps listed below, this should only last a few seconds.
Steps to Change or Rotate SAML Signing Key
- Create a new signing key in the TraitWare Console
- Change the signing key on the SAML application in the TraitWare console
- Update the signing key in the service provider SAML configuration
- Test a login to the service provider (incognito browser)
Lockout Warning: It is highly recommended you have two separate browsers open to perform the key rotation.
- Browser One - Admin logged in to service provider SAML configuration page
- Browser Two - Incognito browser to test login after the key is changed
If something is configured incorrectly during the key change it may lock users out of the service provider, including the admin and the ability to change the configuration. This is why it is highly recommended to have the two browsers open separately. Do not log the admin out of the service provider or close the browser where the admin is logged in until a login has been successfully tested on an incognito browser. The admin should remain logged in to make any changes if something is configured incorrectly.
It is recommended to review the rest of this documentation before planning your key rotation.
TABLE OF CONTENTS
- Rotate/Change the Signing Key
- Create a New Signing Key
- Assign New Signing Key to Application
- Get New Key Value
- Test the Login
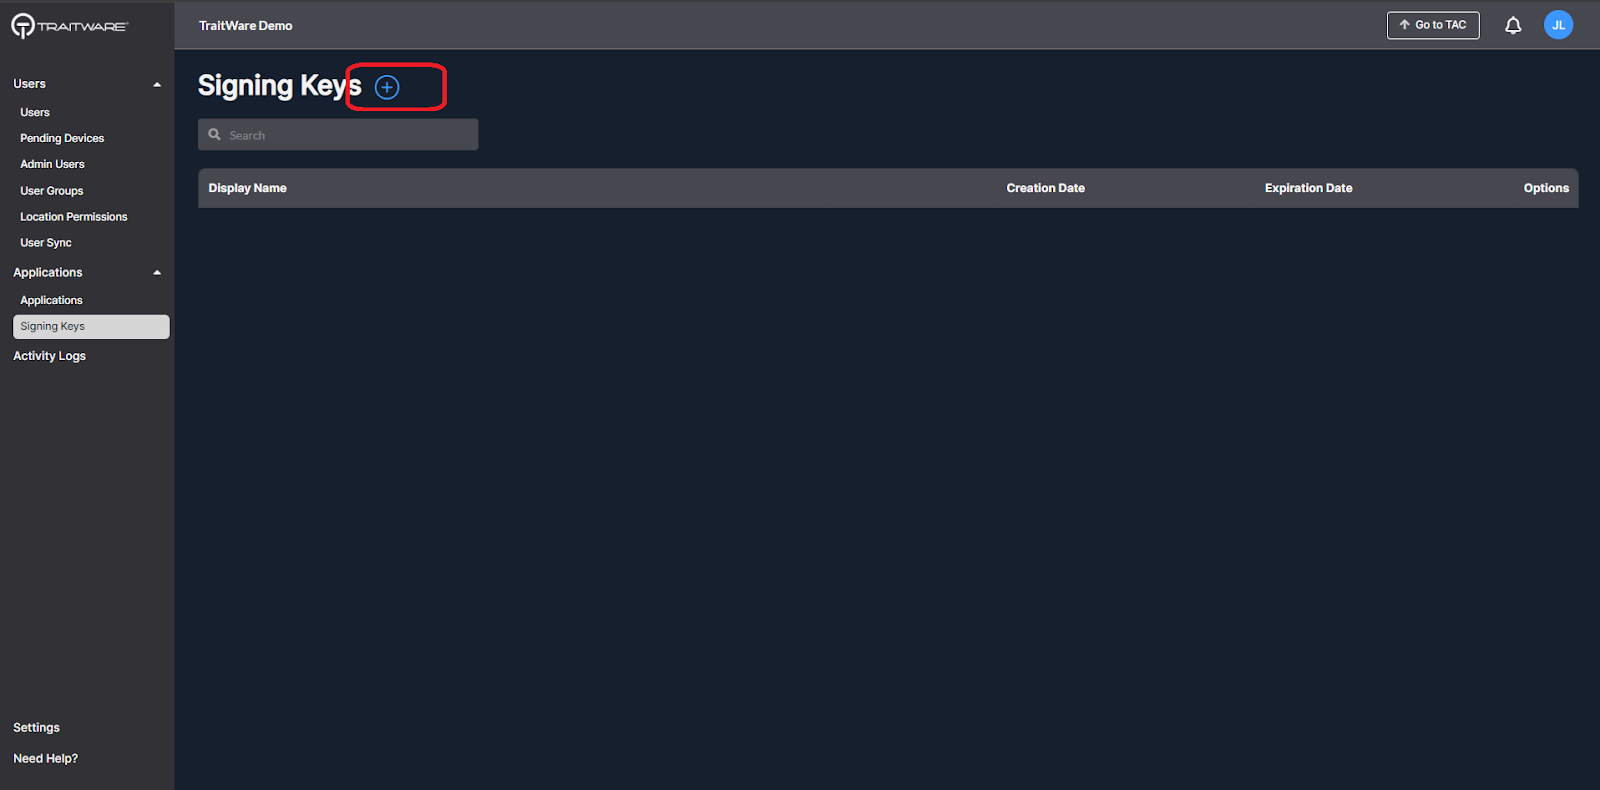
Create a New Signing Key
- Navigate to Applications>Signing Keys in menu of the TraitWare console. Click the plus sign to add a new signing key.
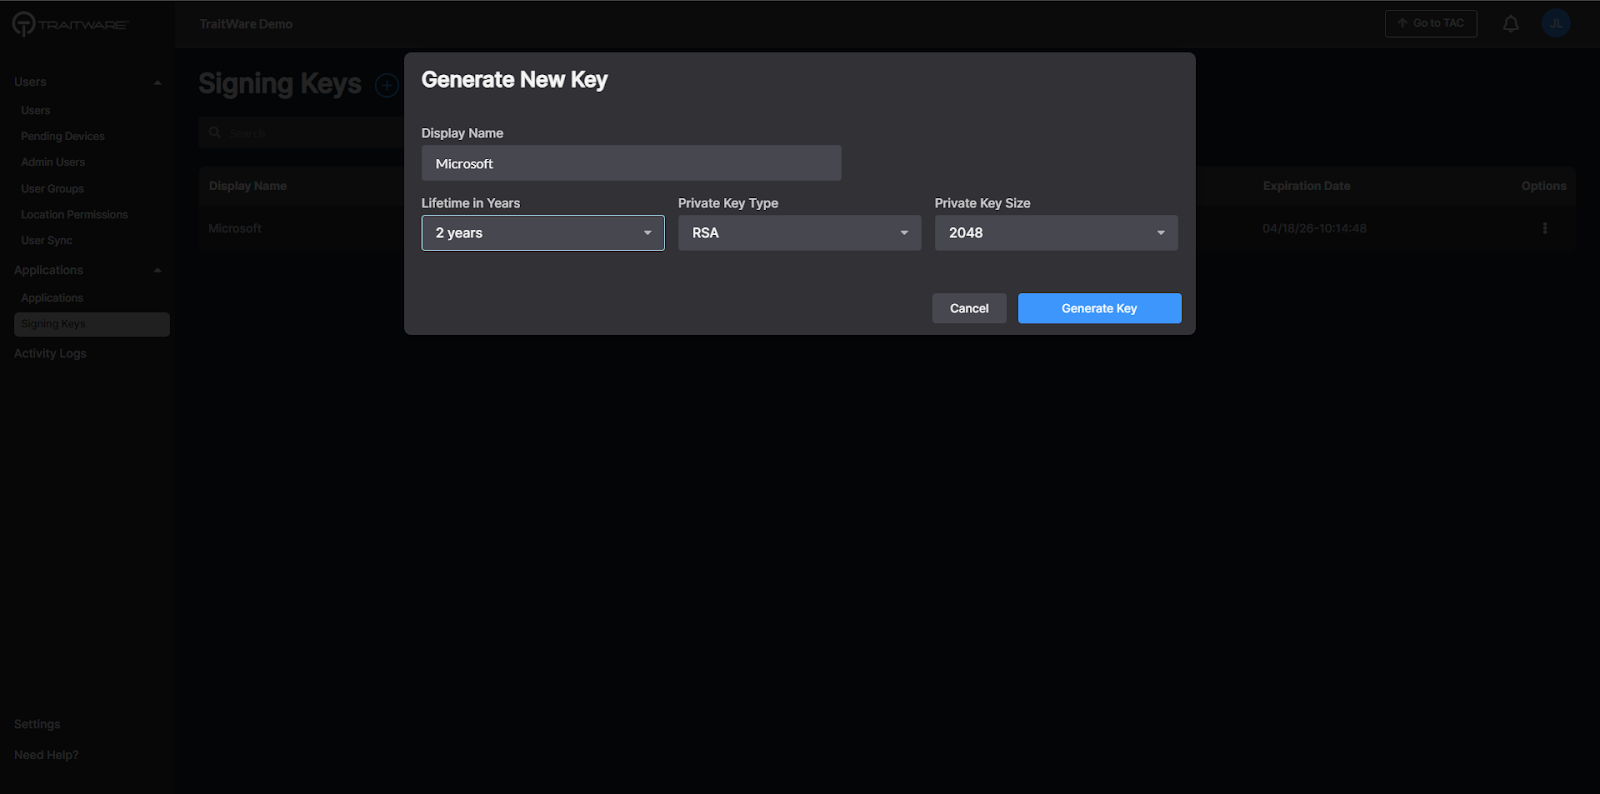
- Enter a name for the new key and select desired Lifetime in Years. Click Generate Key.
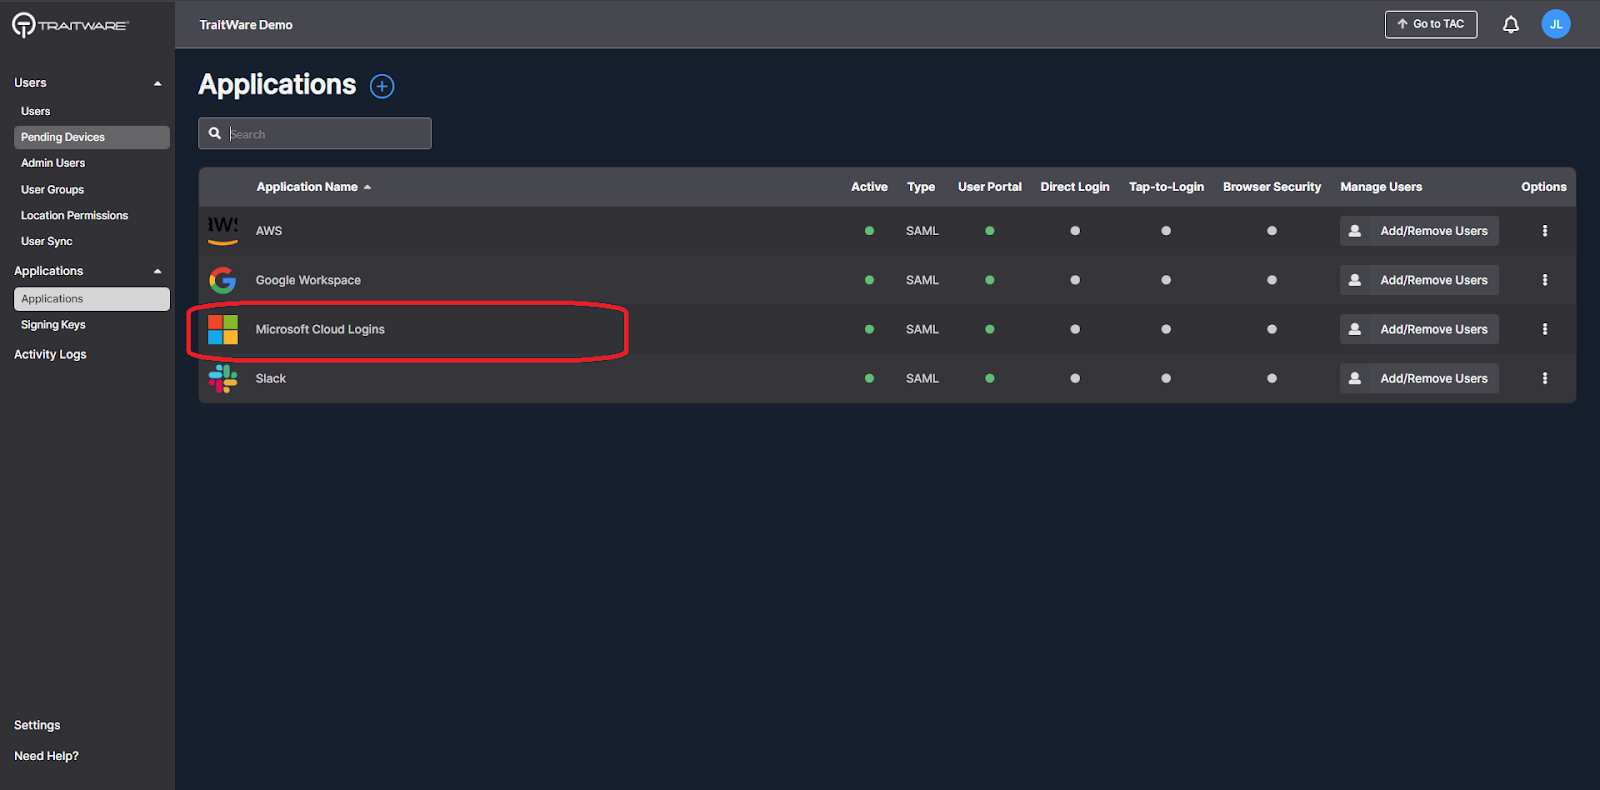
Assign New Signing Key to Application
- Navigate to the SAML application where the key needs to be changed
- Click on Signing Key under the Configuration tab to expand that section. Click Edit Signing Key
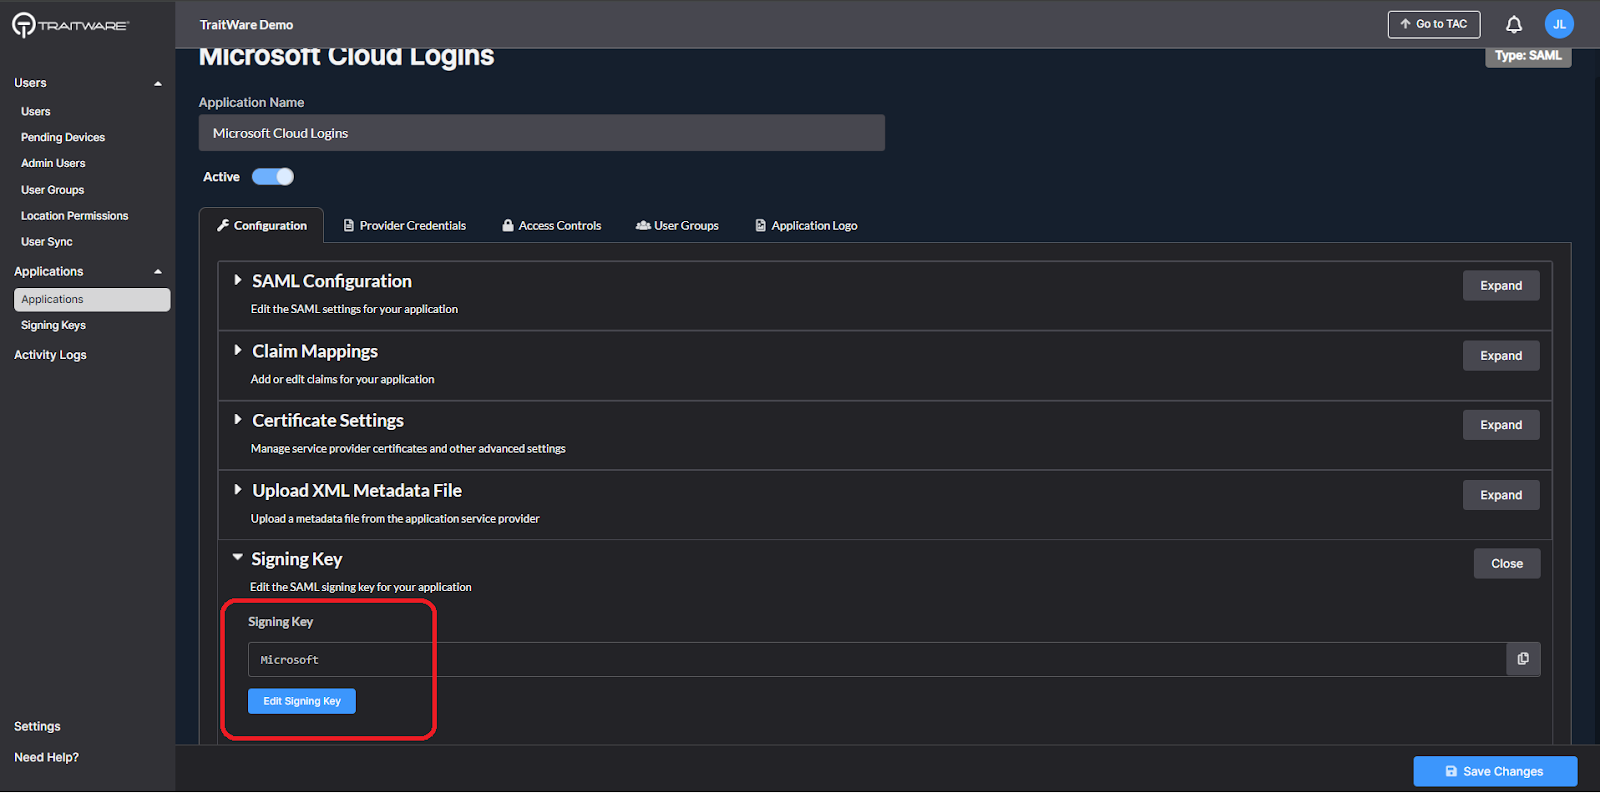
- Select the new signing key
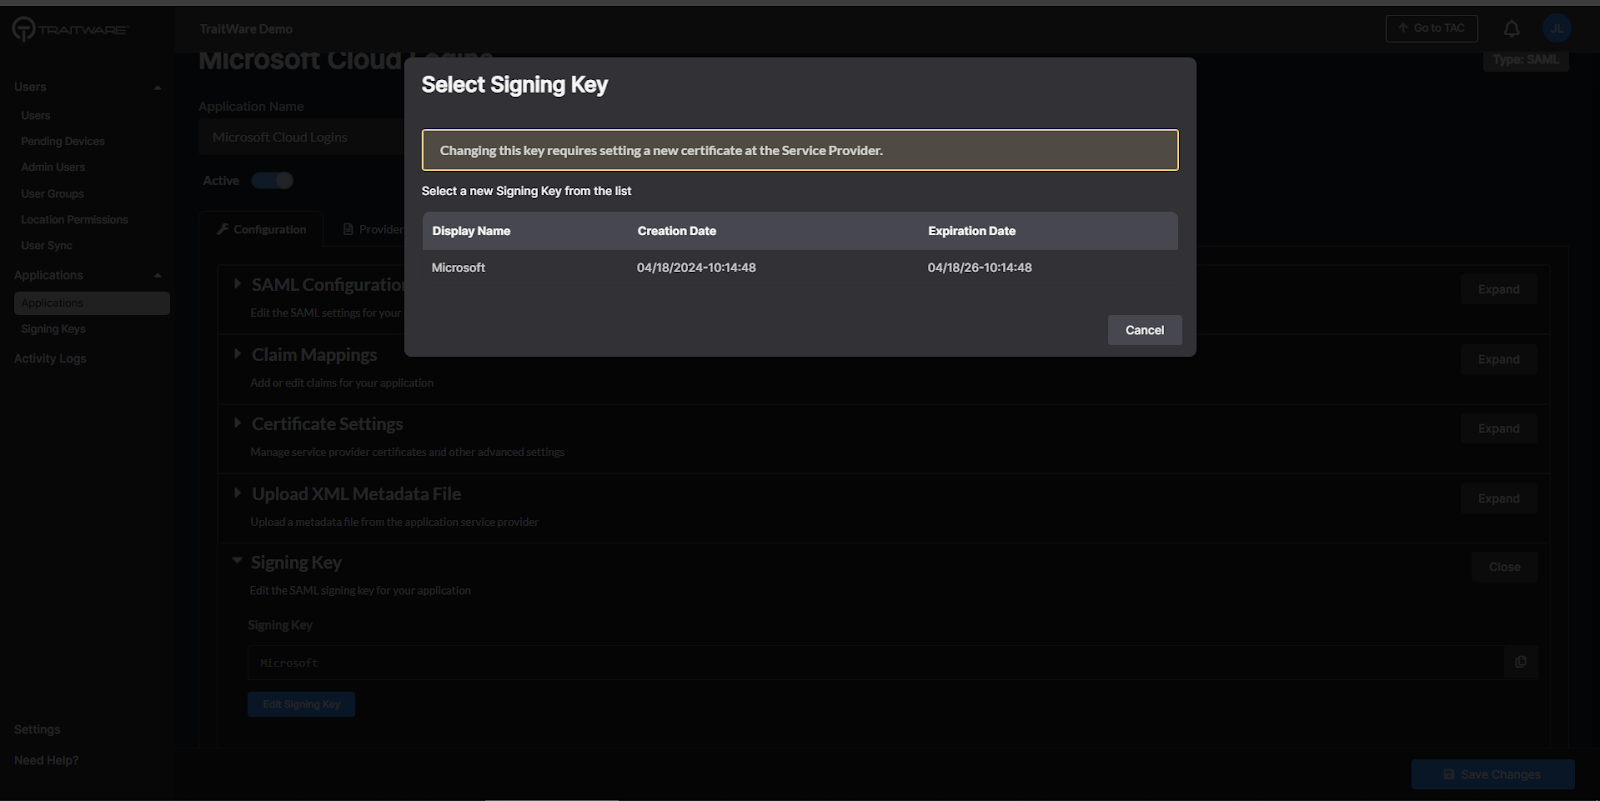
The application has been assigned the new key.
Get New Key Value
In the SAML application just updated, click the Provider Credentials tab to find information about the new key.
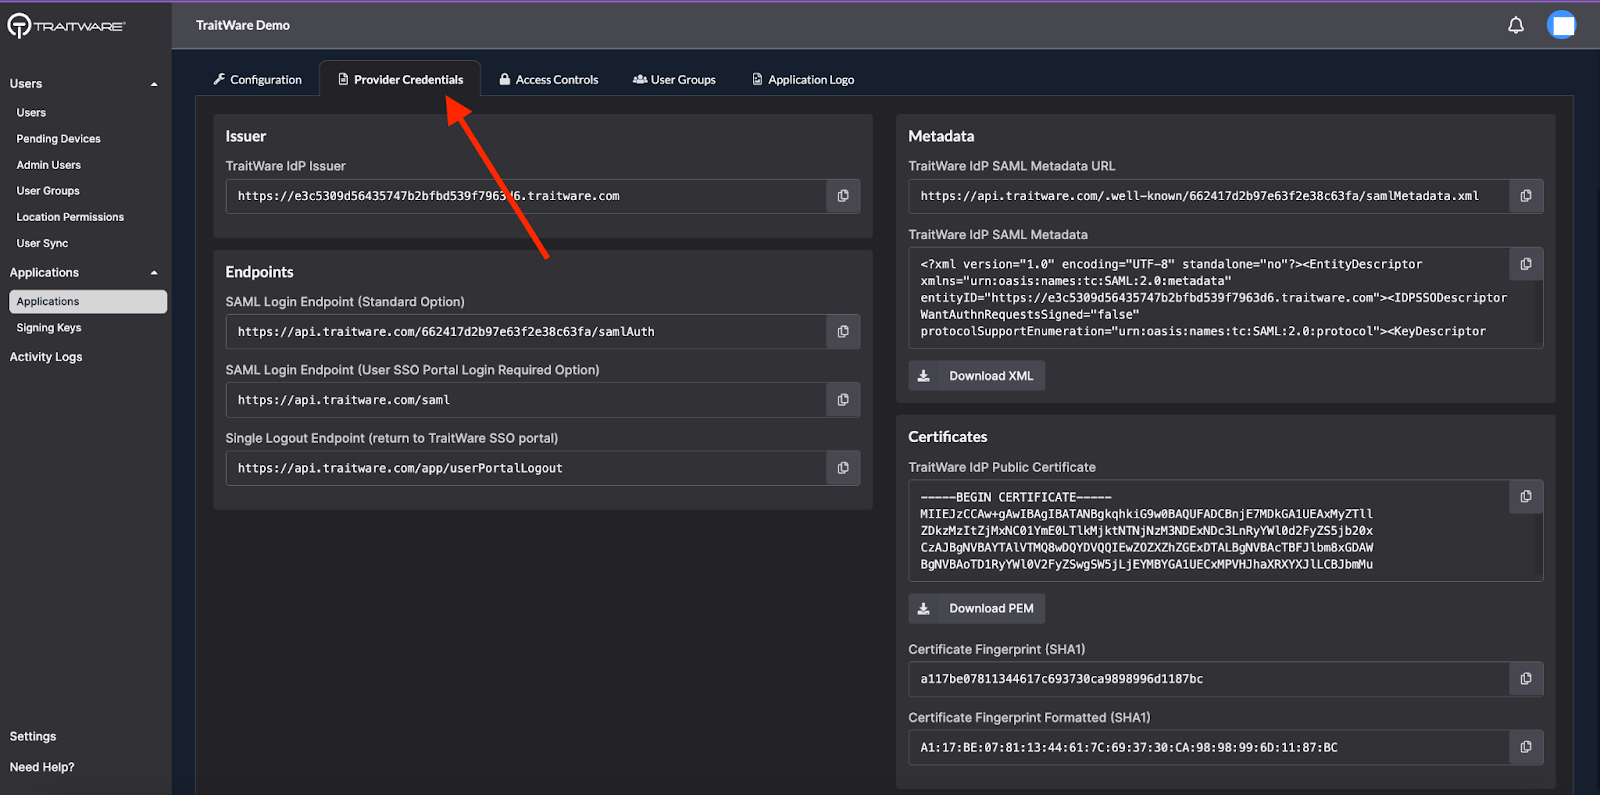
Service provider SAML configurations typically need one of the two items below to change the key:
- Copy or download the Metadata XML file and upload or paste it in the service provider SAML configuration
- Copy or download the Certificate (key) and paste or upload it in the service provider SAML configuration
See the SAML configuration documentation for each service provider to find which method is supported.
Test the Login
Test a login in an incognito browser window to ensure the service provider has been configured correctly with the new key.
Do not close the browser where the admin is logged into the service provider until the application is configured correctly and there is a successful test login.
Was this article helpful?
That’s Great!
Thank you for your feedback
Sorry! We couldn't be helpful
Thank you for your feedback
Feedback sent
We appreciate your effort and will try to fix the article