Overview
TraitWare can be used to protect the log in to Microsoft services, adding strong, low-friction, highly-secure passwordless MFA.
This guide demonstrates how to federate a Microsoft tenant domain to use TraitWare Passwordless MFA as the primary login for Microsoft services.
Use cases where TraitWare can be used to protect services on federated domains:
- Microsoft web applications
- Microsoft desktop applications
- Microsoft mobile applications
- Windows 10/11 Entra-joined sign-in (requires TraitWare credential provider)
- Windows 10/11 Entra-registered (workplace joined) sign-in
- Windows 11 domain-joined IdP sign-In (requires additional configurations)
Prerequisites
- The Microsoft Graph API User Sync must be configured and working.
- Ensure that the Graph API permission for IdentityProvider.ReadWrite.All is enabled.
**Note: Microsoft federation is domain level. Non-disruptive user testing requires a secondary domain.
TABLE OF CONTENTS
- Verify Domains in Azure
- Add/Assign Global Administrator
- Create Application in TraitWare Console
- Federate the Domain
- Remove Federation
- Rotate/Change the Signing Key
Verify Domains in Azure
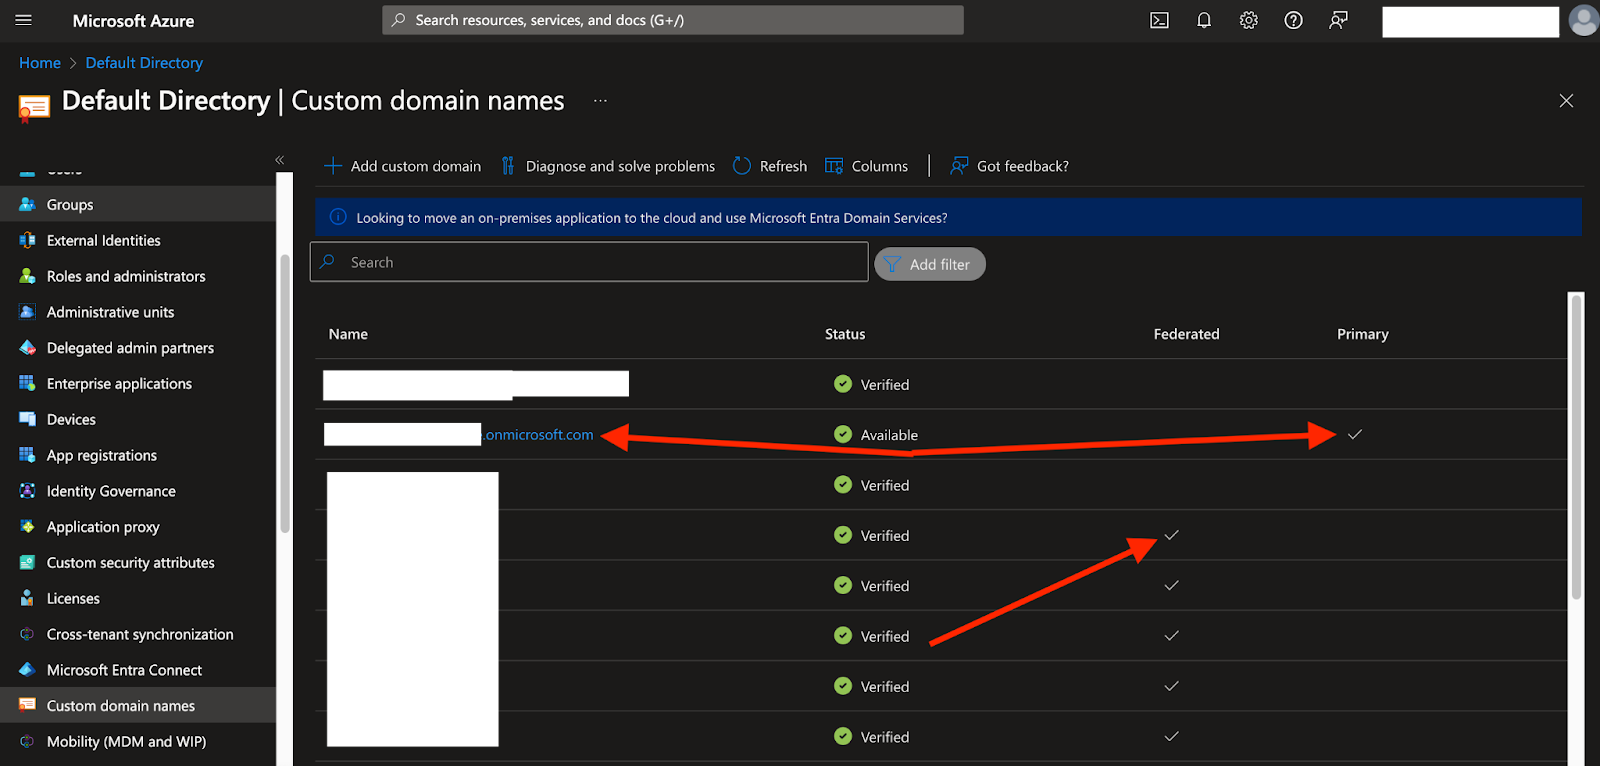
- Make sure the account has more than one verified domain. Federation requires that one domain remains unfederated (Primary Managed domain). TraitWare recommends selecting the .onmicrosoft.com domain as the primary.
- Tenant domains are found by navigating to Entra ID>Custom domain names in the Azure console.
Add/Assign Global Administrator
Ensure there is a global administrator on the account.
- Add a Global Administrator. This user will not use TraitWare to sign in. This account does not require licenses from Microsoft.
- Navigate to Entra ID → Users → + New User
- Fill in the appropriate information for the Name and User name (email)
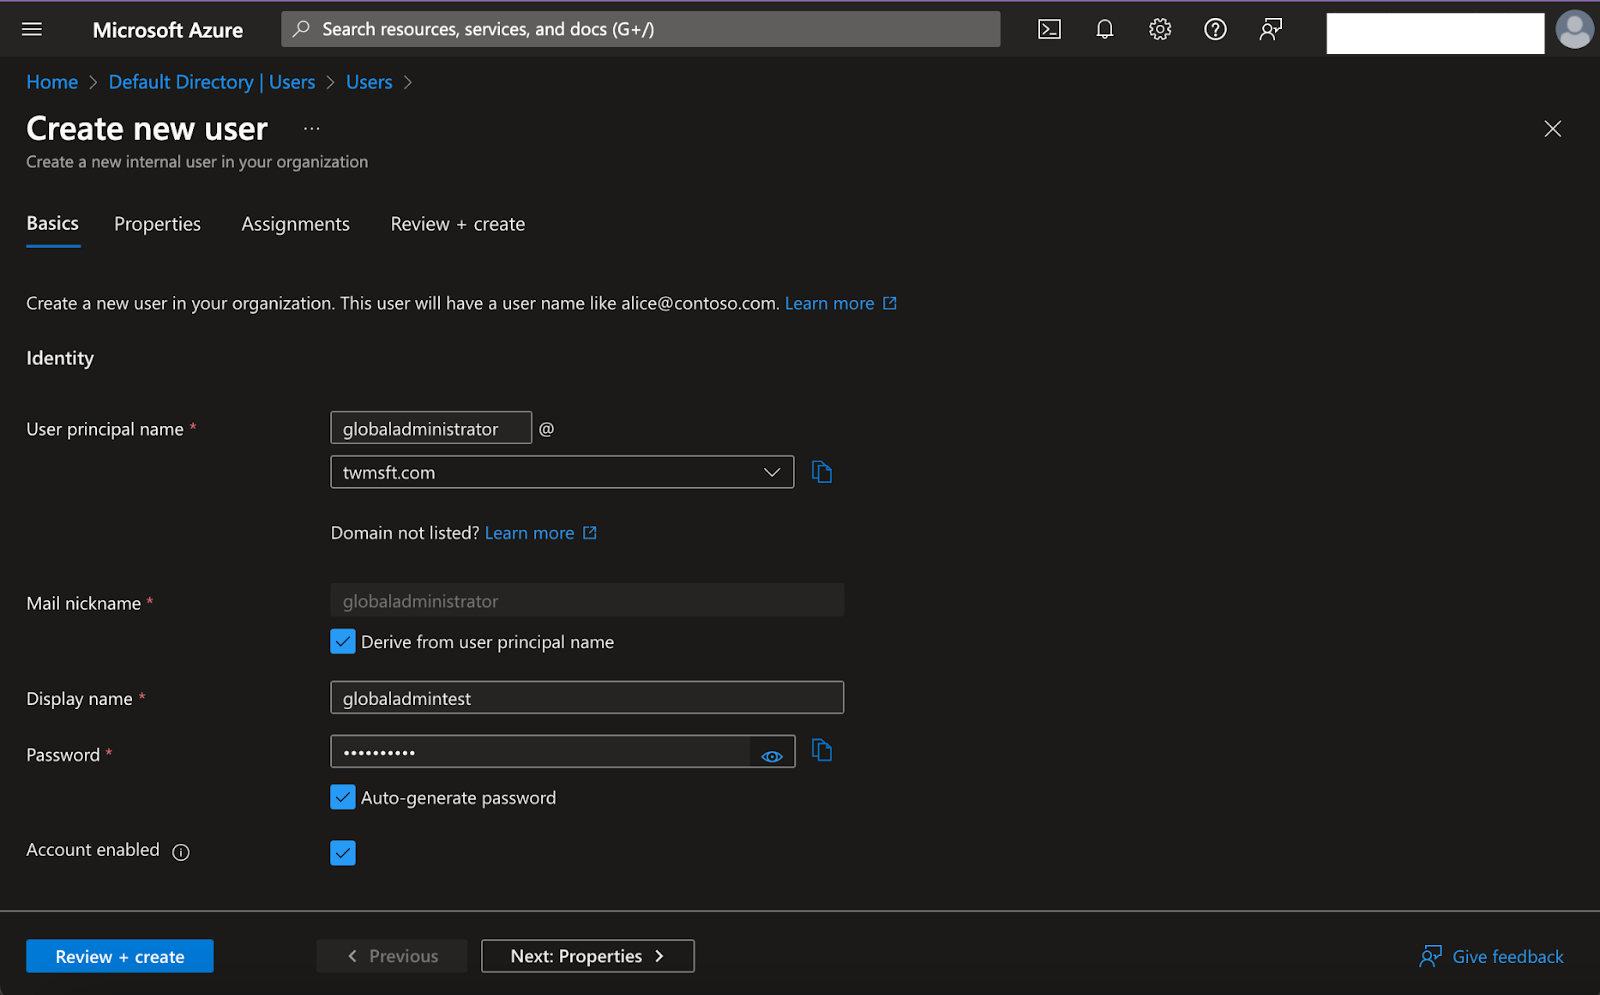
- Select Assignments, Add role and change to Global Administrator then select Ok.
- Select Review + Create

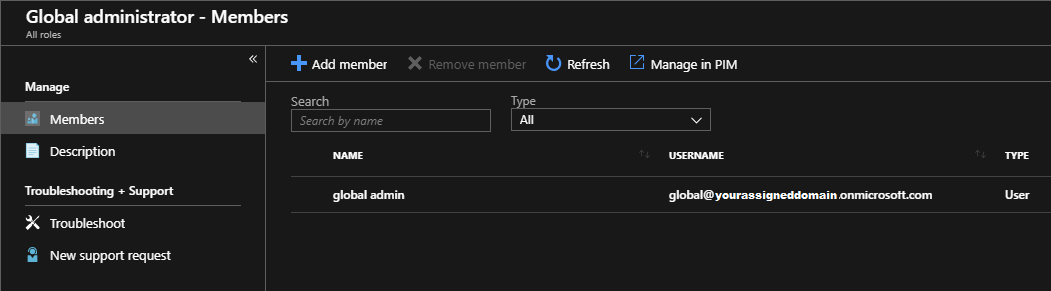
- If the account already has an existing user that is preferred as the global administrator, navigate to Entra ID → Roles and administrators → Global Administrator
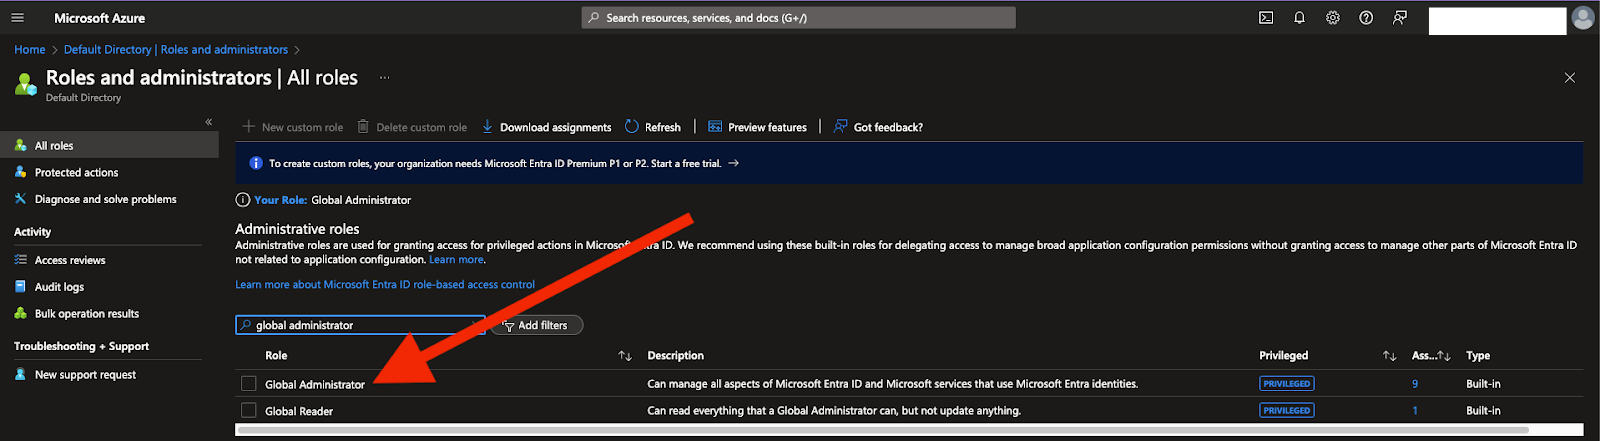
- Select + Add member and search for the appropriate user to add as a member
**Note: It is highly recommended to use security best practices when creating a password
Create Application in TraitWare Console
Create Signing Key
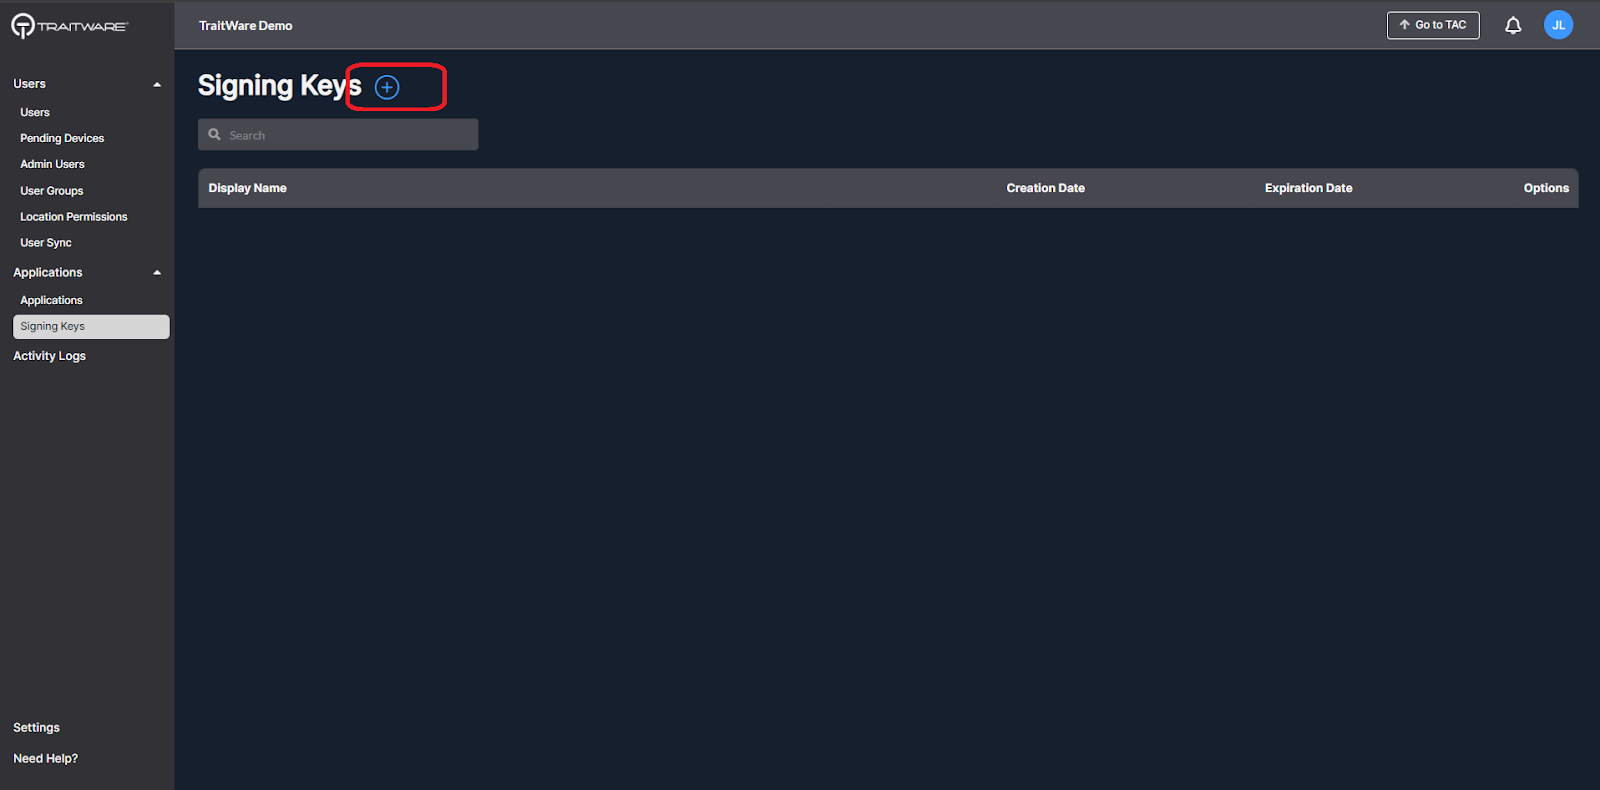
- Navigate to the Signing Keys in the applications menu of the TraitWare console.
- Click the plus sign to add a new signing key.
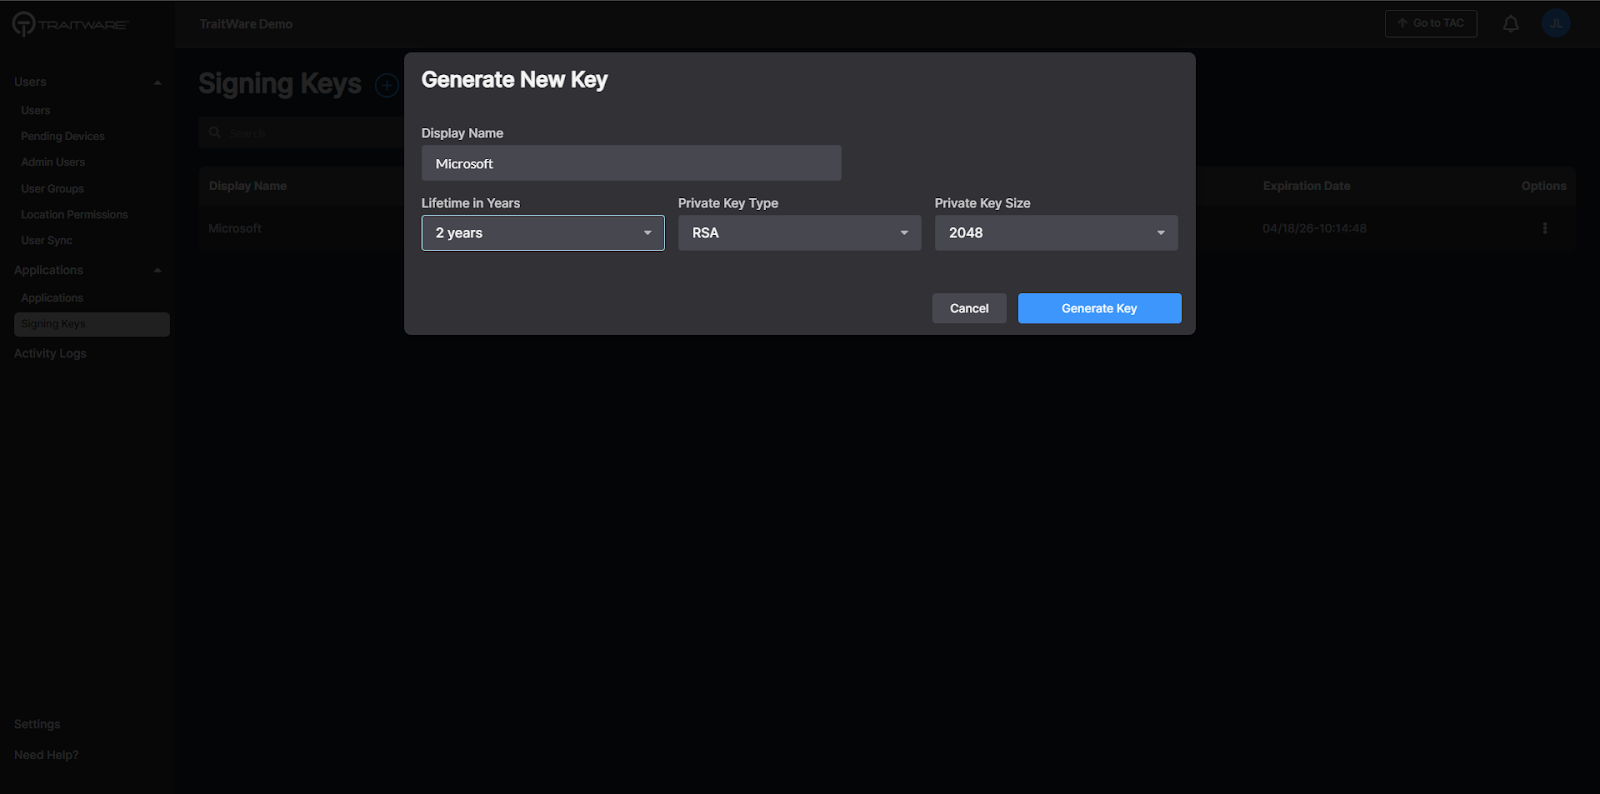
- Enter display name, select desired Lifetime in Years. Click Generate Key.
Create Application
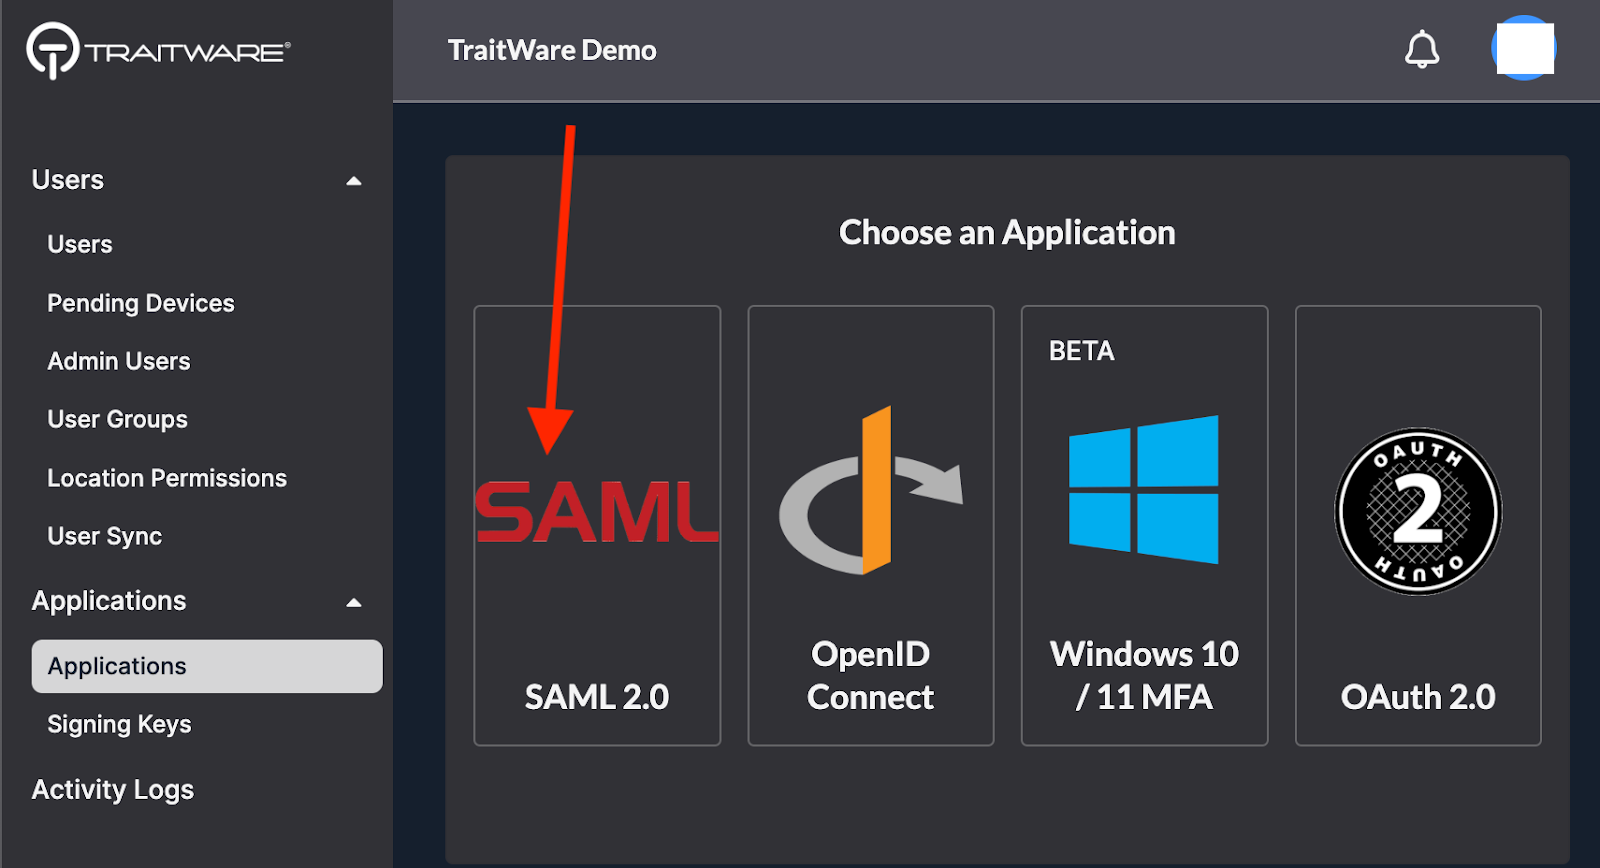
- Navigate to the Application menu and click on the + to add a new application

- Choose the SAML application type
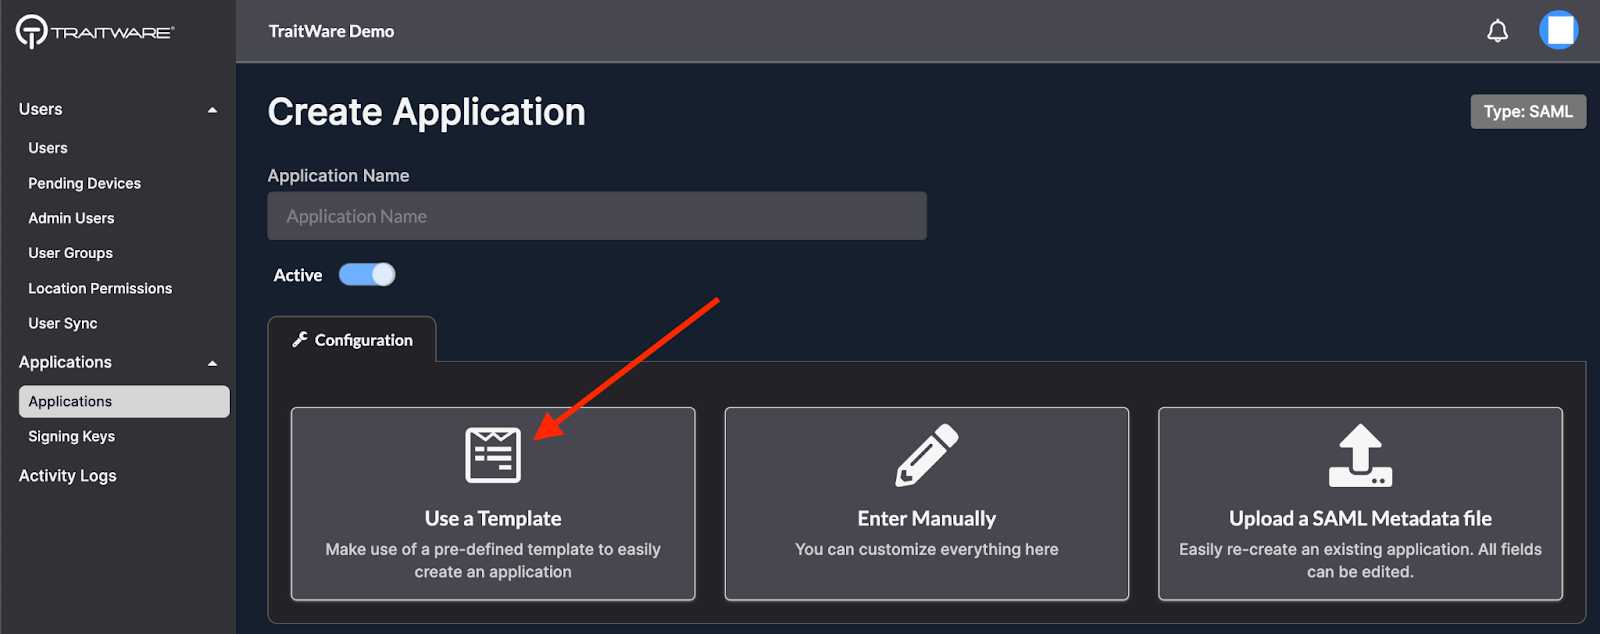
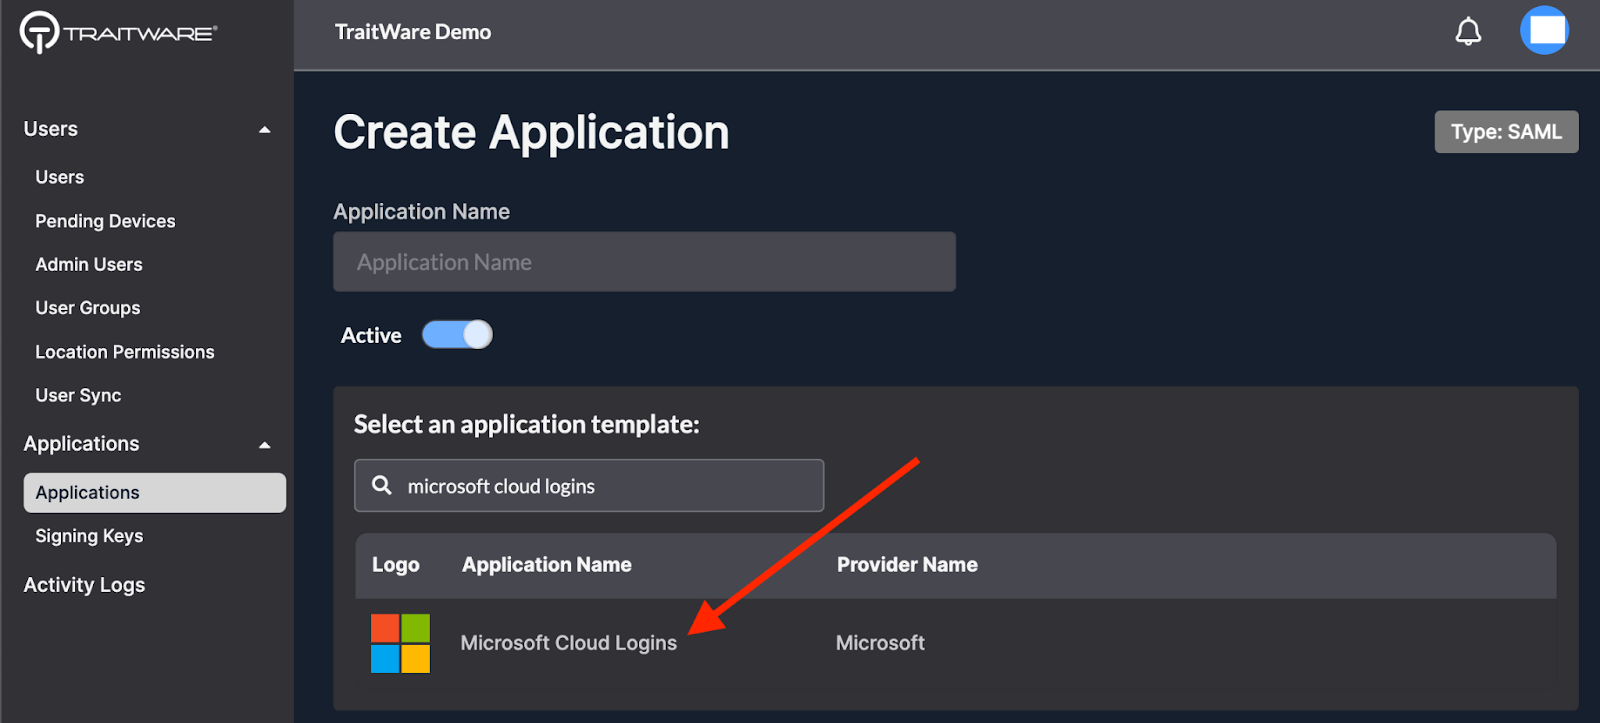
- Enter the Application Name for the application
- Select Use a Template
- Search for ‘Microsoft’, select Microsoft Cloud Logins, and click Submit
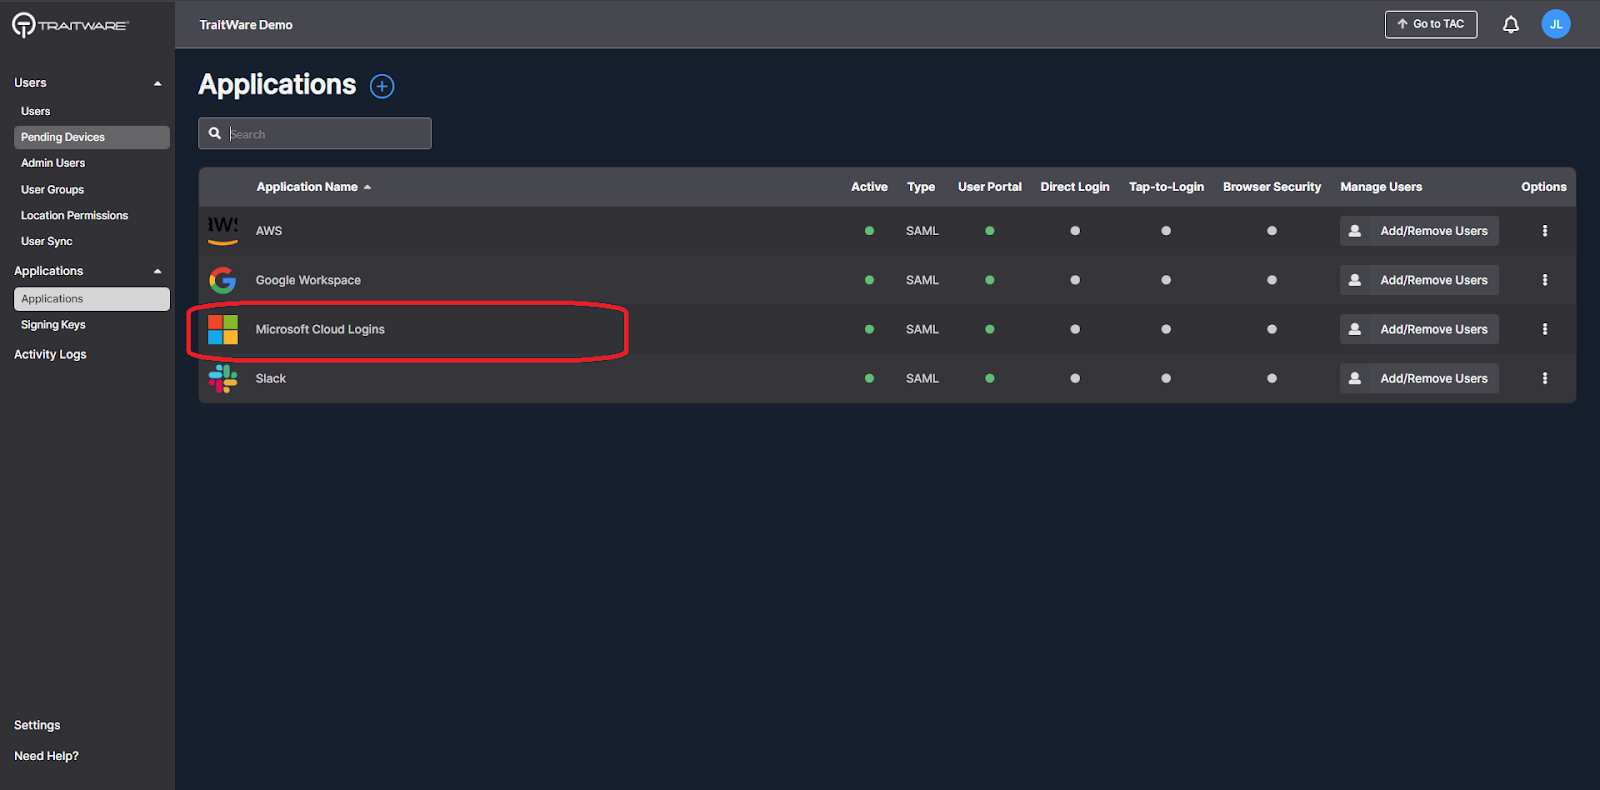
- Select the newly-created application
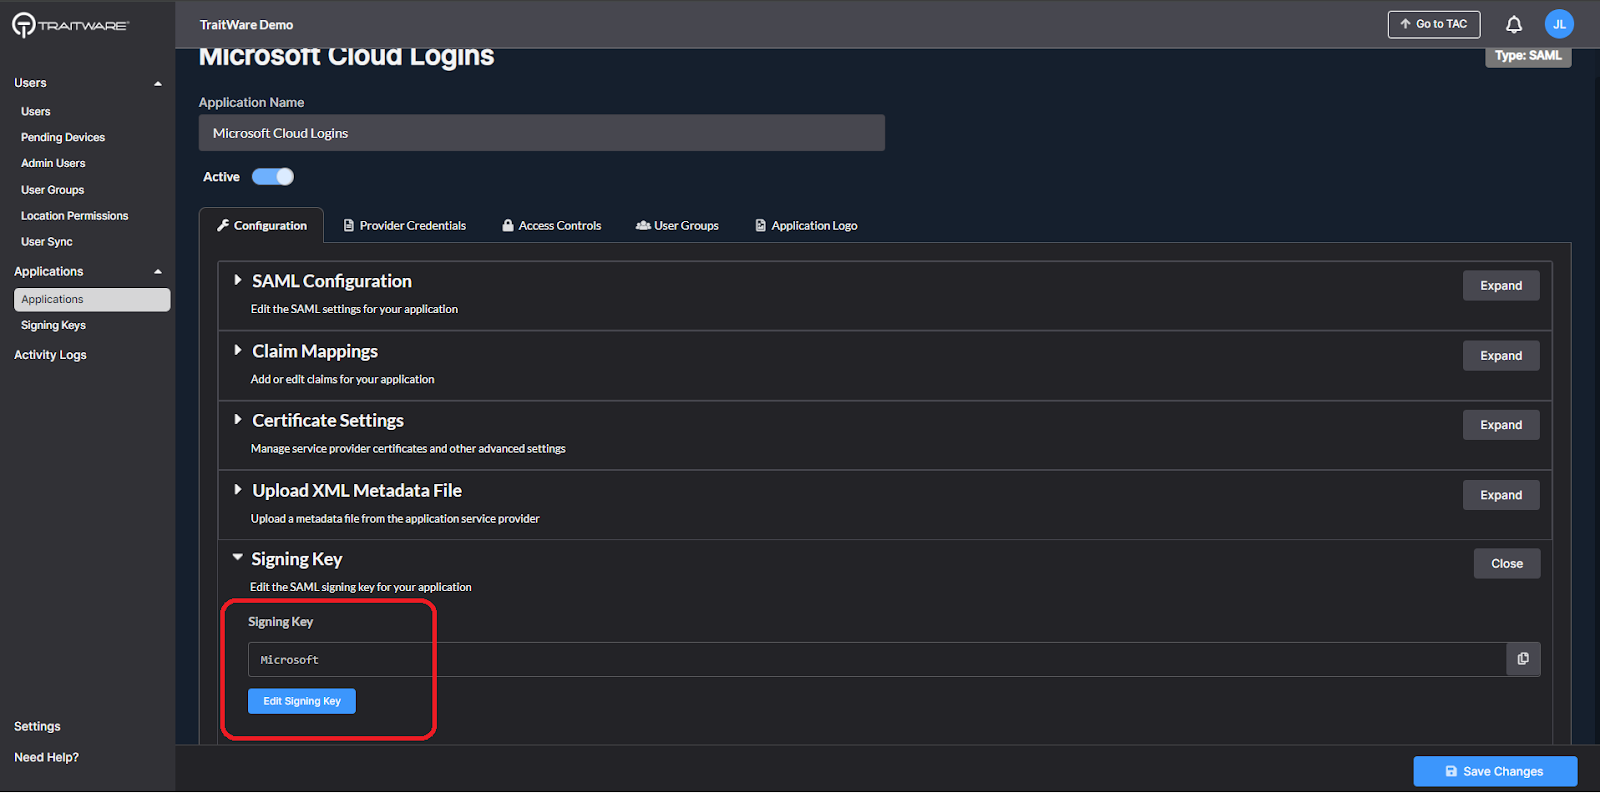
- Click on Signing Key under the Configuration tab to expand that section. Click Edit Signing Key
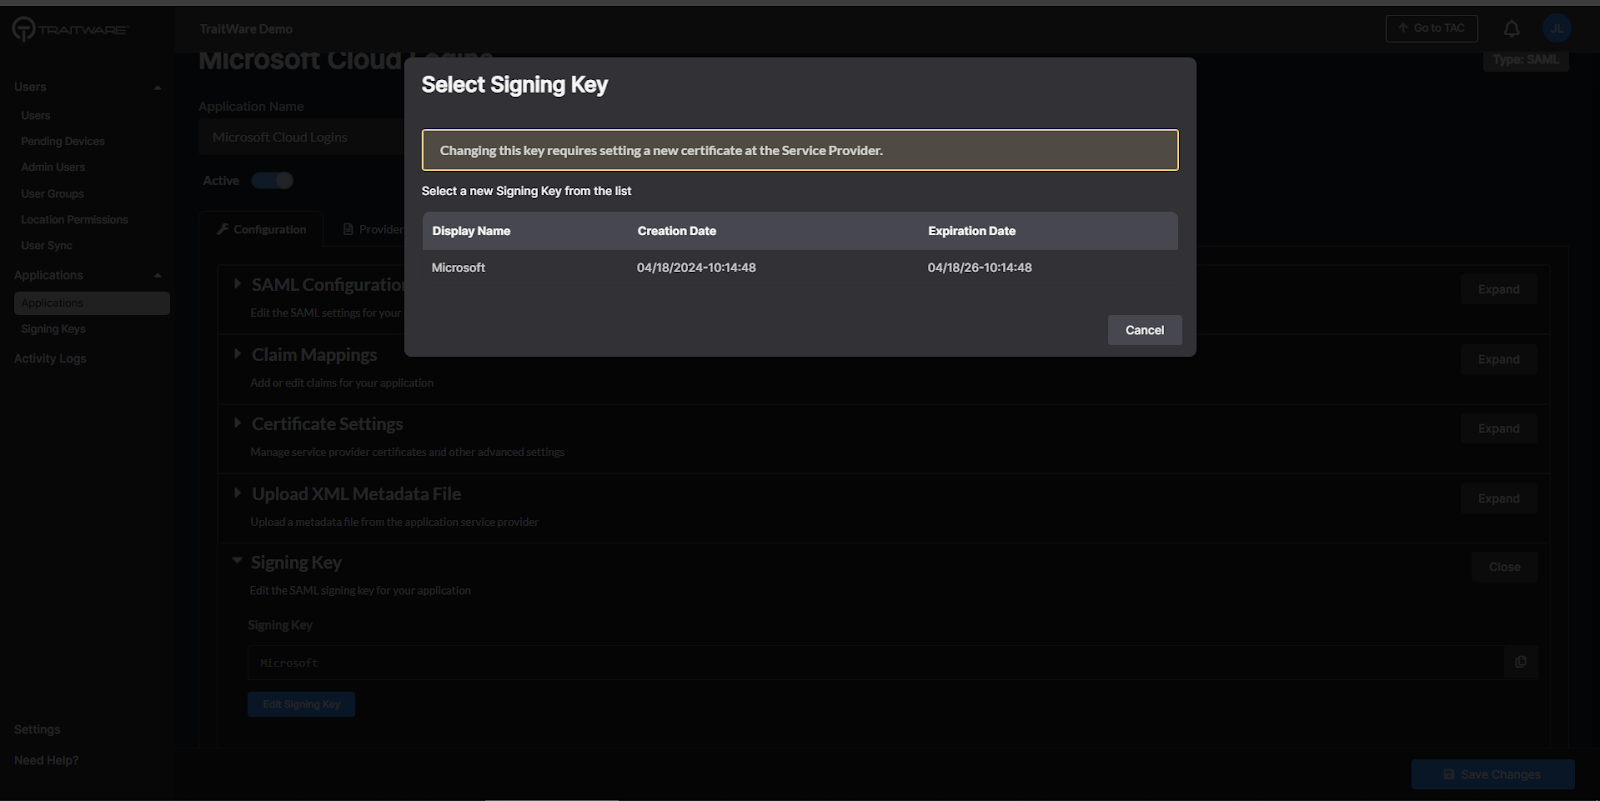
- Select the previously-created signing key
Federate the Domain
Federate Using TraitWare Console
In the TraitWare console, navigate to the User Sync menu and the Federate Domains tab.
- Click the edit icon for the domain to federate. company.com used here as an example

- Select the Application you configured in the previous step
- Click Federate Domain to complete the federation

**NOTE: Do not federate more than one domain with the same Application. Create a separate application for each domain that needs to be federated. If a domain is accidentally federated with an application used on a different federated domain, a warning will appear and the domain will exist in a broken state in the Microsoft account. It must be unfederated using the powershell command to unfederate.
- The domain will now have a green circle indicating it has been federated

Test the federation to ensure it has been federated successfully.
**Note: Although the federation will display immediately as successful in the TraitWare console and in the Azure/Entra console, it can take several minutes for the federation to appear on Microsoft logins. This is expected Microsoft behavior.
Test the Federation
Test the federation to ensure it has been federated successfully.
**Note: Although the federation will display immediately as successful in the TraitWare console and in the Azure/Entra console, it can take several minutes for the federation to appear on Microsoft logins. This is expected Microsoft behavior.
Navigate to office.com or another Microsoft login page and enter your email address. When federation is successful you should see a screen similar to the image here.

Remove Federation
Sometimes it may be necessary to remove federation and change a domain back to managed, such as when rotating a signing key.
Remove Federation Using TraitWare Console
- Click the edit icon on a federated domain to remove federation. company.com used here as an example

- Click Un-Federate Domain

- If successful there will be a grey dot in the Federated column for that domain

**Note: Although the removal of federation (back to managed) will display immediately as successful in the TraitWare console and in the Azure/Entra console, it can take several minutes for the removal of federation to appear on Microsoft logins. This is expected Microsoft behavior.
**Note: This will disable TraitWare authentication for the selected Microsoft domain
**Note: Although the removal of federation (back to managed) will display immediately as successful in the TraitWare console and in the Azure/Entra console, it can take several minutes for the removal of federation to appear on Microsoft logins. This is expected Microsoft behavior.
Rotate/Change the Signing Key
At some point the signing key will expire as set when the key was originally created. It is a best security practice to have a limited lifespan for signing keys. TraitWare sends out notification emails alerting administrators that keys are expiring. The signing key needs to be changed before it expires to ensure uninterrupted service. The process of changing a key uses many of the steps listed above and is similar to how the domain was originally federated.
We suggest coordinating the steps below relatively quickly in succession to minimize any downtime. There will be downtime between the time when the key is updated on the application and when the domain is federated with the new key. If planned accordingly with the steps listed below, this should only last a few seconds.
Rotate/Change Using TraitWare Console
Order of steps we recommend to limit downtime using the TraitWare Console
- Create a new signing key in the TraitWare Console
- Change the signing key on the Microsoft application in the TraitWare console
- Un-federate the domain in the TraitWare Console
- Federate the domain in the TraitWare Console
- Test the federation with a TraitWare user account to ensure the login works as expected
Create a New Signing Key
- Navigate to Applications>Signing Keys in menu of the TraitWare console. Click the plus sign to add a new signing key.
- Enter a name for the new key and select desired Lifetime in Years. Click Generate Key.
Assign New Signing Key to Application
- Navigate to your Microsoft application (the application used with federation)
- Click on Signing Key under the Configuration tab to expand that section. Click Edit Signing Key
- Select the new signing key
The application has been assigned the new key. Follow the steps above to Un-Federate and Federate again with the new key (using TraitWare Console or Powershell).
Was this article helpful?
That’s Great!
Thank you for your feedback
Sorry! We couldn't be helpful
Thank you for your feedback
Feedback sent
We appreciate your effort and will try to fix the article