The TraitWare MFA credential provider has been deprecated. Migrate your endpoints to the improved Windows Endpoint Protection Agent.
See Windows Endpoint Protection - Passwordless MFA (online and offline) for information on deployment and use.
Overview
The purpose of this guide is to explain how to integrate TraitWare MFA into Windows devices.
TABLE OF CONTENTS
- Prerequisites
- Download the TraitWare installer MSI
- TraitWare Admin Console
- Single User – Single Profile
- Multiple Users
- Microsoft Windows
- Using Windows MFA
- Disable other forms of authentication
Prerequisites
TraitWare MFA has a one-to-one mapping between a Windows User Profile, Windows MFA application and TraitWare user. For every Windows User Profile, there is a single Windows Credential Provider application and TraitWare user.
| Operating System | Version |
| Windows | 10 |
| Windows | 11 |
| Server | 2016 |
| Server | 2019 |
| Server | 2022 |
Note: The TraitWare user and application must be configured PRIOR to installation of the Windows MFA MSI.
Download the TraitWare installer MSI
Please follow the link below to download the TraitWare installer:
TraitWare MSI Installer – Version 1.1.3
TraitWare Admin Console
Single User – Single Profile
This functionality allows for one TraitWare user to access a unique Windows Profile on a specific Windows endpoint with both online and offline access. The endpoint can support mapping of additional TraitWare users to corresponding Windows Profiles. This means that users will only have access to this specific Windows endpoint. This functionality is best used for a single user accessing a unique profile on a specific Windows endpoint.
This procedure is used to add a second user to a second unique profile.
Note: One TraitWare user per Windows Profile per Windows Endpoint.
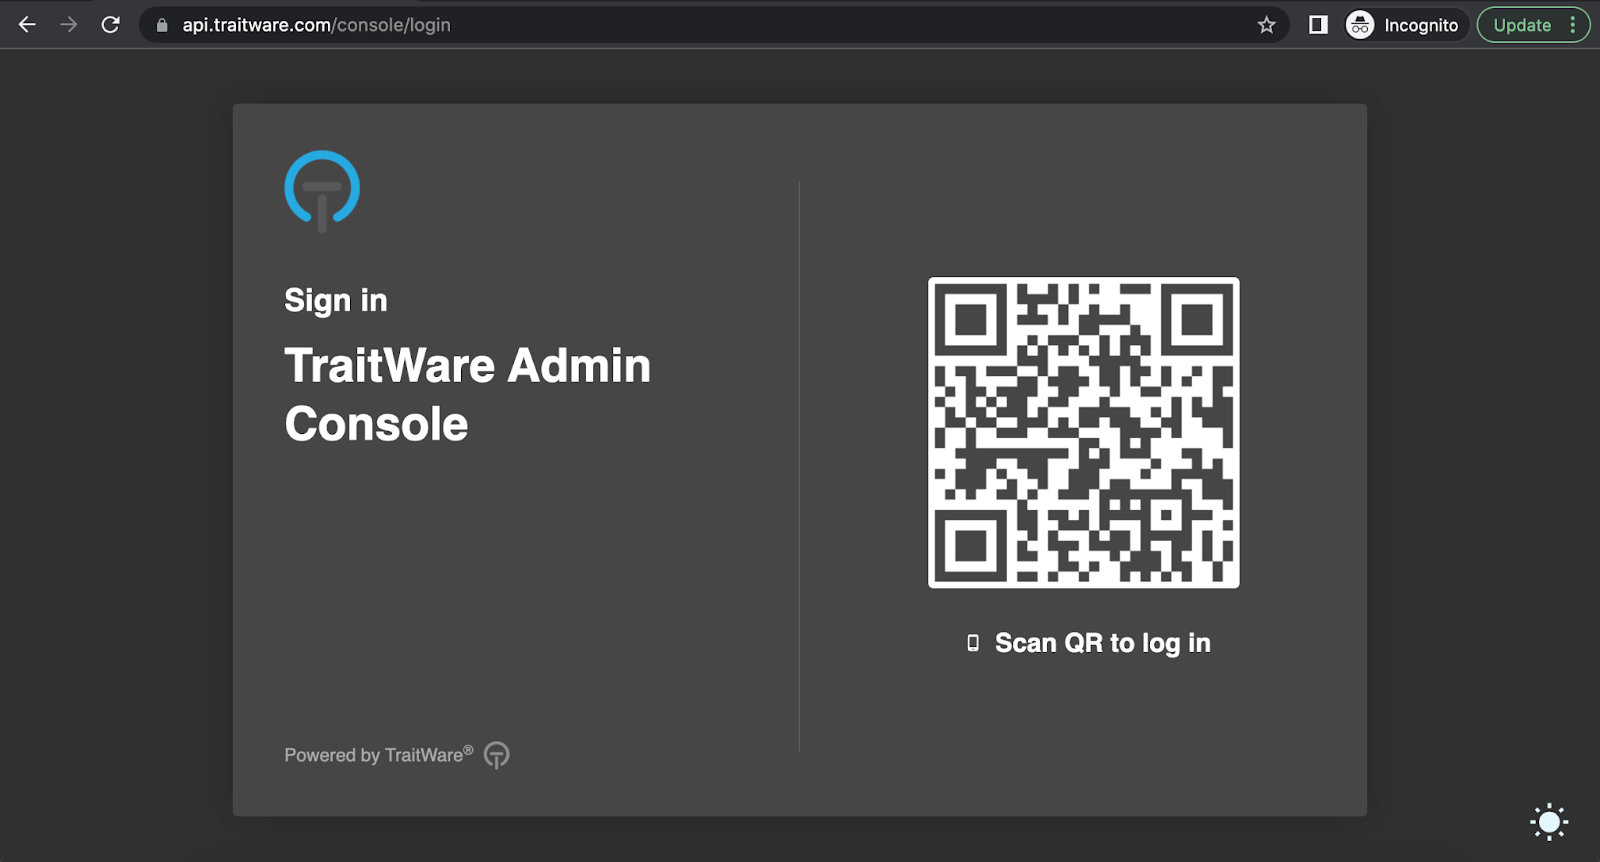
Administrators – Sign into the TraitWare Admin console.
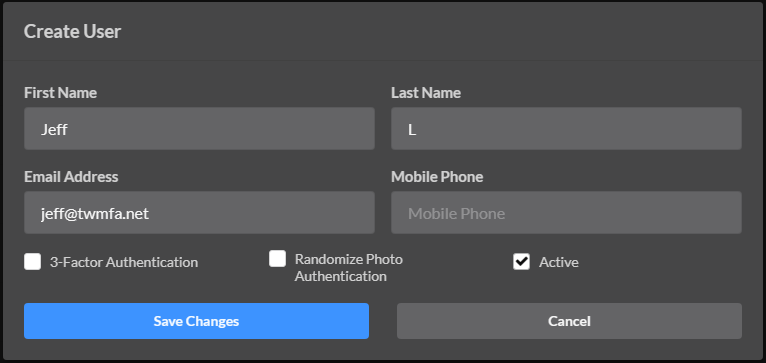
Go to Users. Click Create User.

Enter the user information and click Save Changes.
Go to Applications.
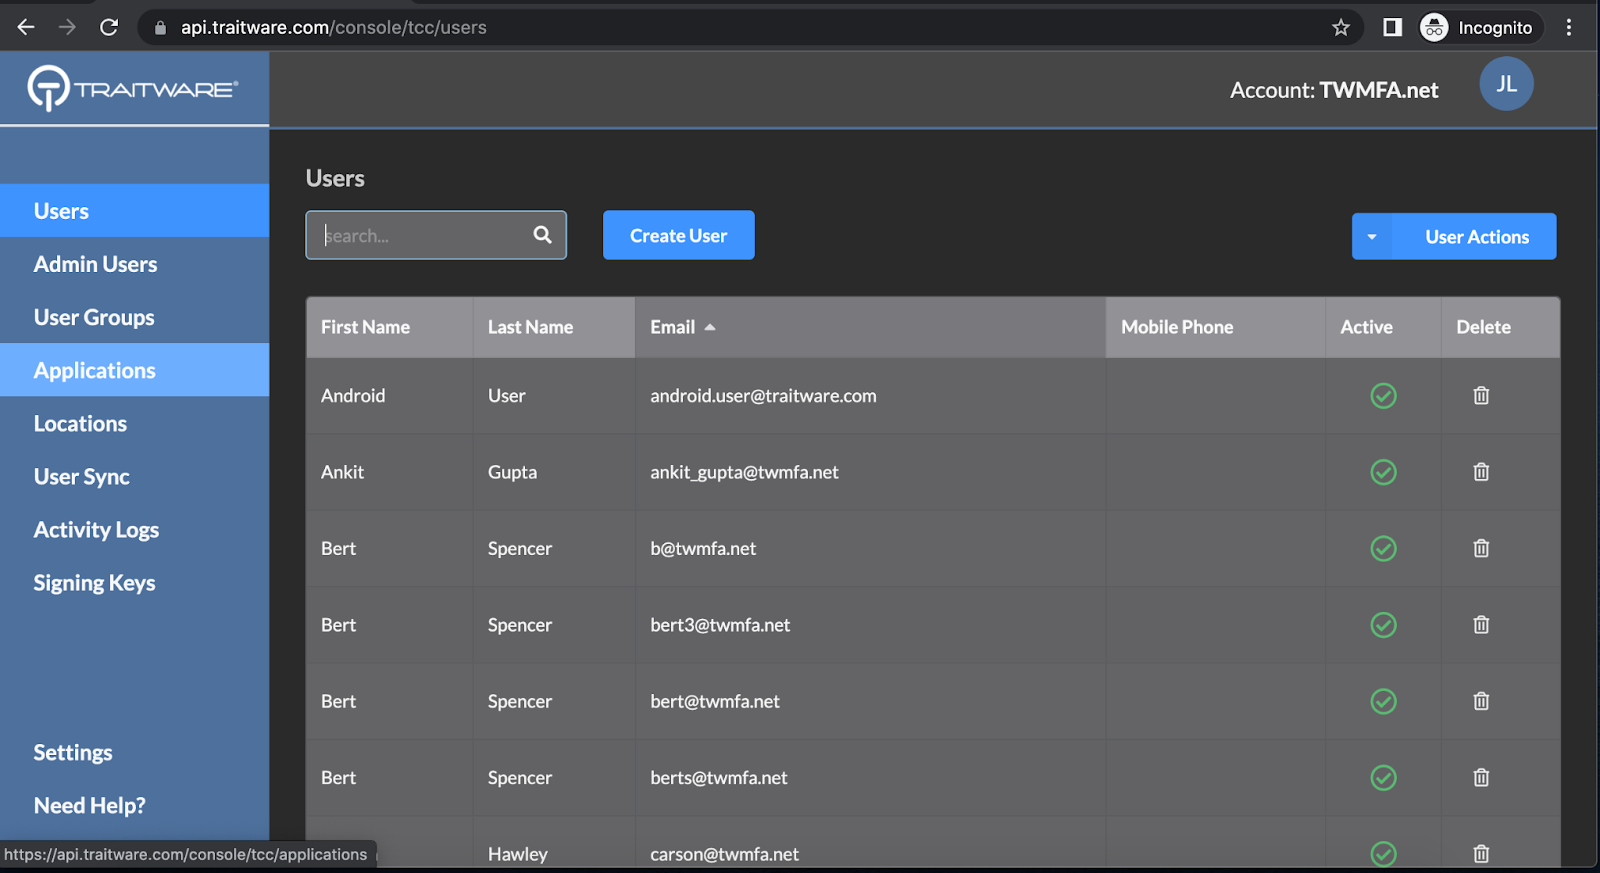
Click on Windows 10/11 MFA.

Enter the Application name. Click Save Changes.

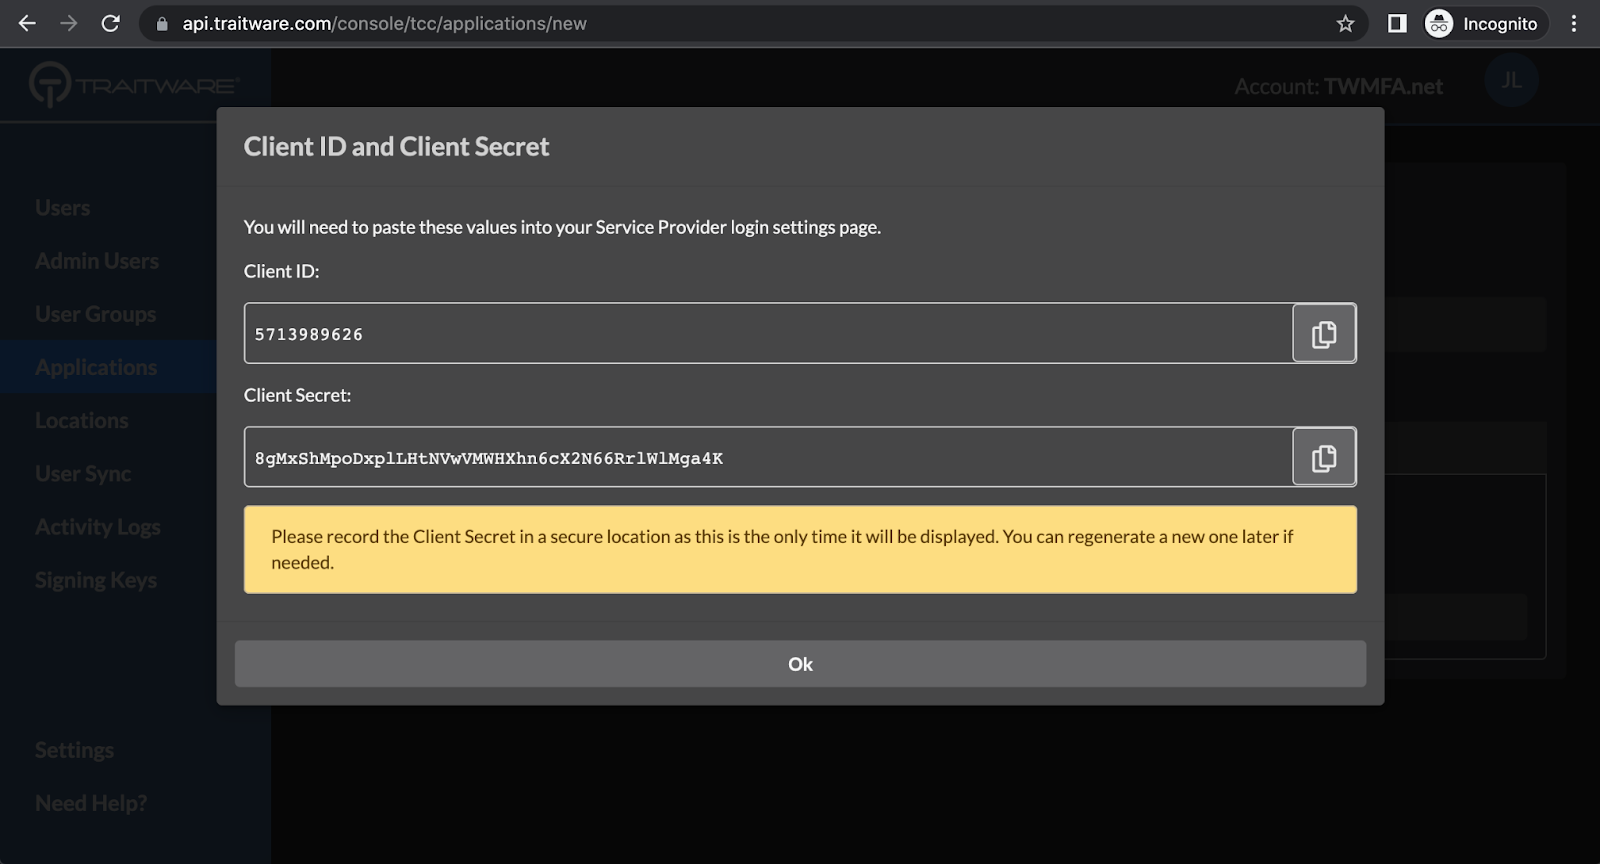
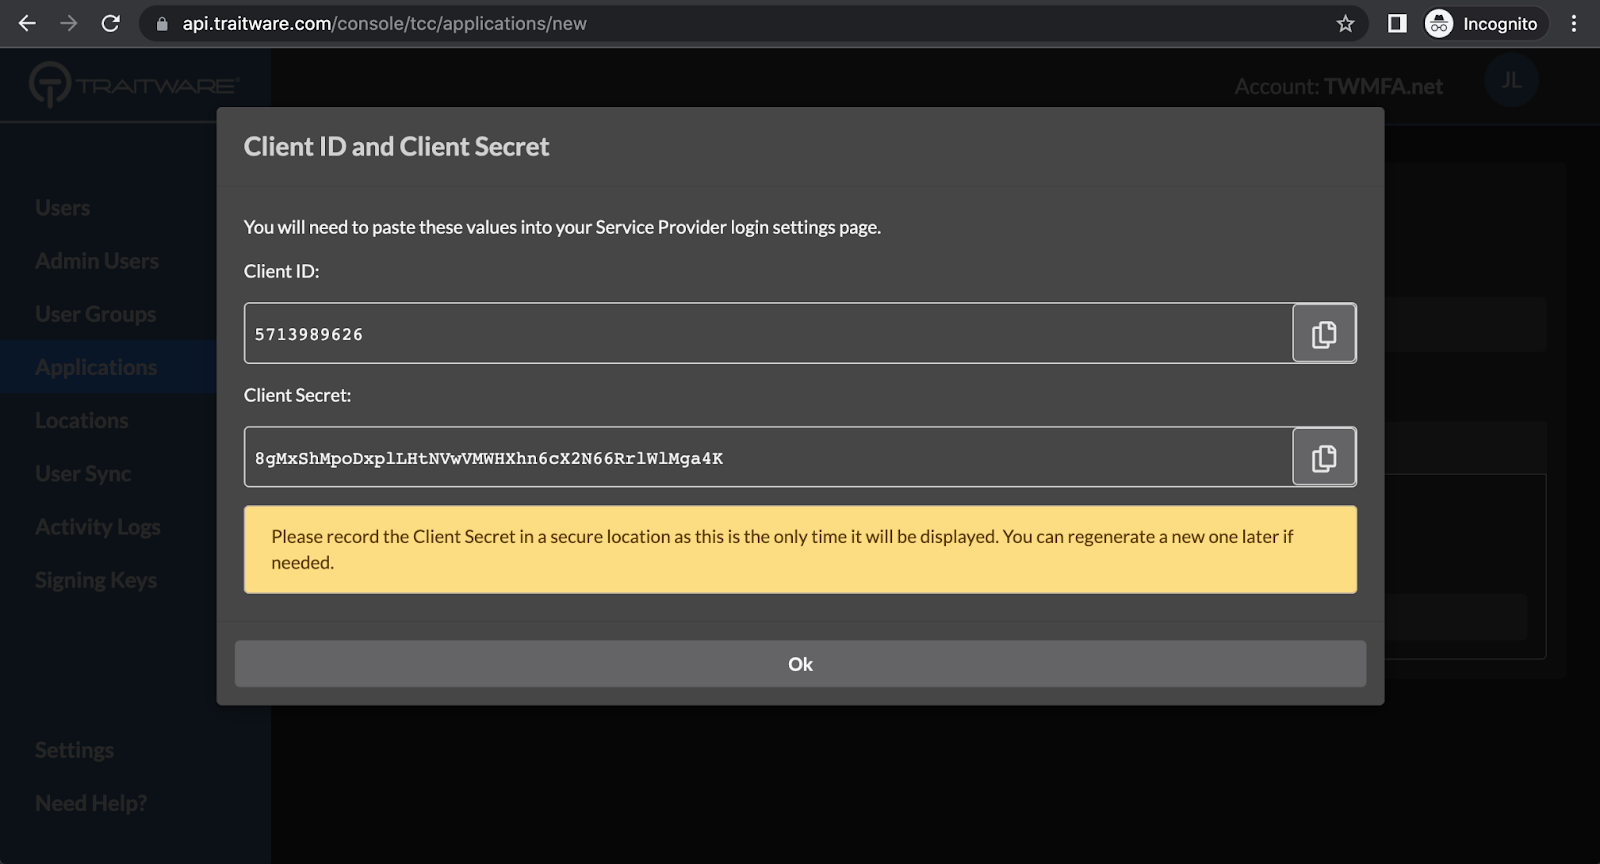
Client ID and Client Secret will be displayed.
Note: Client Secret will only be displayed once – make sure to copy it into a secure location.
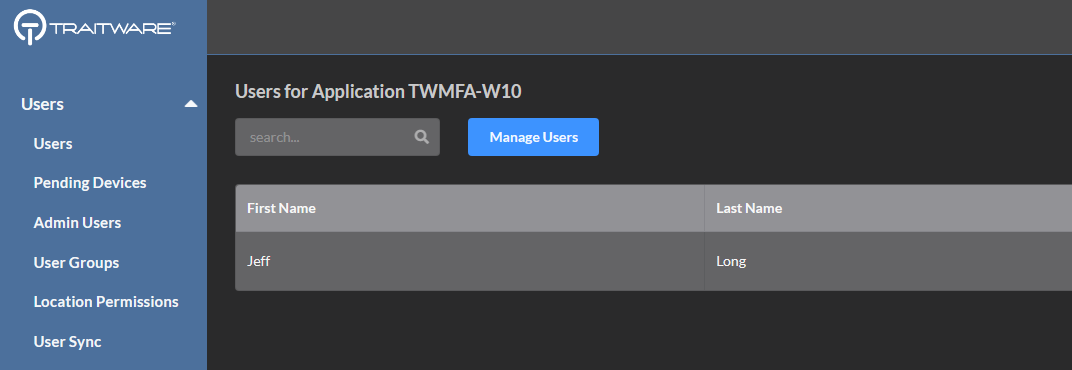
Select the newly-created application and click on the Add/Remove Users button.
Click Manage Users.
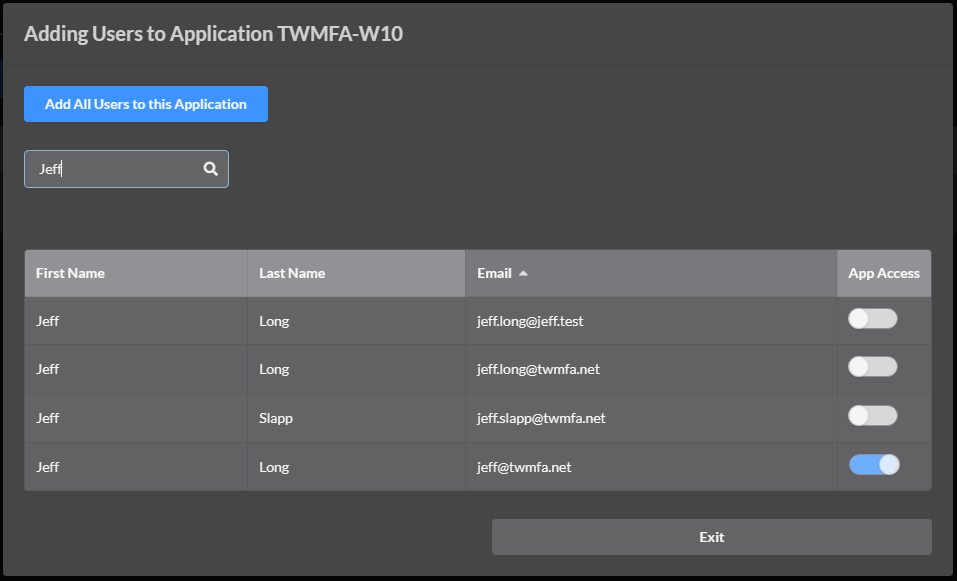
Select Users by clicking on the App Access button next to the user’s Email address. When finished click Exit.
Multiple Users
This functionality allows for one or more TraitWare users to access multiple Windows endpoints. This means that any user with access granted in the TraitWare console can scan the QR code and log into the Windows machine. This functionality is best used for multiple users accessing the same Windows Profile with little customization and mostly cloud applications. This can be used across multiple Windows endpoints.
Note: Only one profile per Windows endpoint. No support for offline access with Multiple users to single
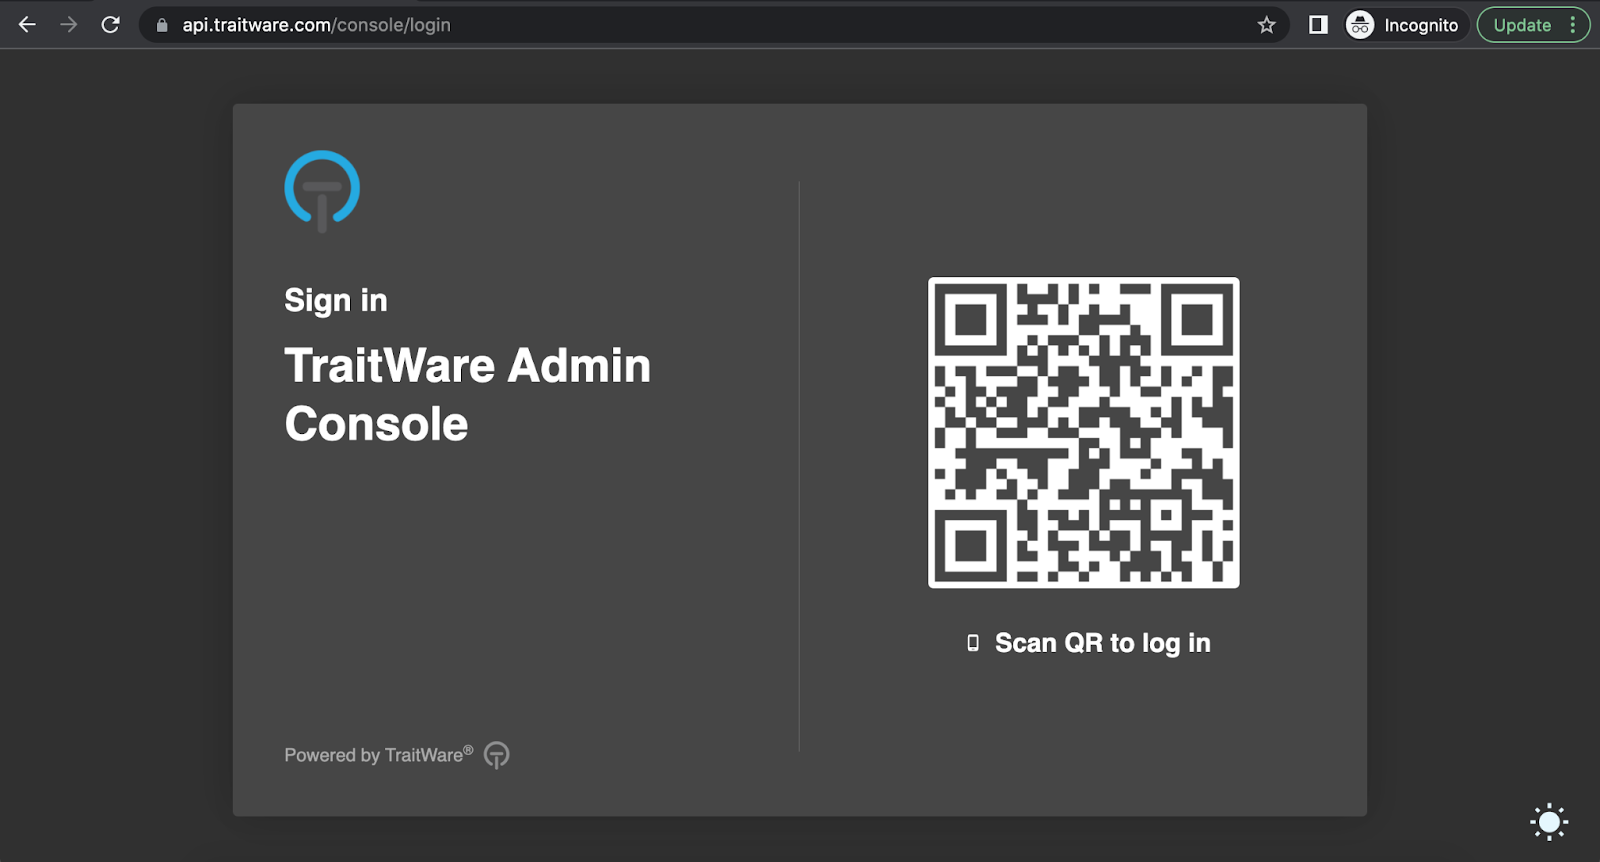
Administrators – Sign into the TraitWare Admin console.
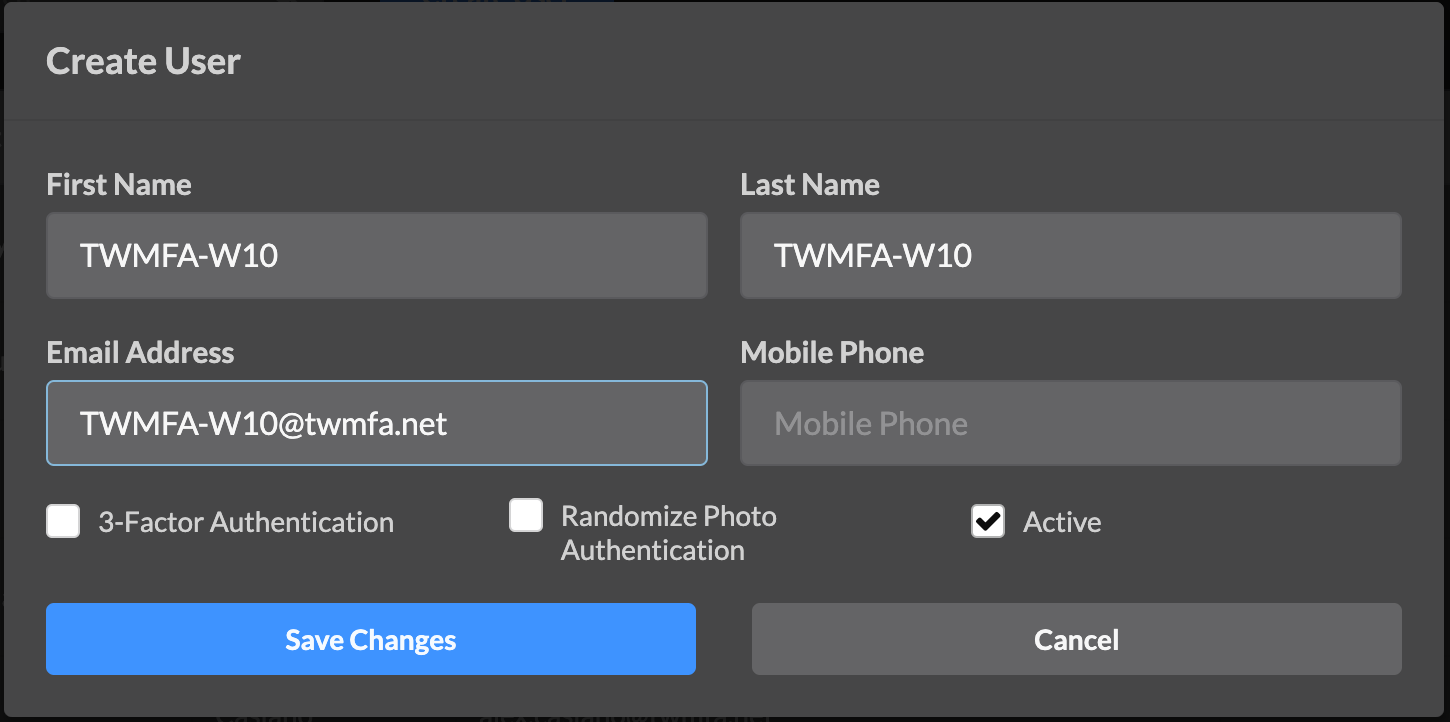
Go to Users. Click Create User.

To enable multiple users accessing the same Windows Profile, create an alias user to correspond to the Windows 10/11 OIDC application to be created in the next step. This enables the Windows Profile name and computer name in the relevant fields. The email address used does not need to be an active account capable of receiving email.
Create User. Click Save Changes.
Go to Applications.

Click on Windows 10/11 MFA.

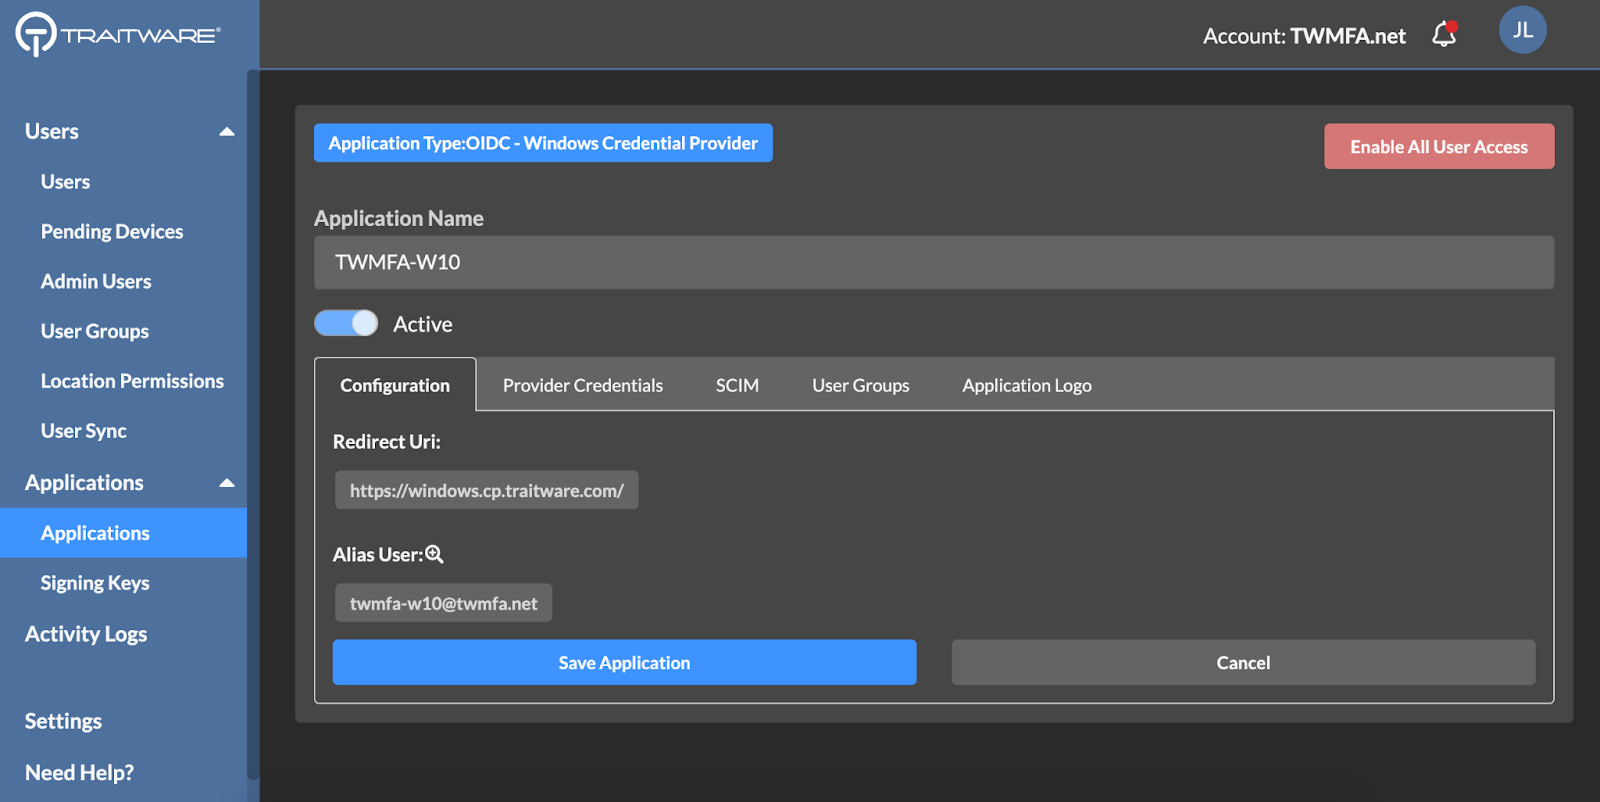
Enter the Application name. Select the Alias User previously created.
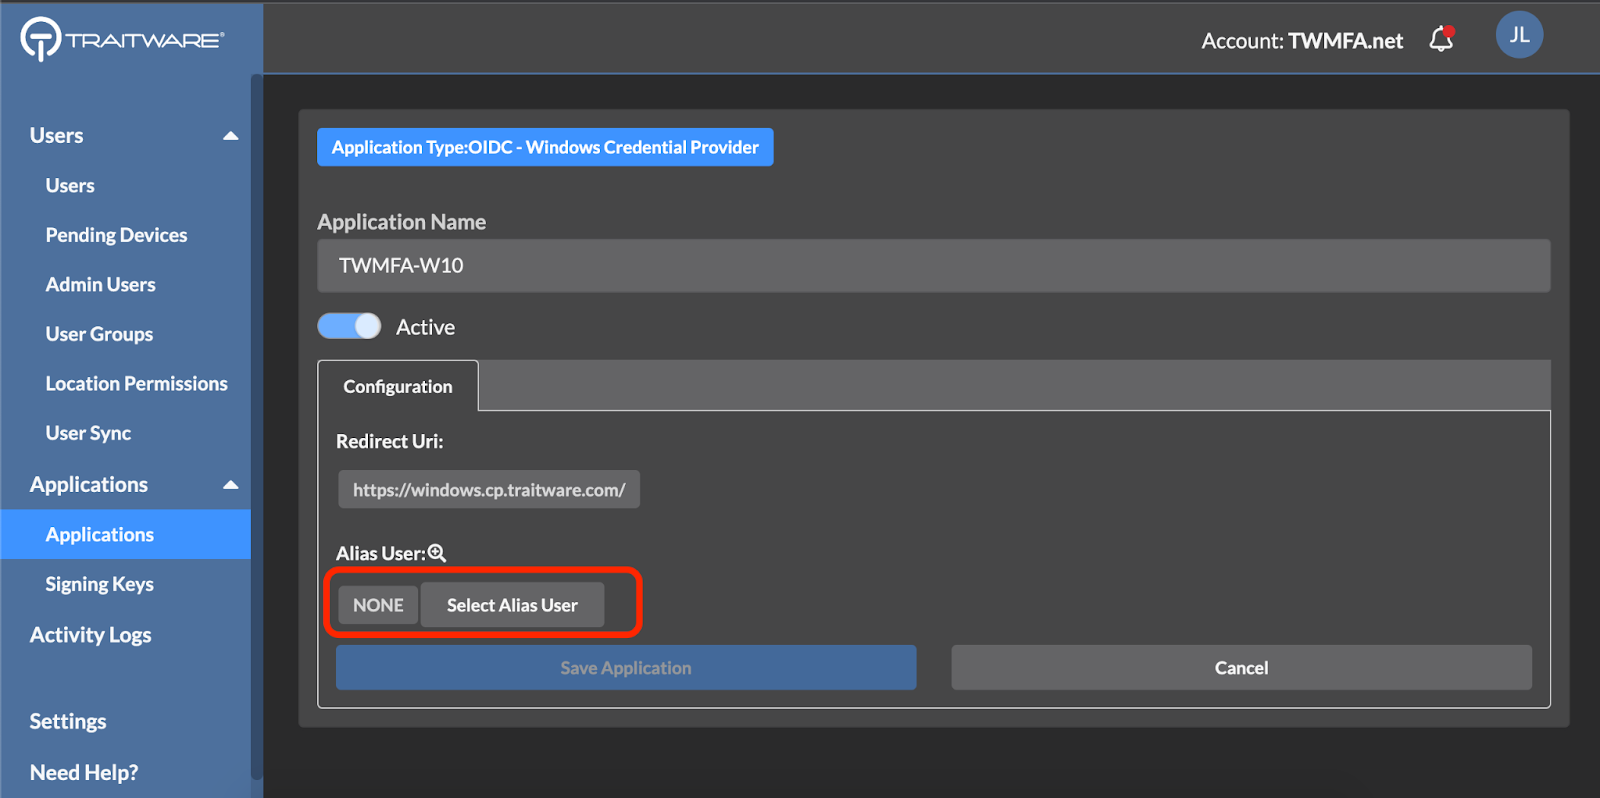
Select the user.

Click Save Application.
Single User to
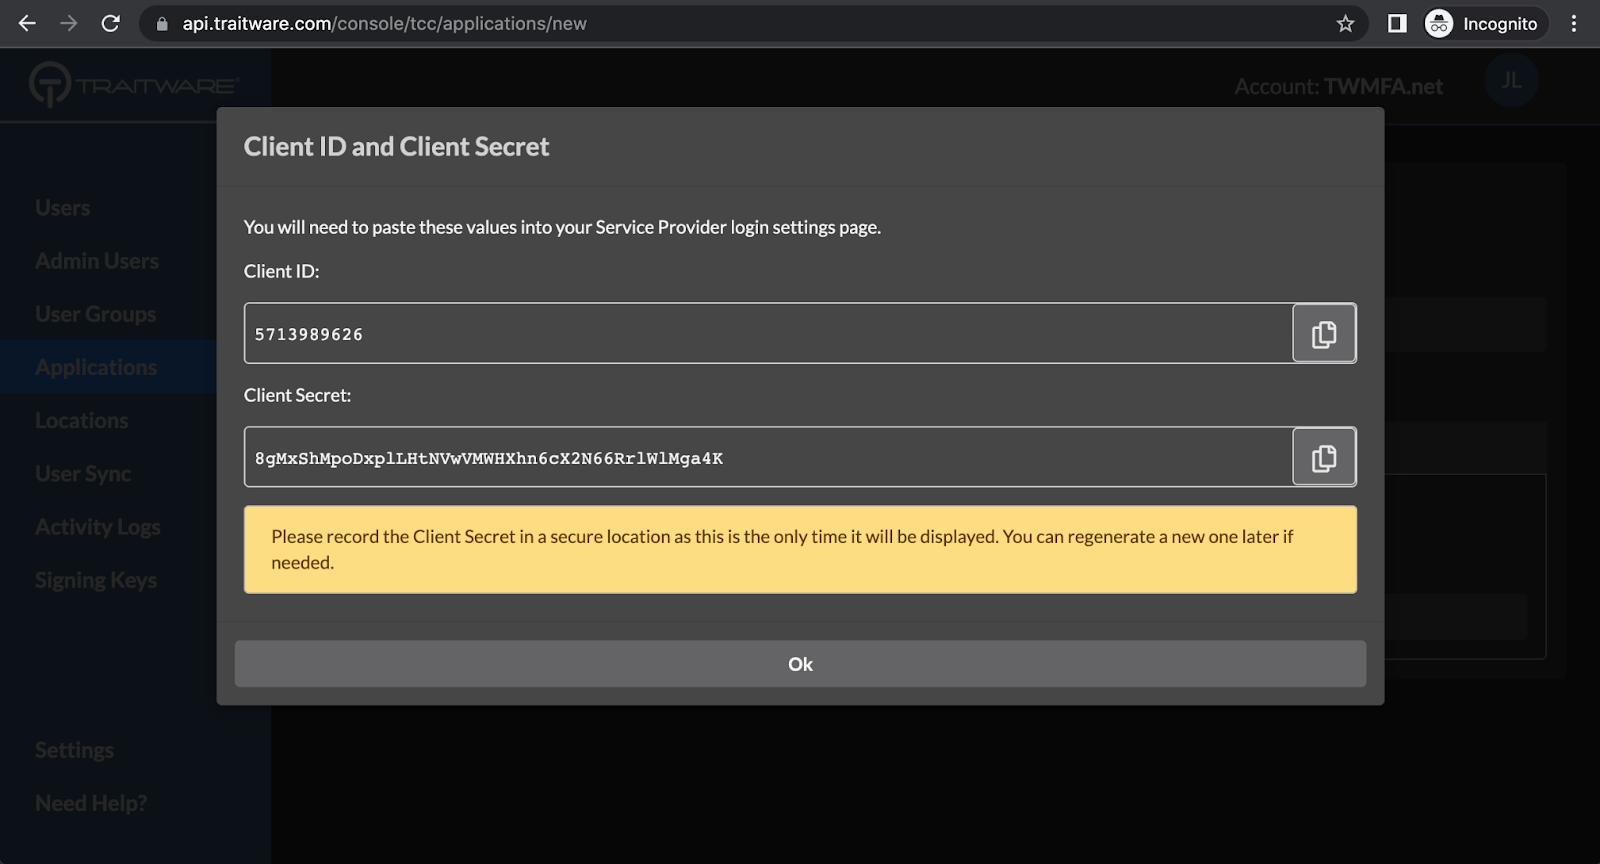
Client ID and Client Secret will be displayed.
Note: Client Secret will only be displayed once – make sure to copy it into a secure location.
Select the newly-created application and click on the Add/Remove Users button.
Select the Alias User. Microsoft Windows App users.

You are now ready to install TraitWare Window MFA on the local machine.
Microsoft Windows
User-guided installation
GUI – Local Profile and Active Directory
Download TraitWare MFA MSI file.
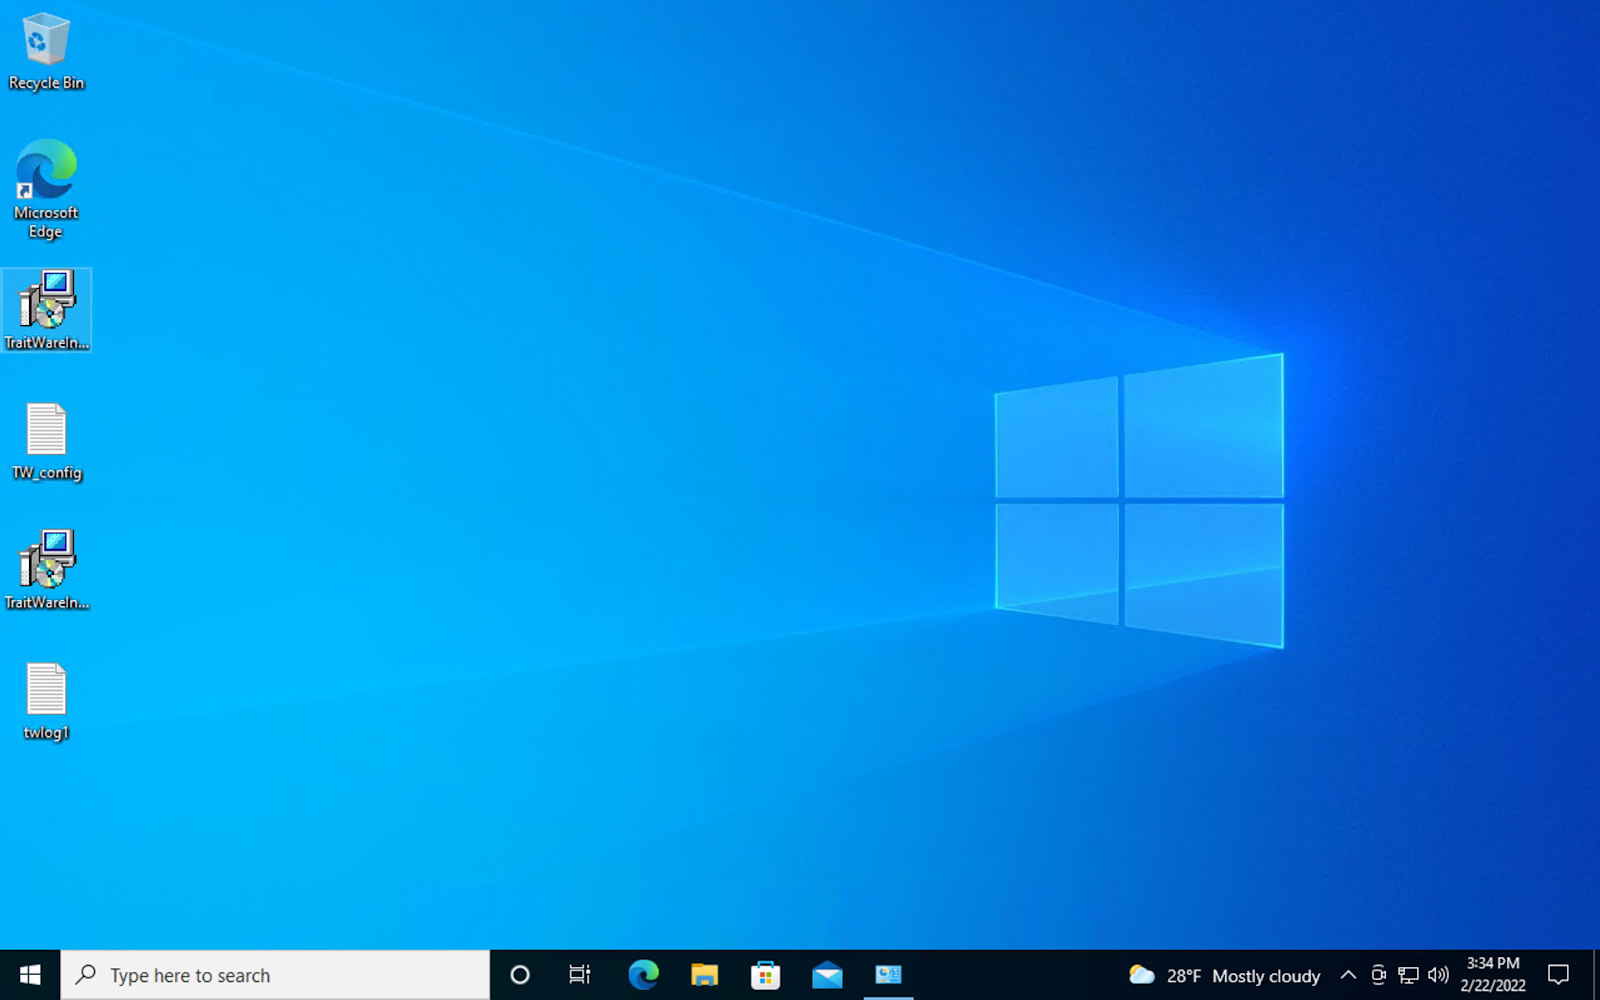
Open the installer.
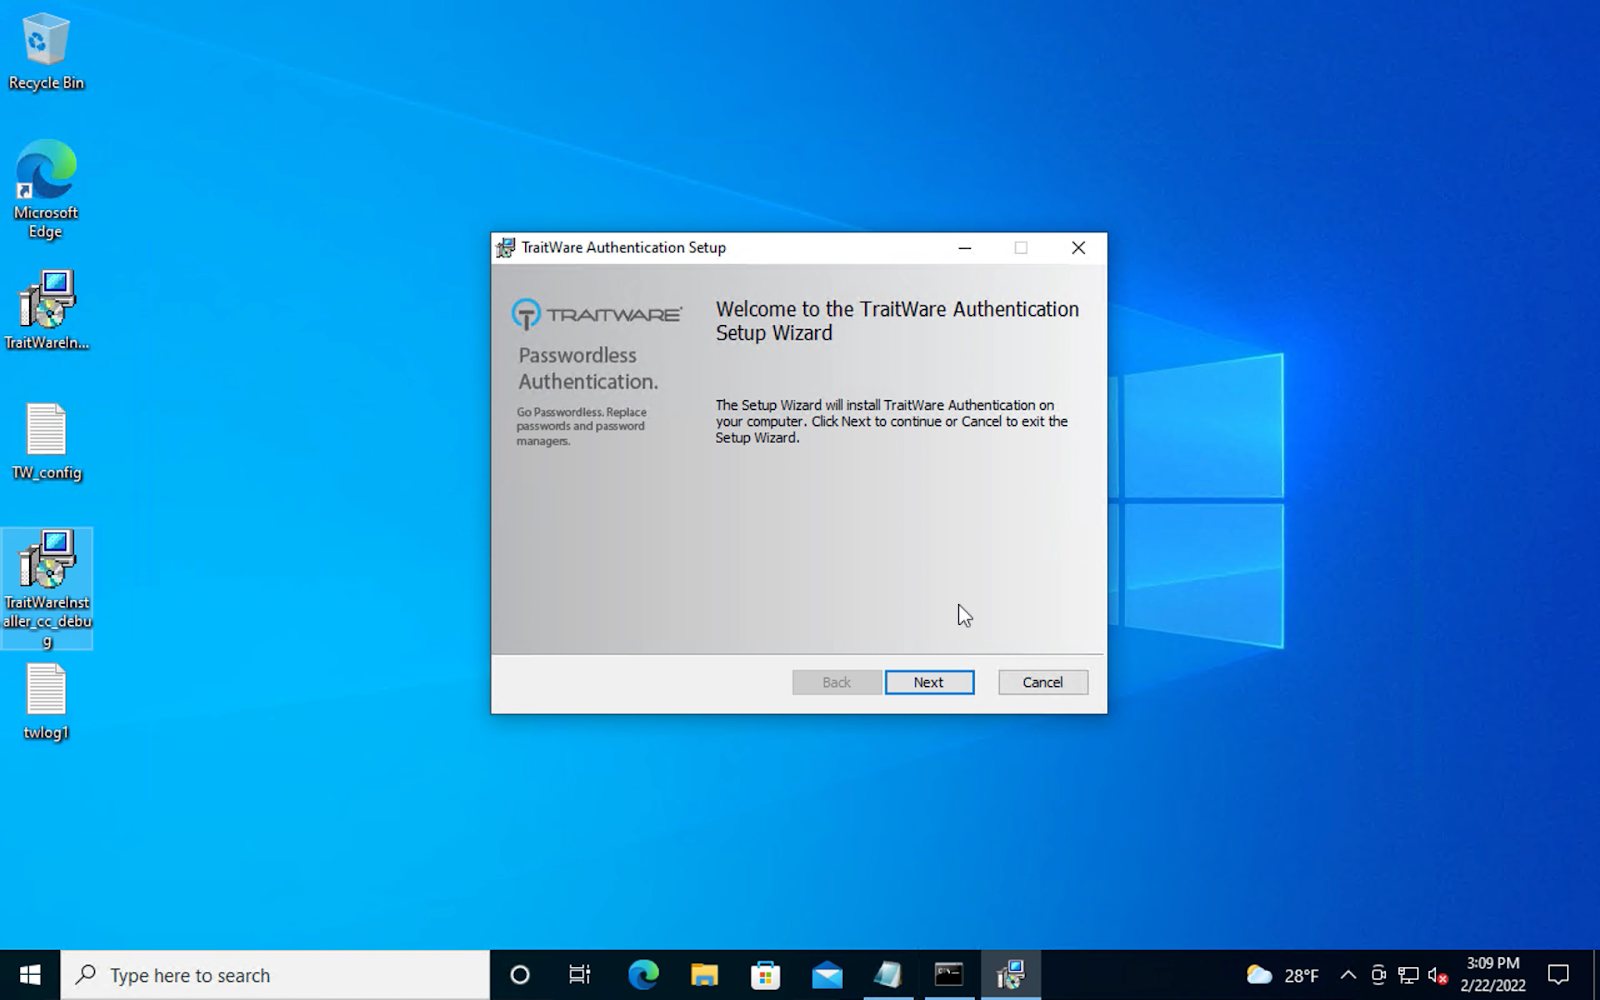
Click Next to continue with the installation.
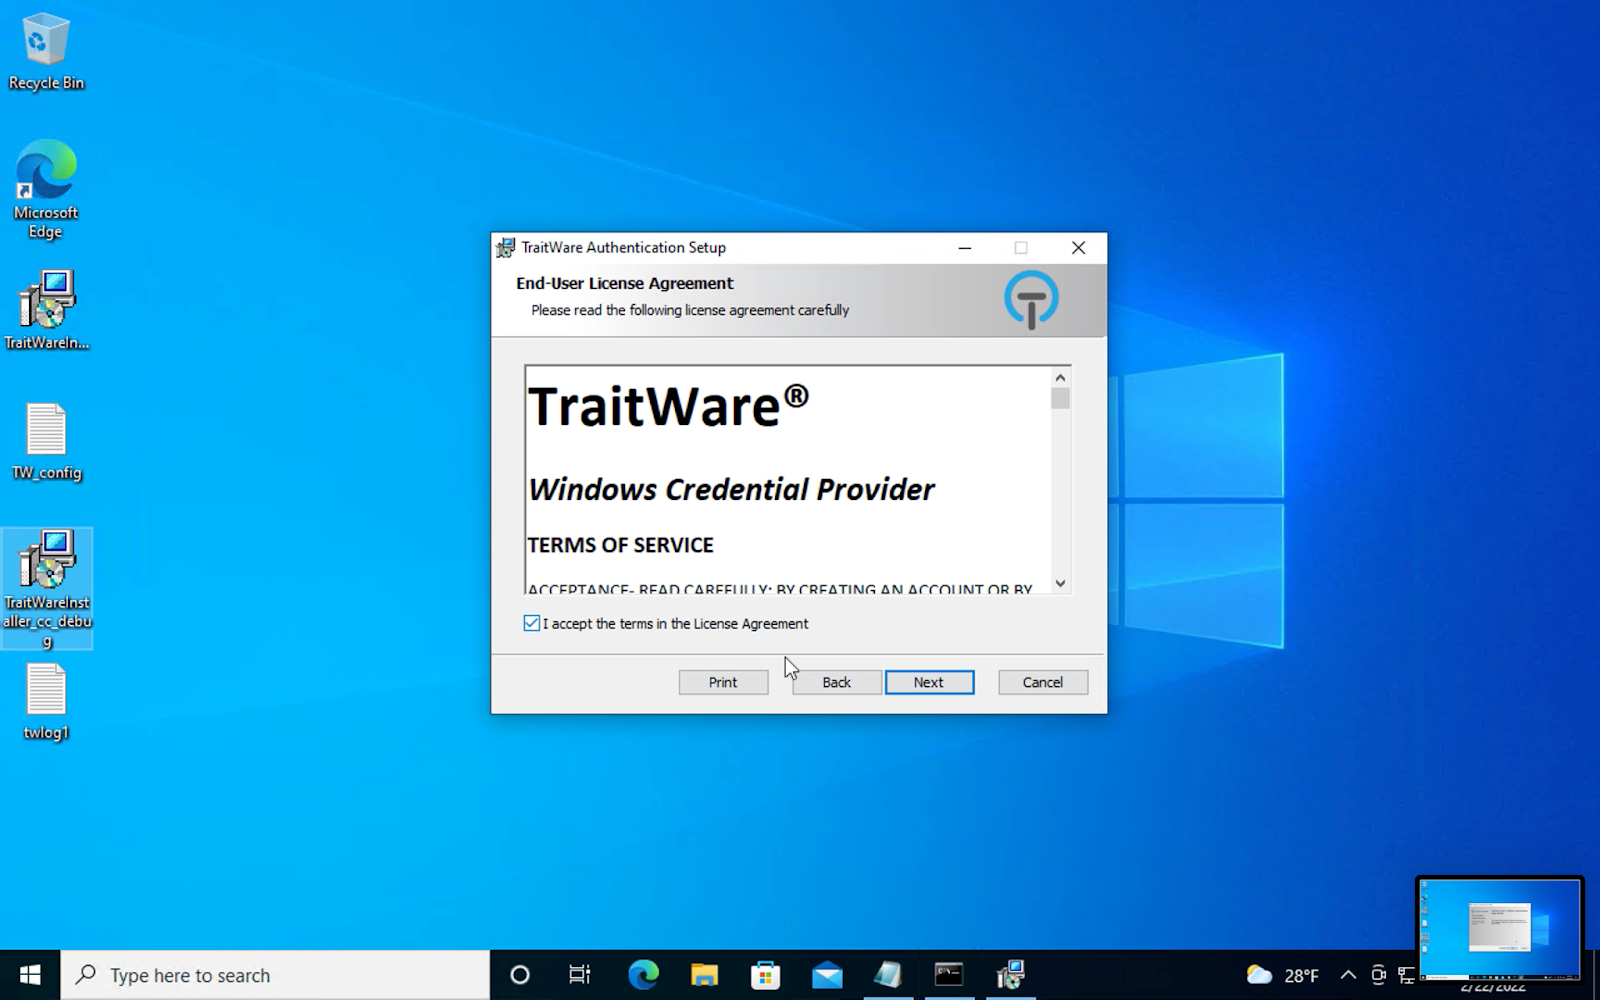
Read the EULA and accept the terms of the License Agreement.
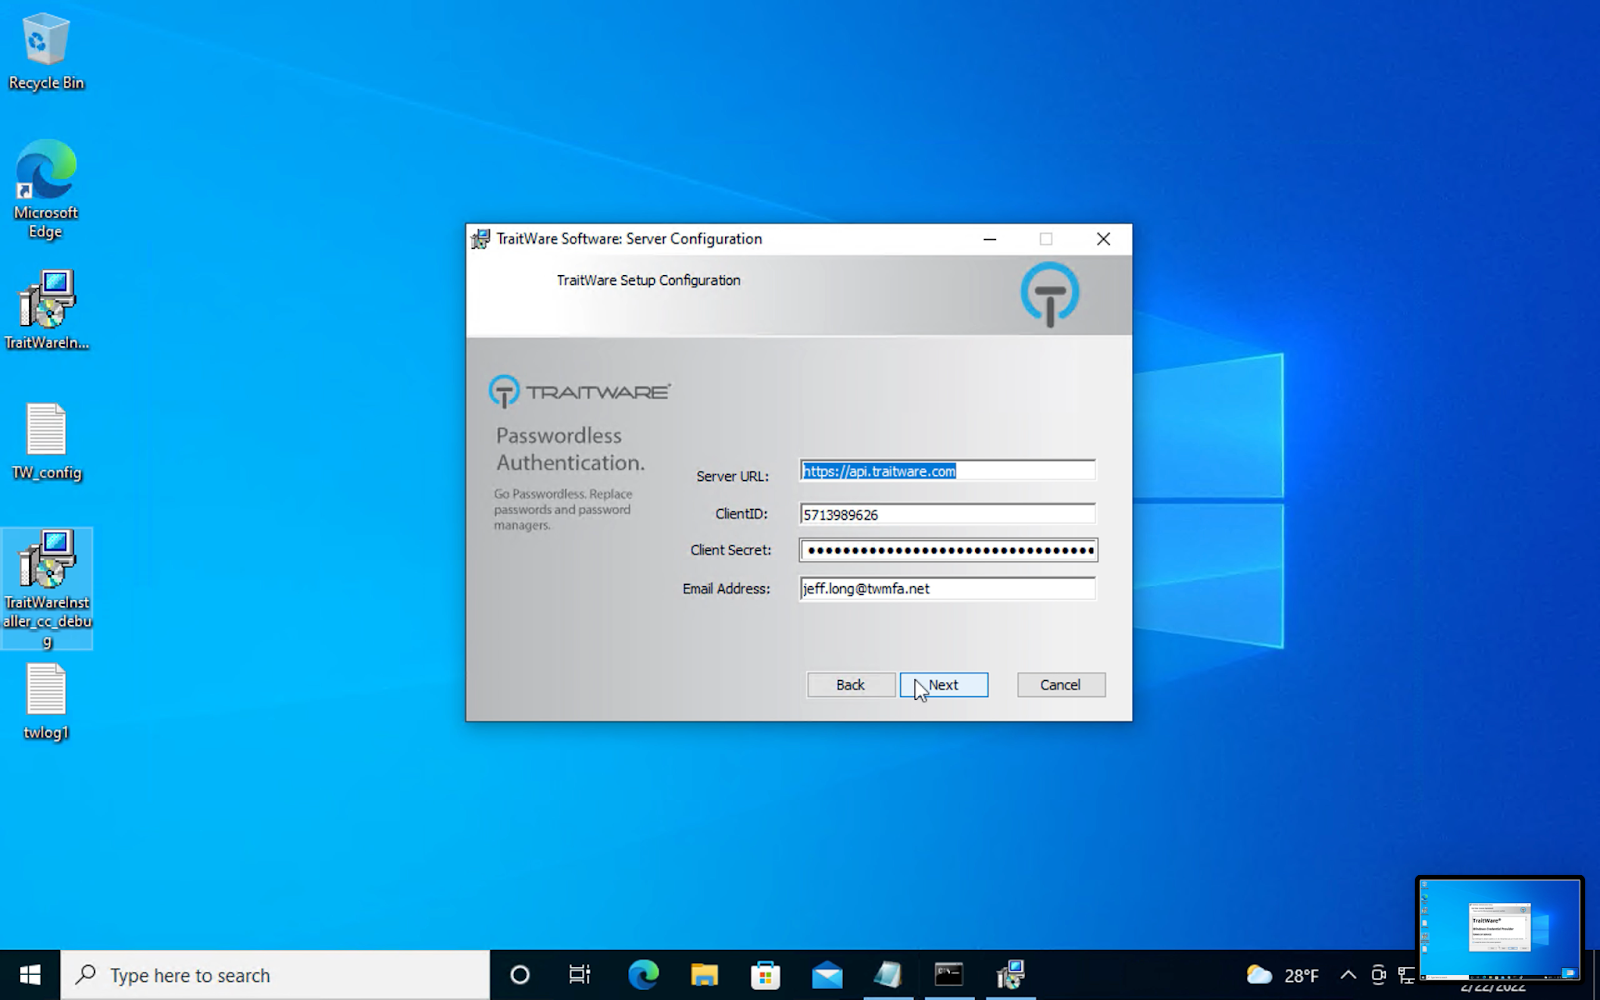
Enter your ClientID and Client Secret from the TraitWare Admin Console. Enter the email address of the alias user above. Click Next.
Note: Only one email address can be entered per installation. Addition users with unique email and passwords can be added via the edit config after installation. Must be uniques ID and password pers user including same user for admin or local user account . This requires that a single user multi-user profile requires segmented accounts in the TraitWare application.
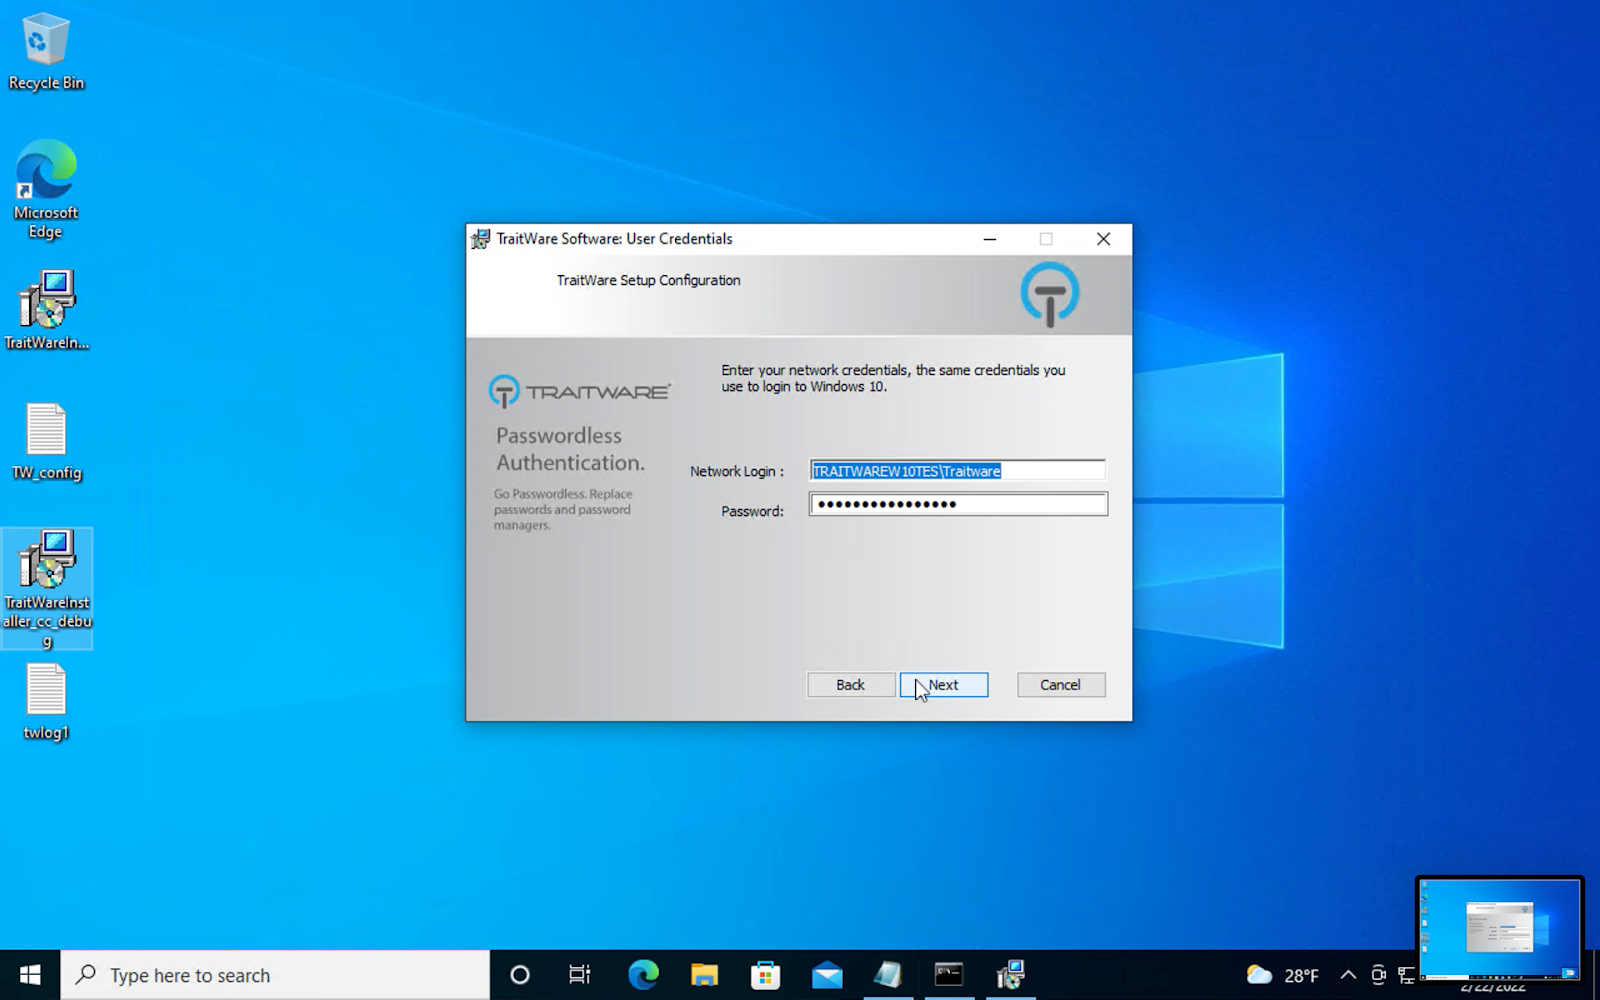
TraitWare will populate the Domain/Username for the current account fields under network login. Enter the password for this account. Click Next.
Note: It is best practice to create a strong password prior to the installation of WindowsMFA. The password may not contain a comma as a character in the string.
TraitWare will prompt for the installation folder. Click next.
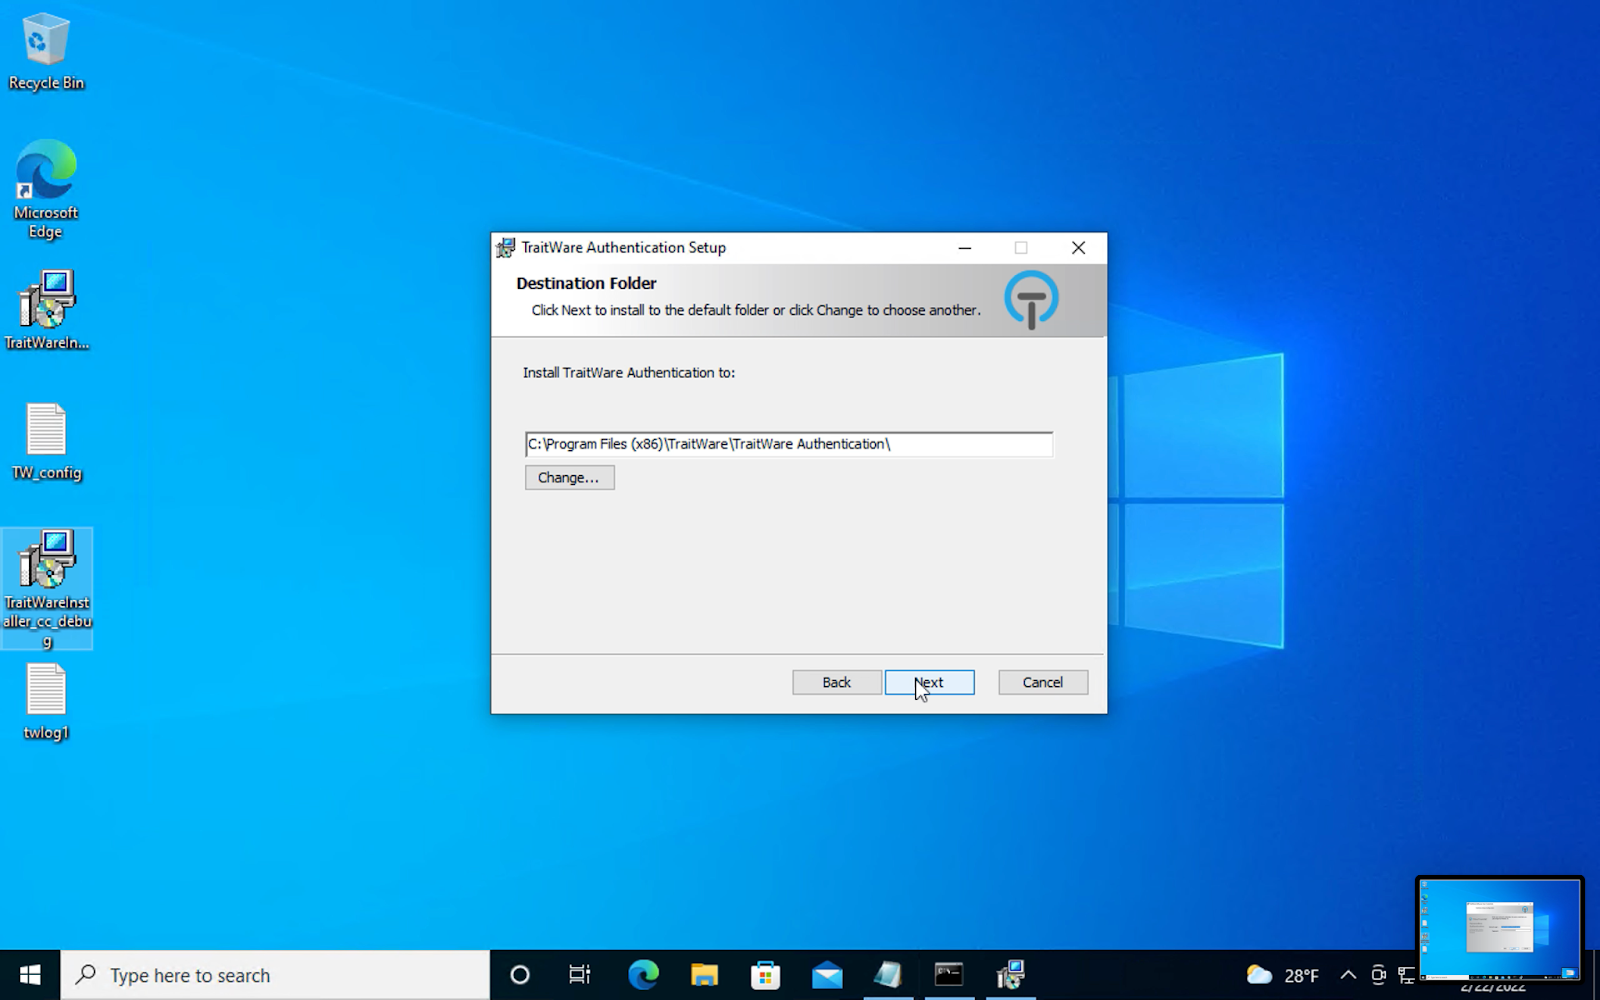
Click Install
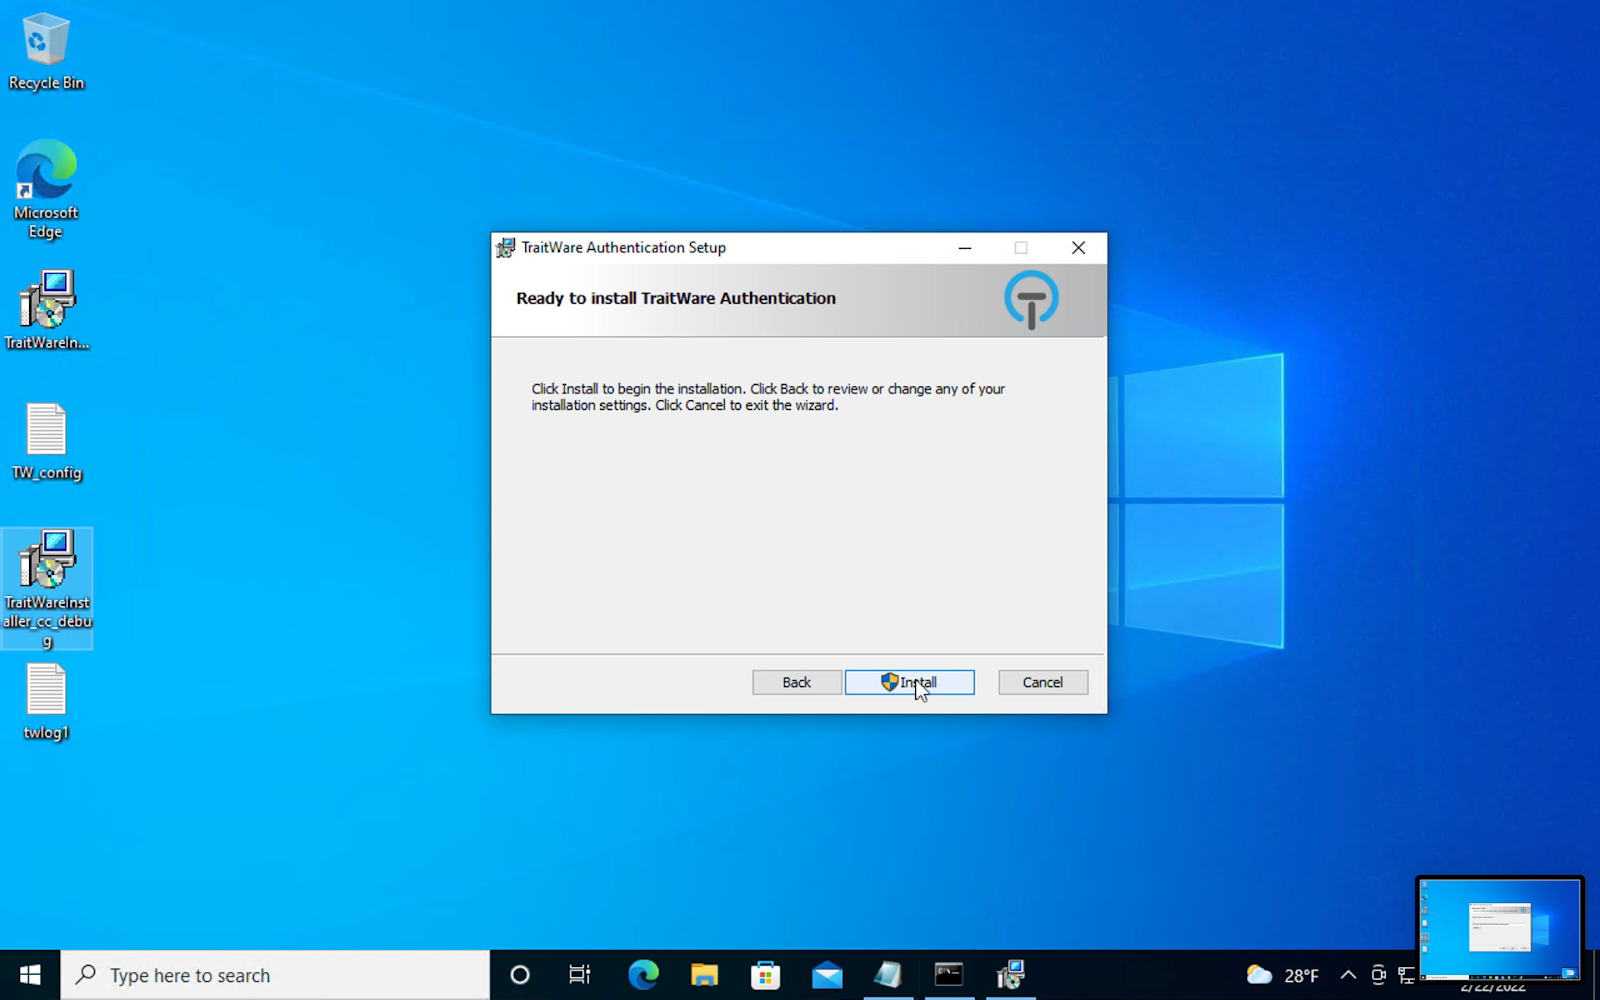
Allow App to make changes on your device? Select Yes.

Installation will begin.
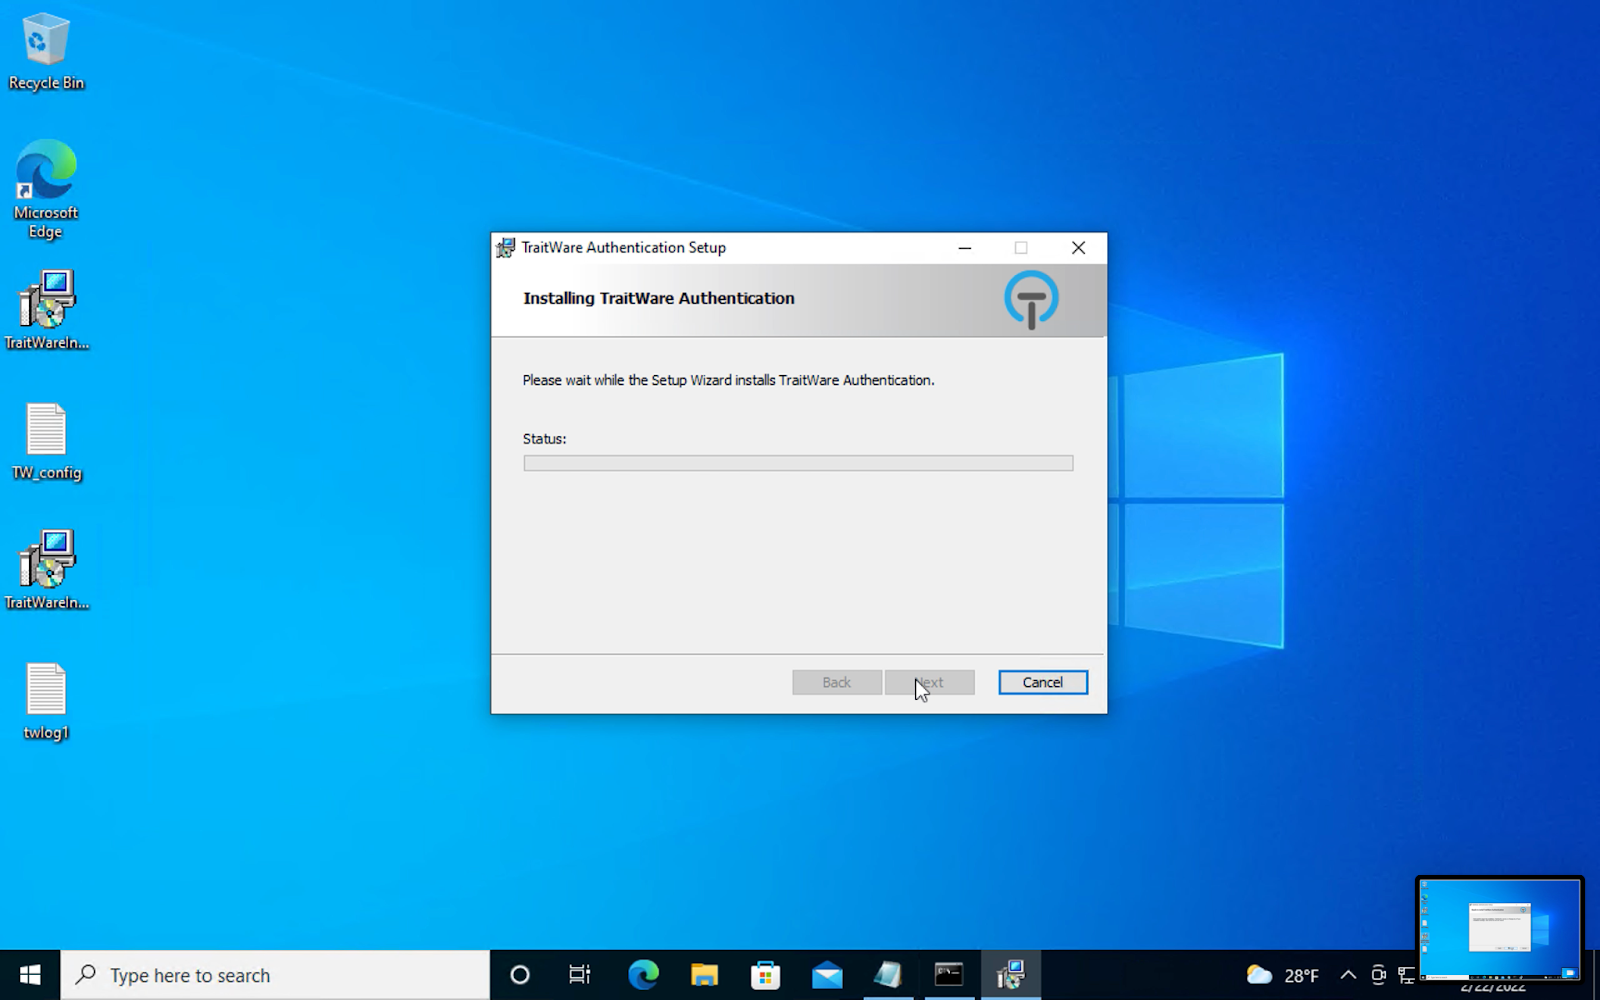
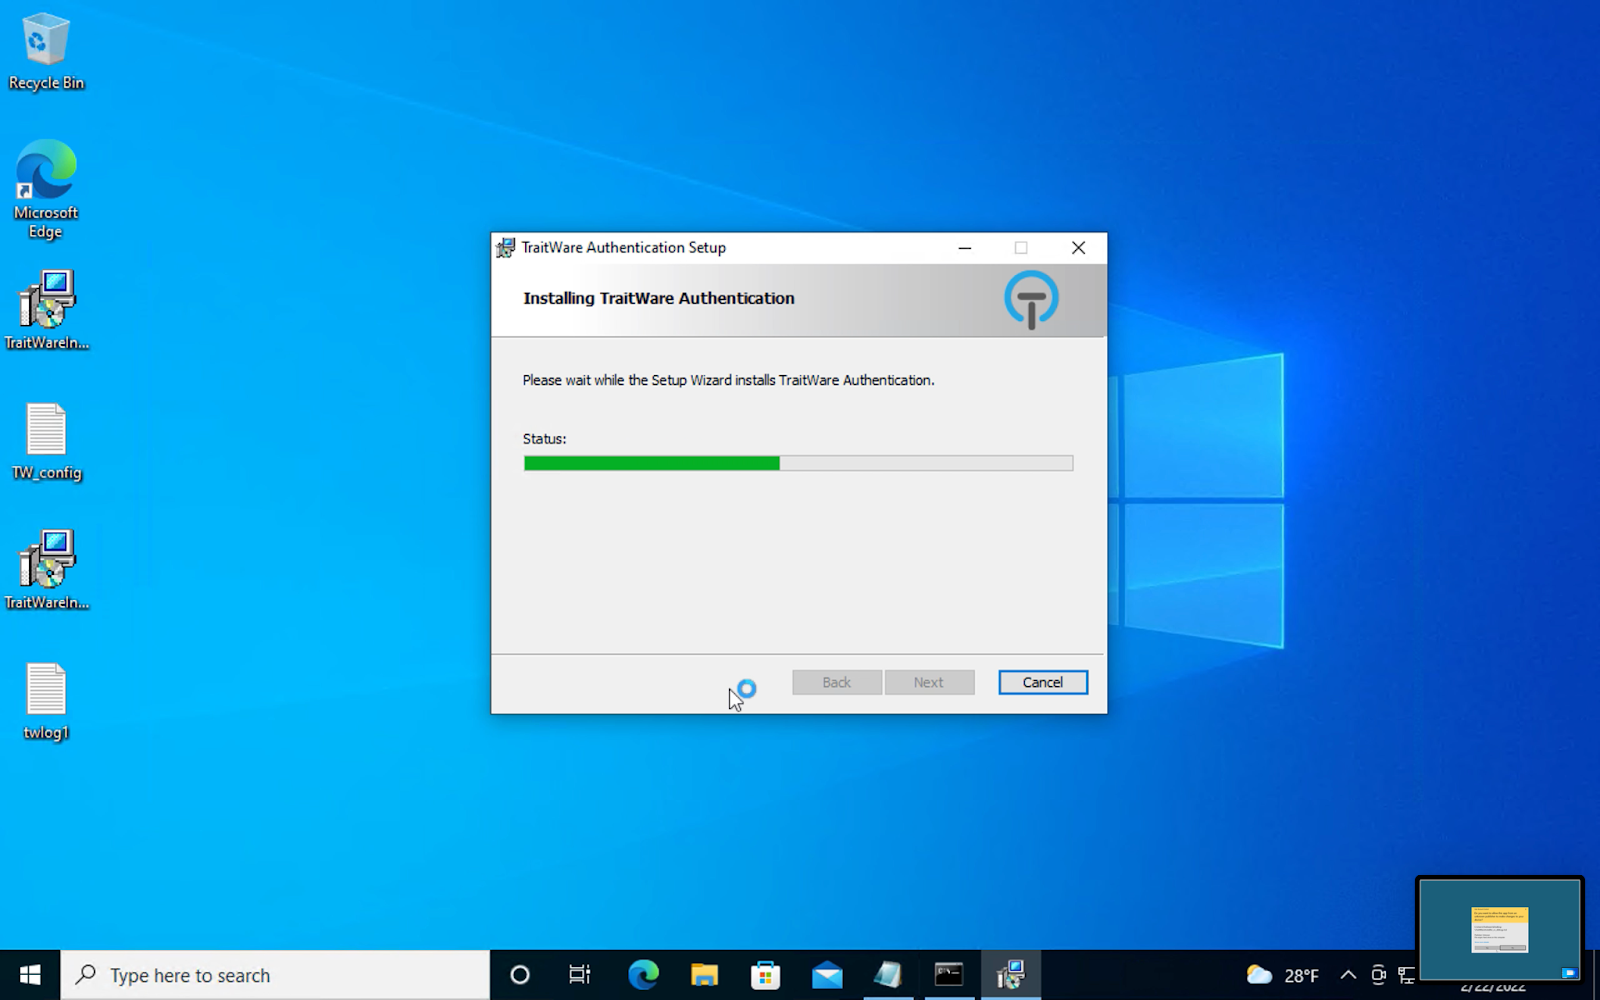
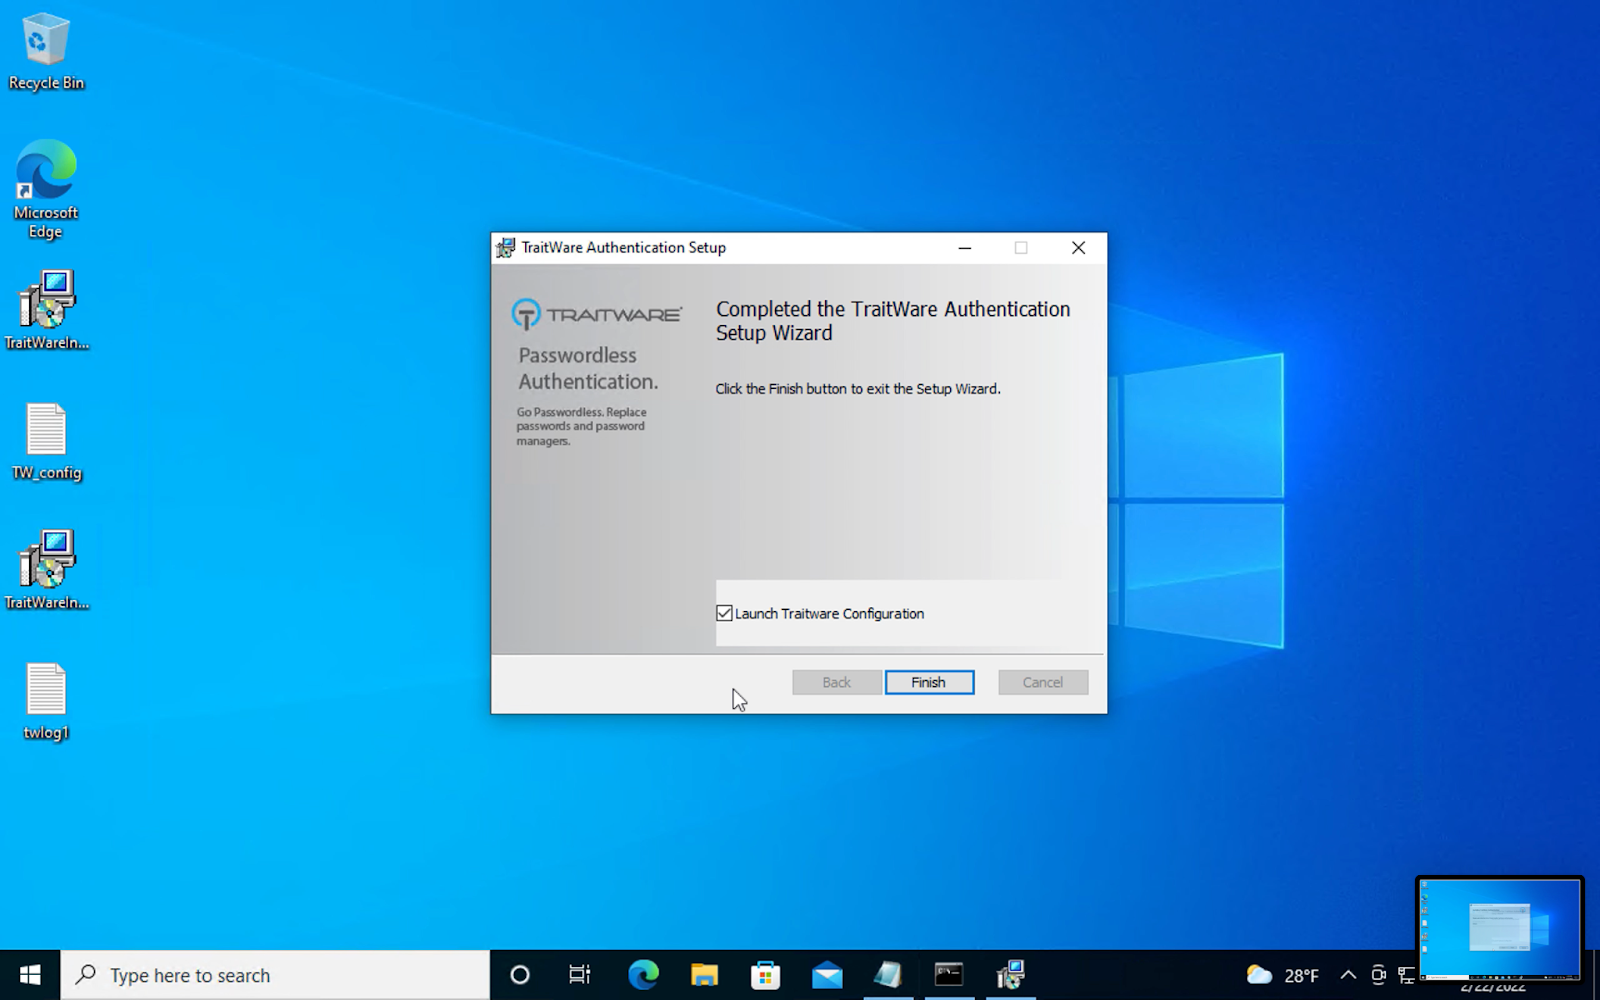
When the installation completes, click Finish.
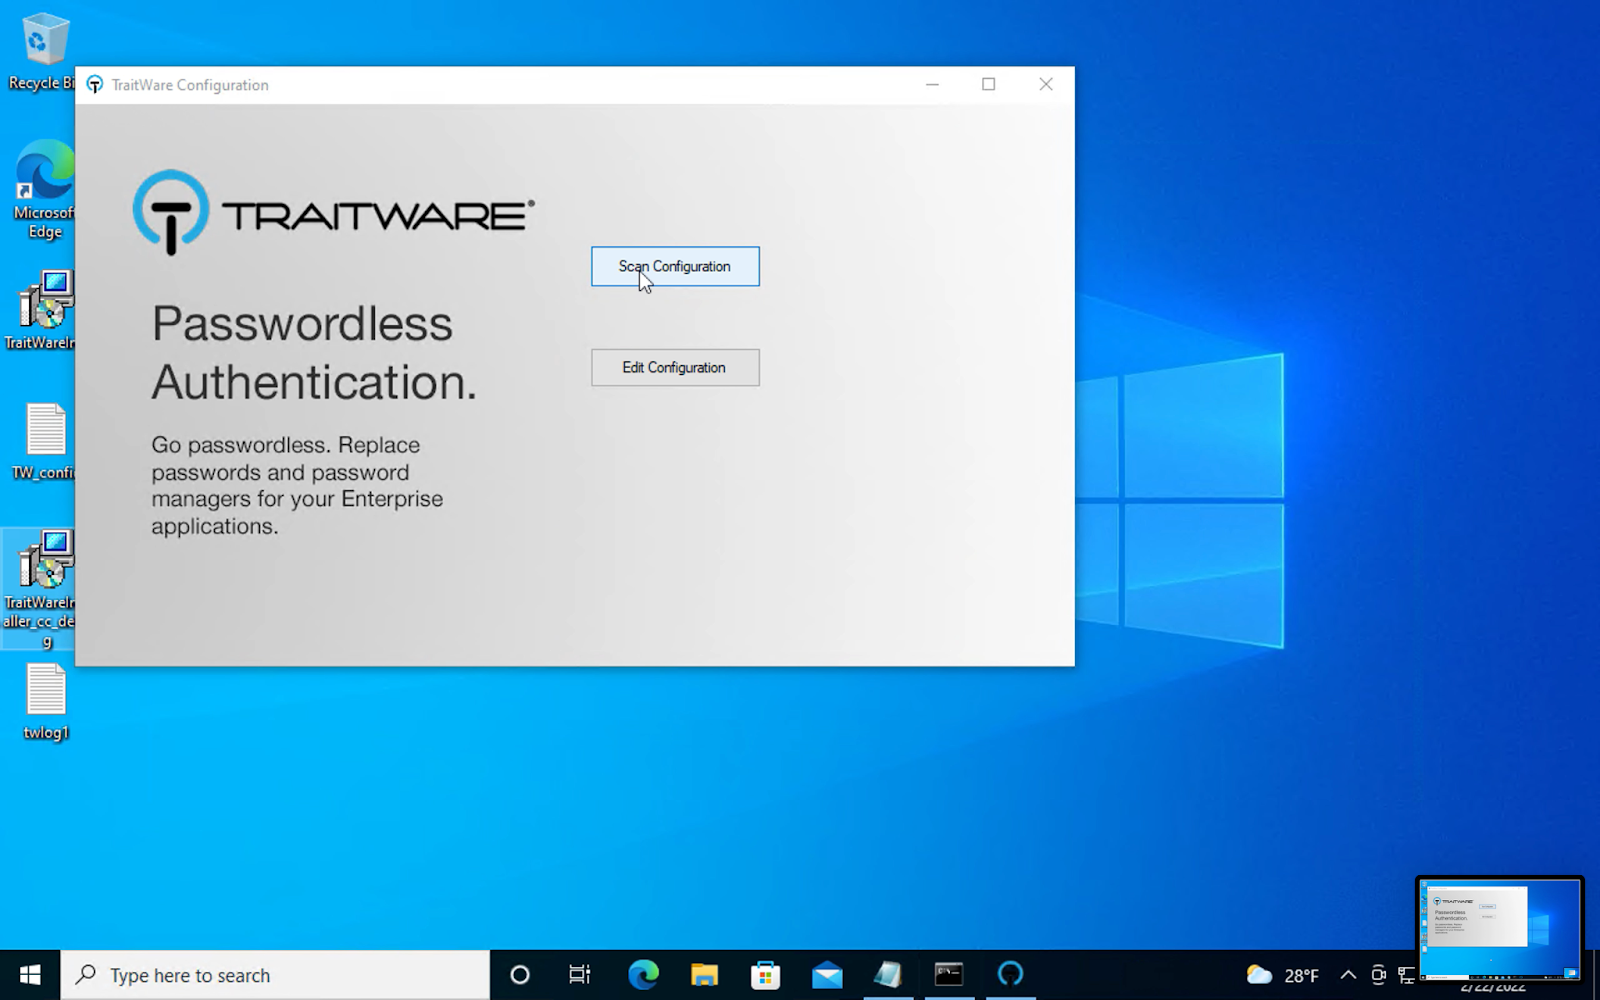
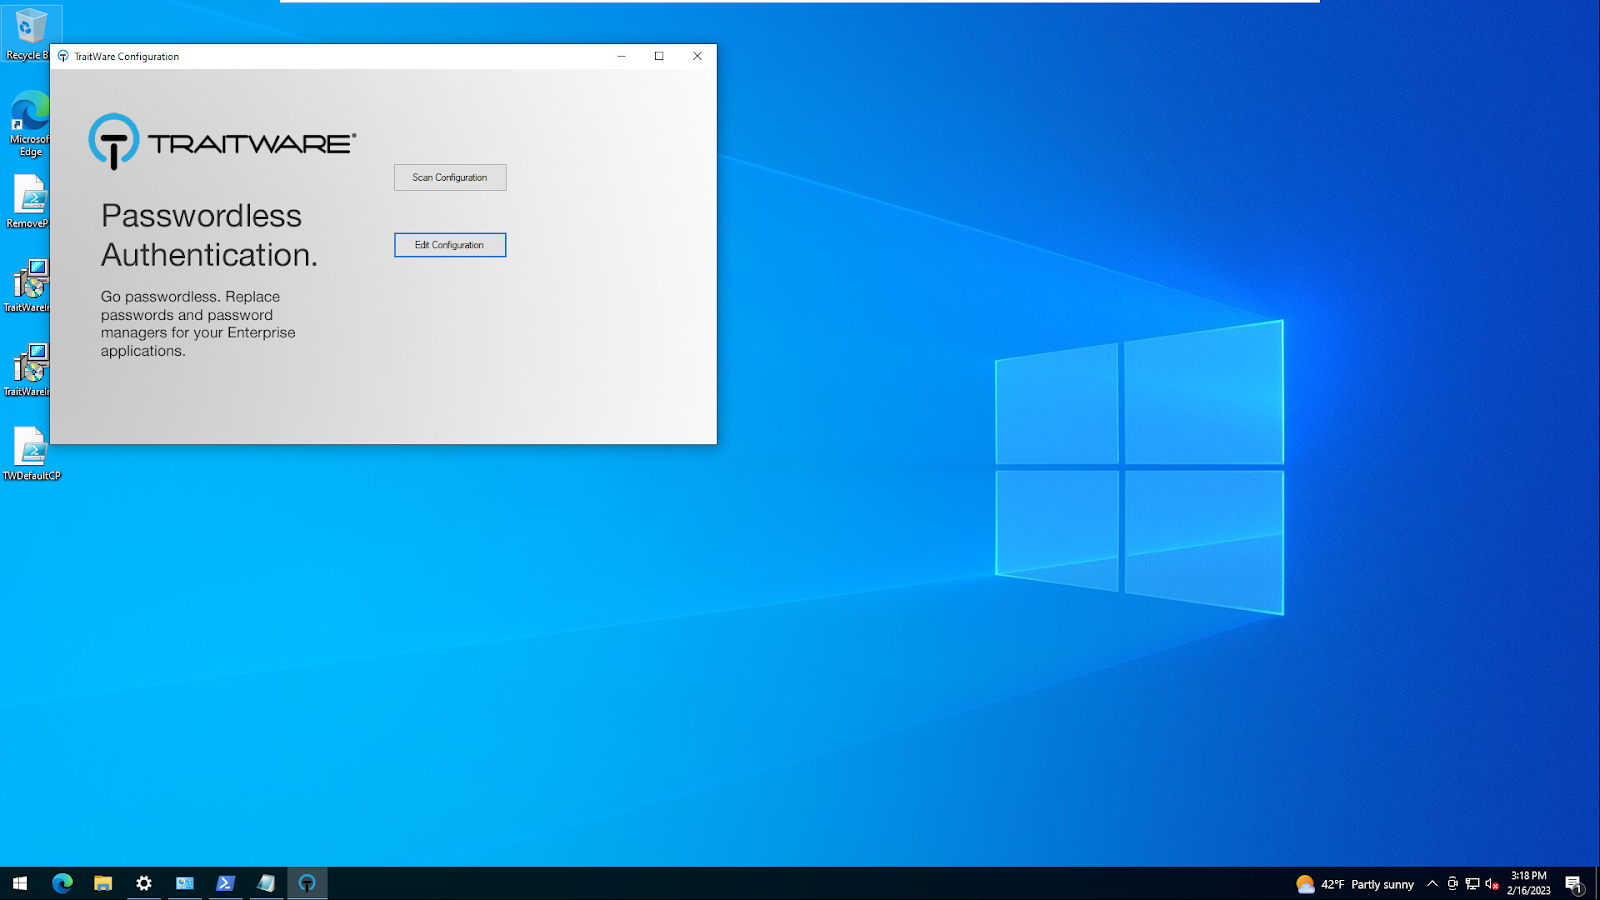
TraitWare Configuration will open. Click Scan Configuration to confirm the settings.
Successful installation. TraitWare is configured. You are now ready to sign into your Windows Desktop with Passwordless MFA.
GUI – Entra ID Domain Joined
Administrator guided installation
CLI
Overview
This is an overview of how to preconfigure the installer via the CLI. Below are the Installation Command, the Context for entering the command and step by step instructions for executing the command line installation.
Install Command
msiexec /i Installer.msi TRAITWARECLIENTID=[TraitWare Client ID] TRAITWAREUSERID=[TraitWare user email]
TRAITWARESERVERSECRET=[TraitWare Client Secret] TRAITWARESERVER=https://api.traitware.com LOGINCRED=[Domain\username] LOGINPASS=[Windows User Password]
To find the domain: echo %userdomain%
To find username: echo %username%
Install Command Context
| TraitWare Installer | Example |
| TRAITWARECLIENTID | TraitWare Client ID |
| TRAITWAREUSERID | TraitWare user email |
| TRAITWARESERVERSECRET | TraitWare Client Secret |
| TRAITWARESERVER | https://api.traitware.com |
| LOGINCRED | Domain\username |
| LOGINPASS | Windows User Password |
Example
Command Line Example
msiexec /i TraitWareInstaller.msi TRAITWARECLIENTID=5713989626 TRAITWAREUSERID=twmfa-w10@twmfa.net TRAITWARESERVERSECRET=BlHexBRw_-YnuNVAT1AErfgtaX9STkXQ9-KjR4Qxic3 TRAITWARESERVER=https://api.traitware.com LOGINCRED=TRAITWARE-W10-T\Traitware LOGINPASS=Passwordsaredumb
Example Context
| TraitWare Installer | Example |
| TRAITWARECLIENTID | 5713989626 |
| TRAITWAREUSERID | twmfa-w10@twmfa.net |
| TRAITWARESERVERSECRET | BlHexBRw_-YnuNVAT1AErfgtaX9STkXQ9-KjR4Qxic3 |
| TRAITWARESERVER | https://api.traitware.com |
| LOGINCRED | TRAITWARE-W10-T\Traitware |
| LOGINPASS | Passwordsaredumb |
Open Windows command prompt. 
Navigate to the directory where the TraitWare installer is located. In this case, the TraitWare installer is located on the Desktop.
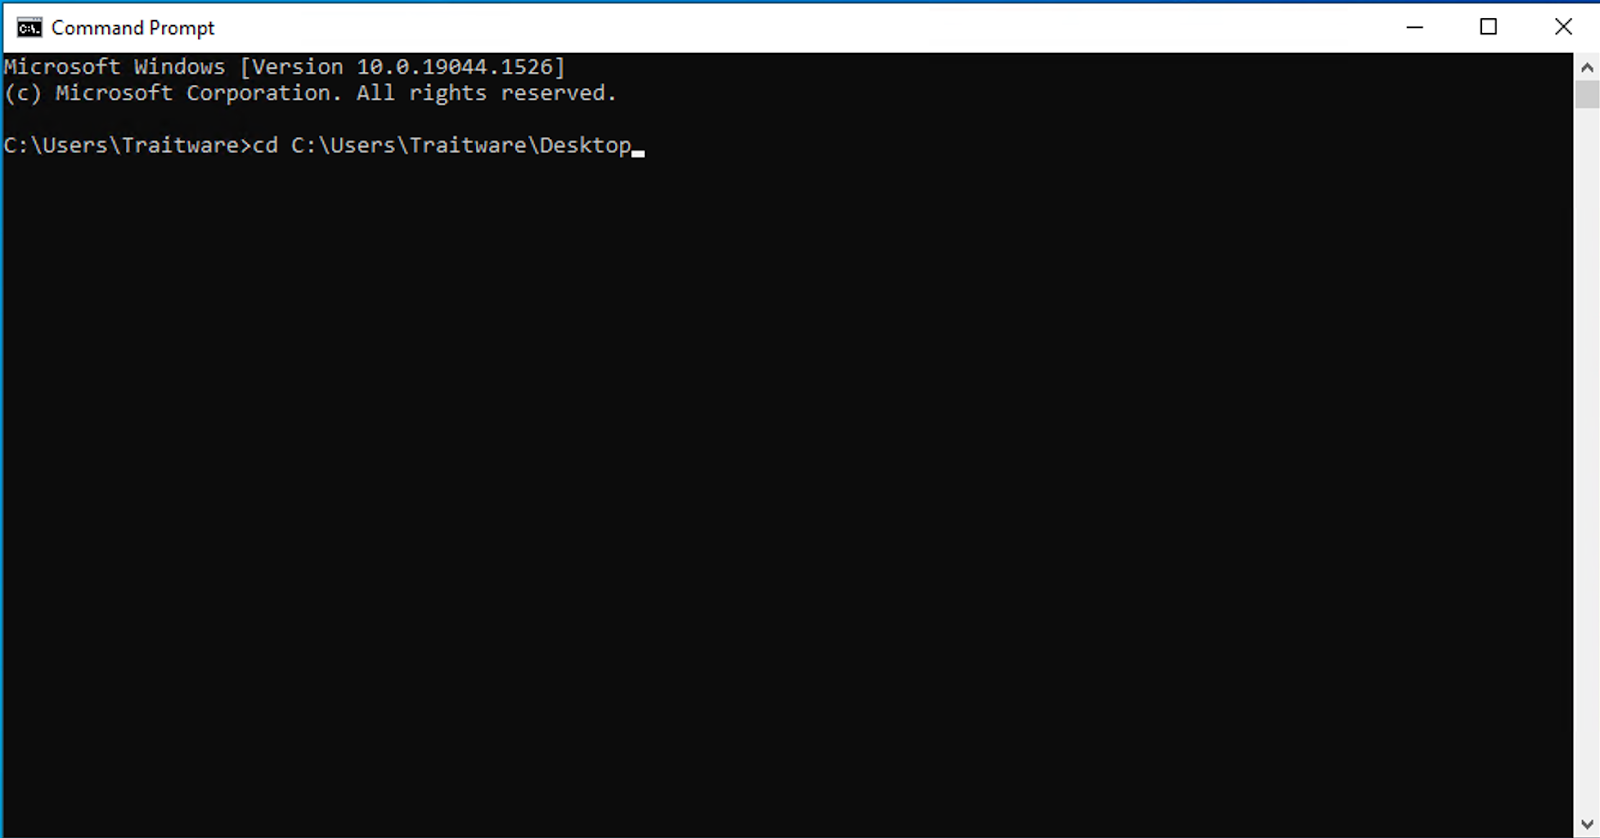
Insert the following command into the CLI. Input the customer information in place of the bracketed description ([description]).
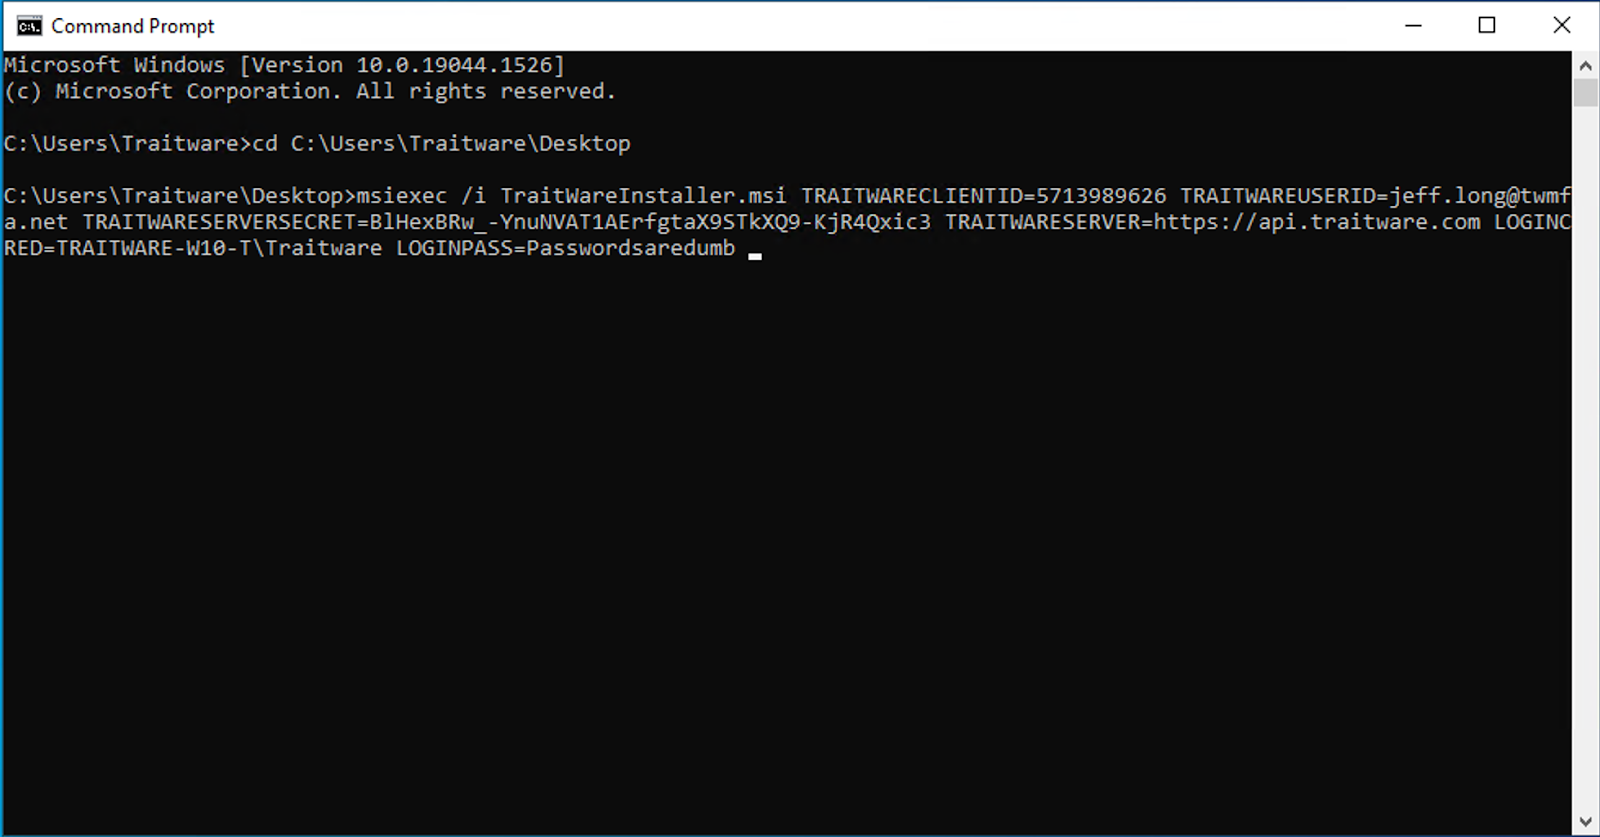
Enter the command and press Enter.
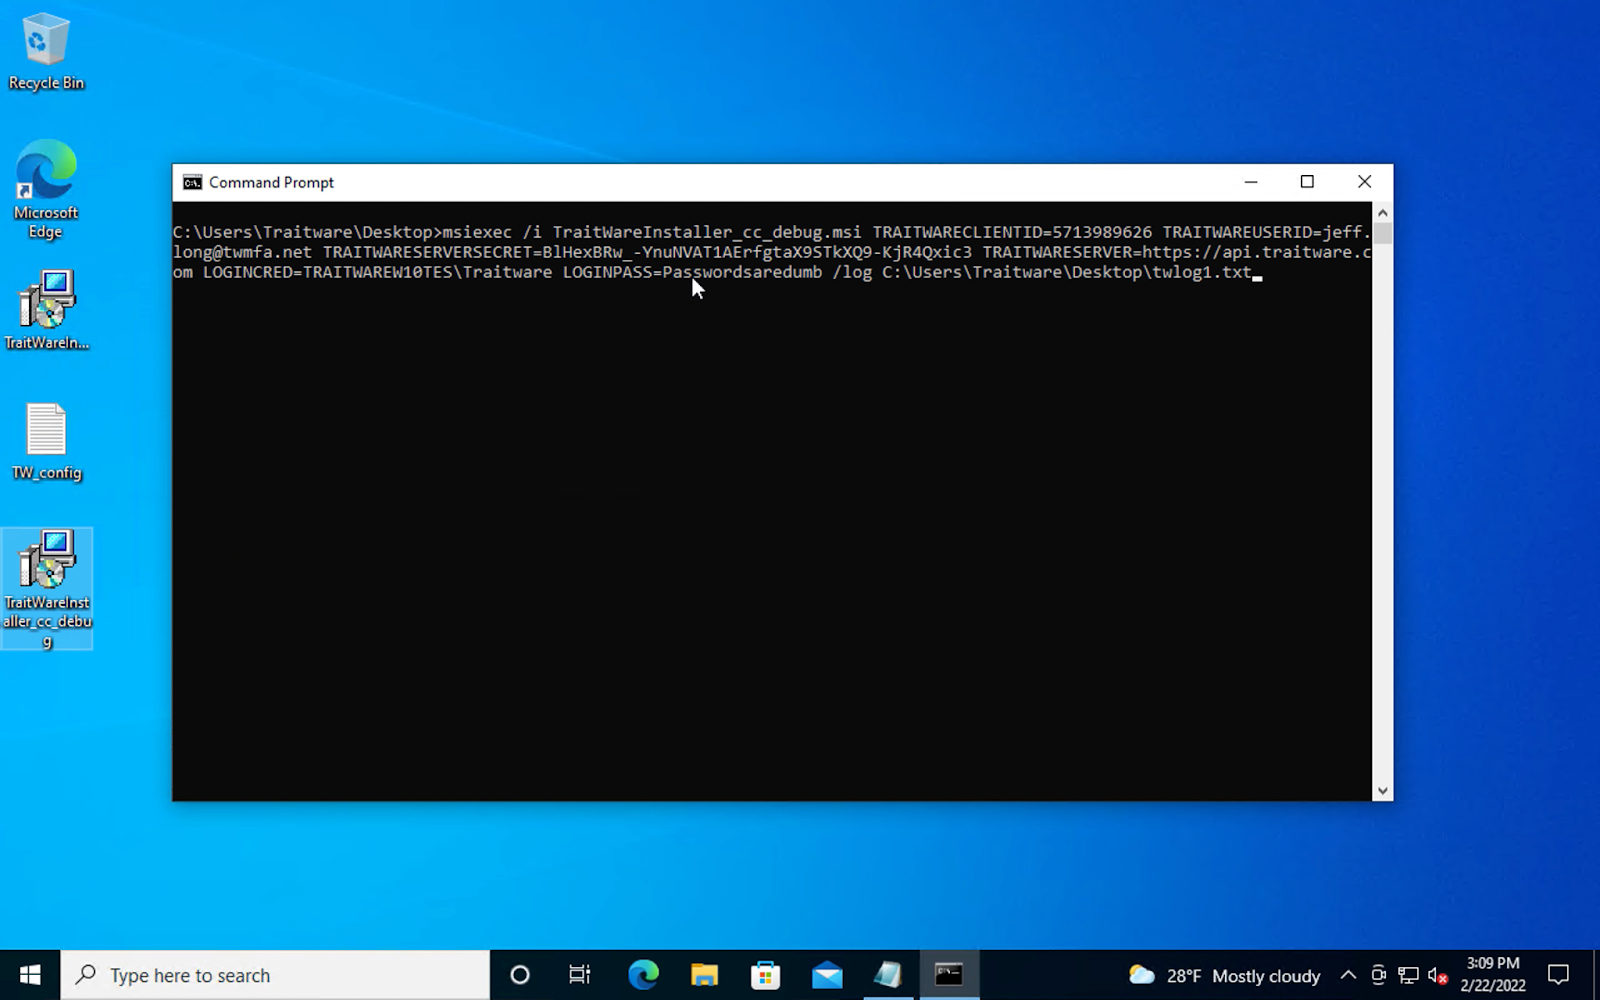
The TraitWare installer will open and be pre-populated with the attributes entered in the command.
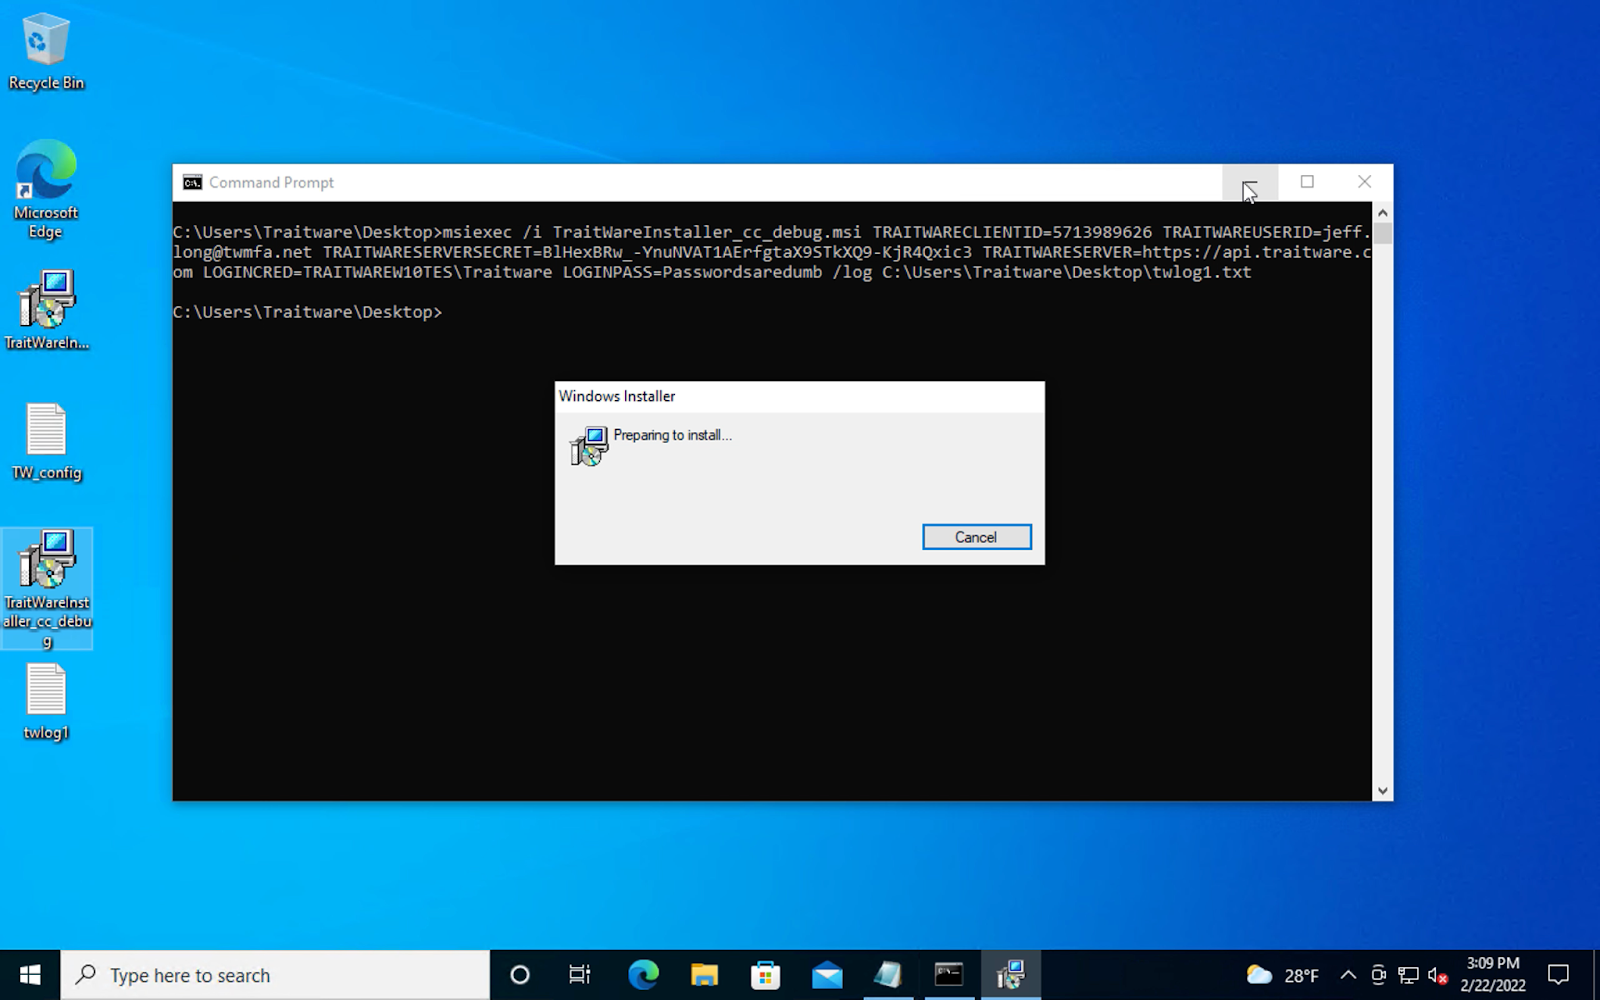
Click Next
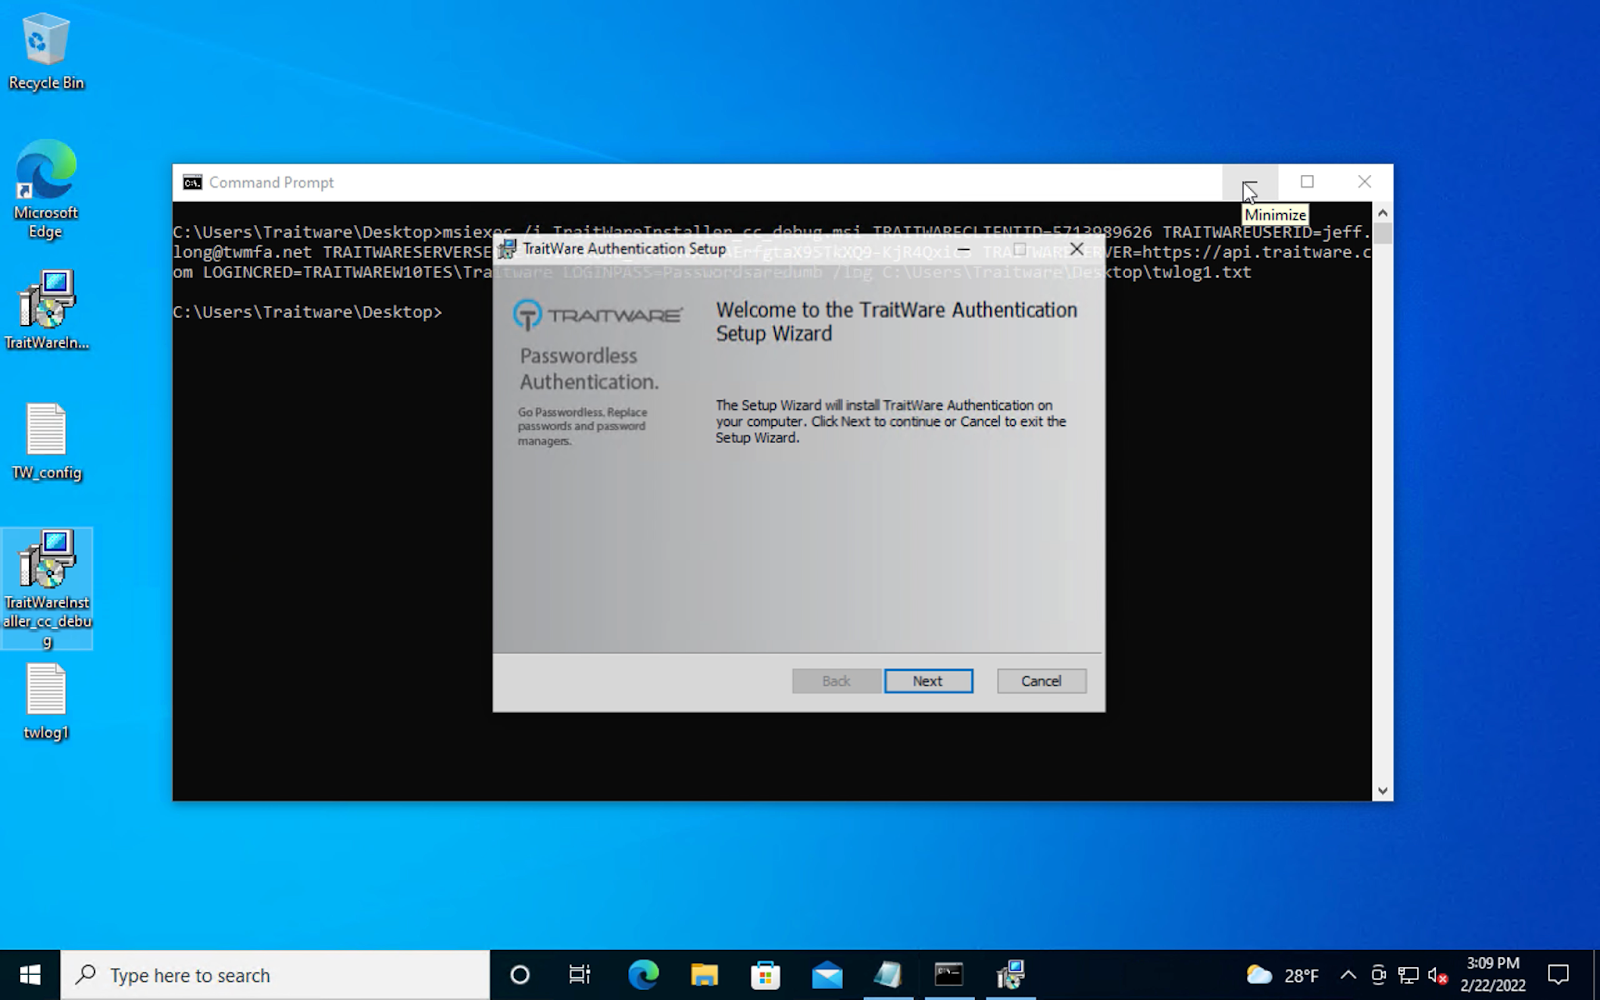
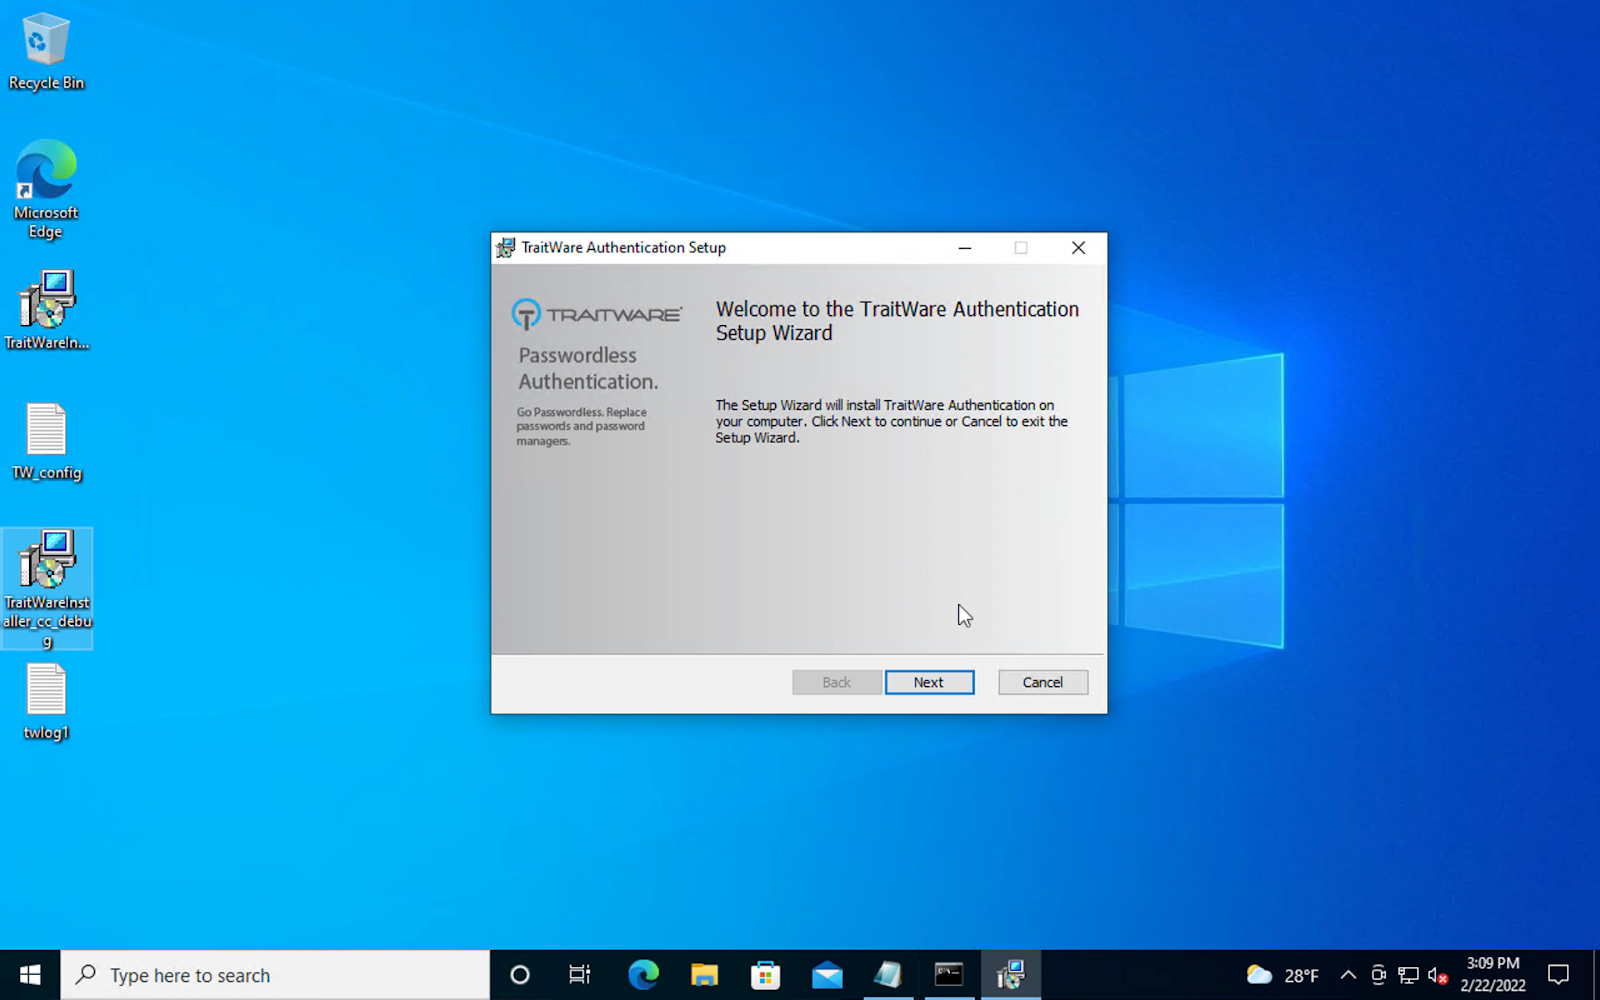
Click Next to continue with the installation.
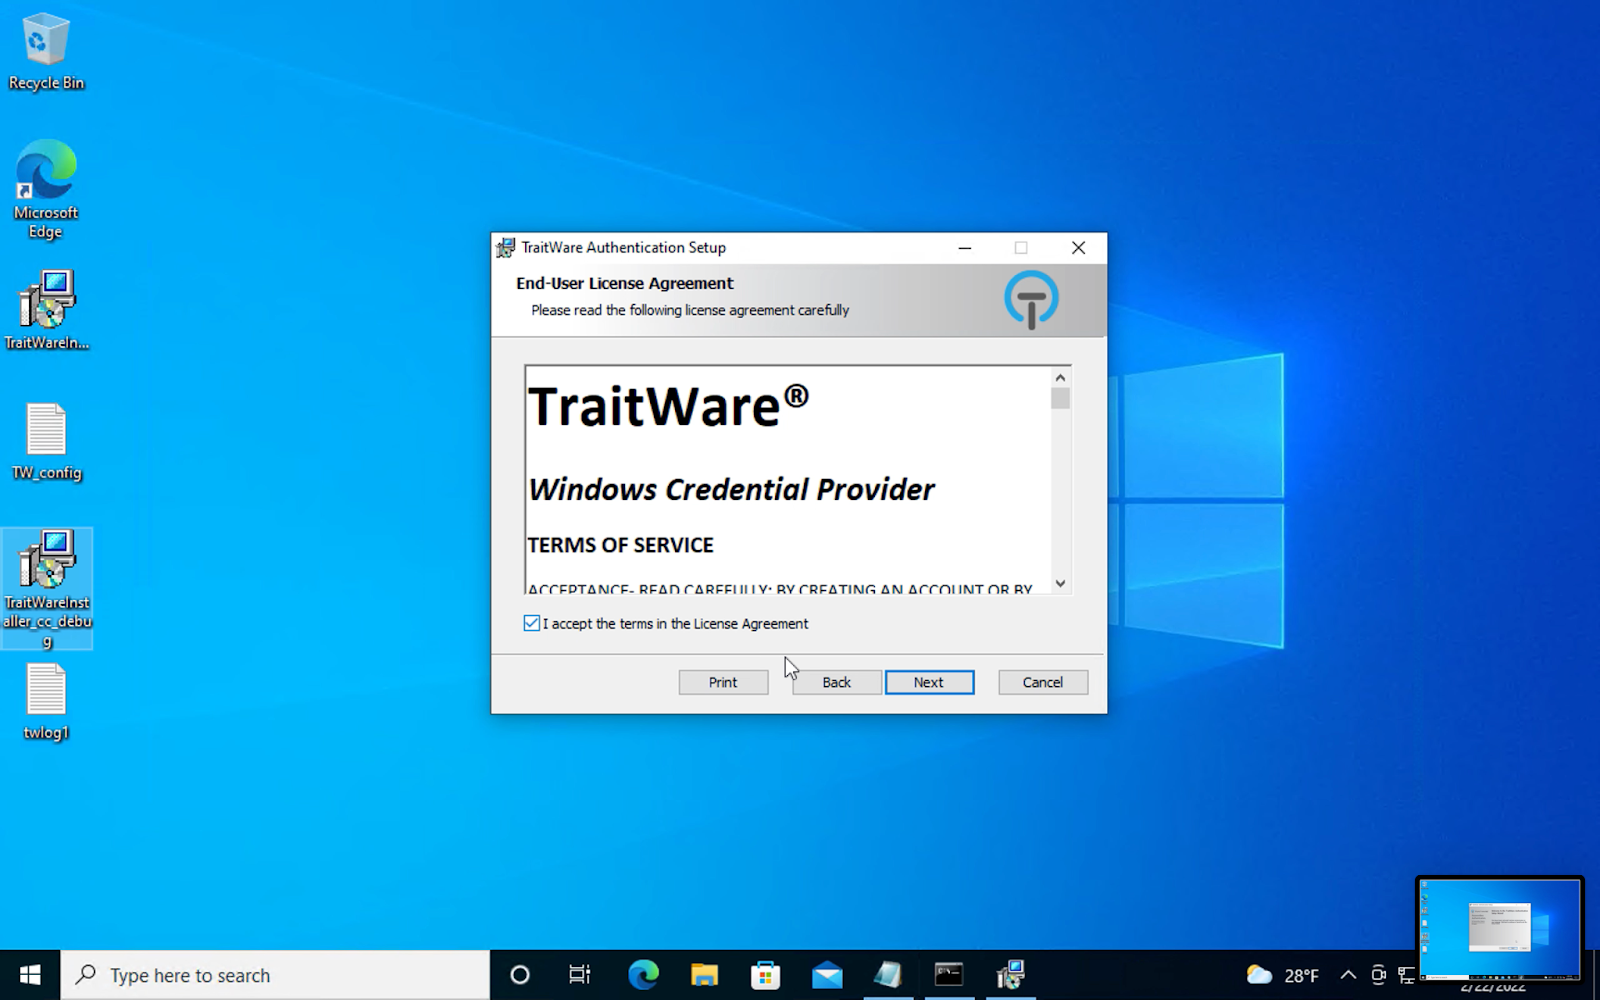
Read the EULA and accept the terms of the License Agreement.
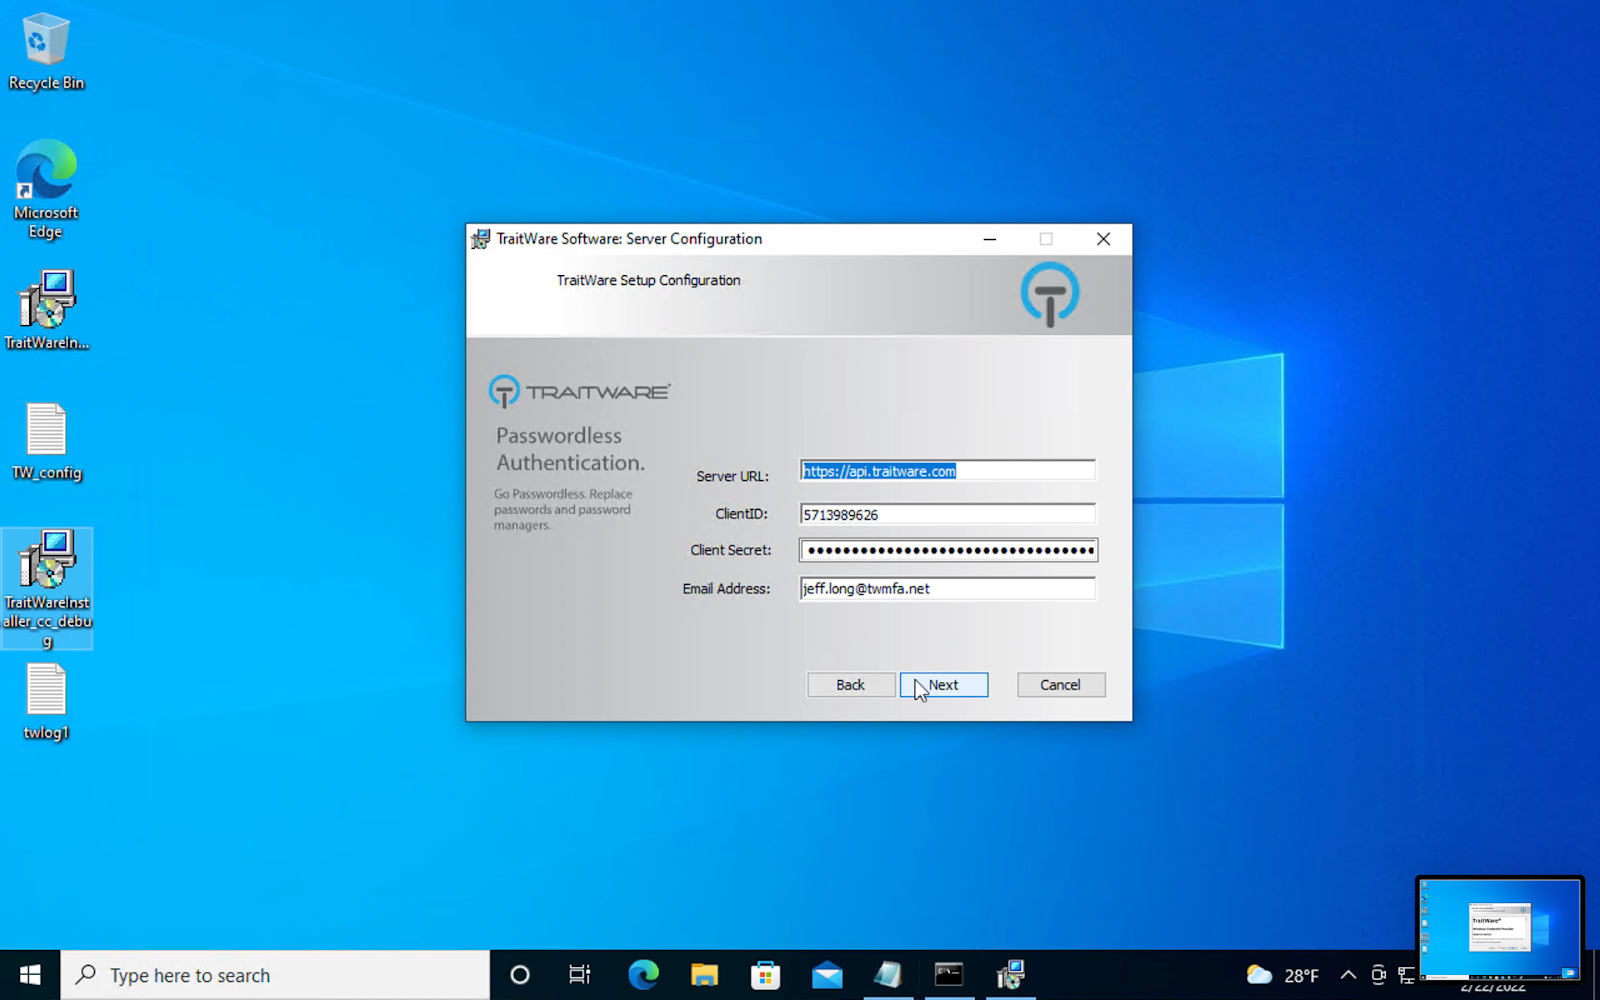
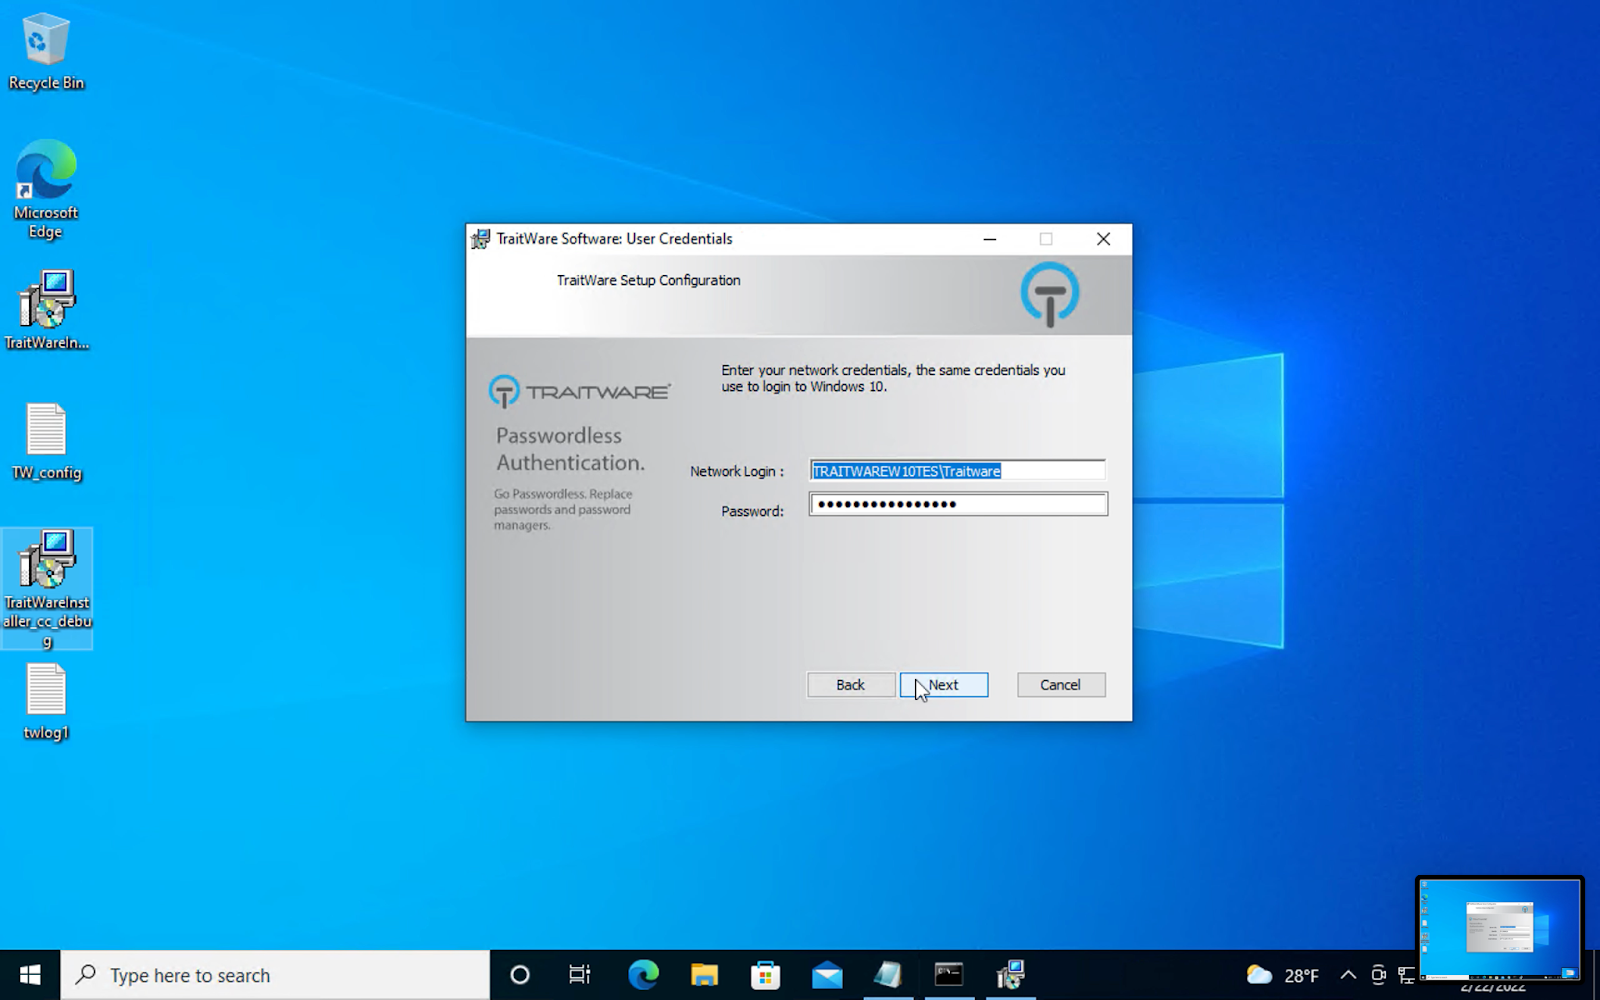
Note: It is best practice to create a strong password prior to the installation of WindowsMFA.
TraitWare will prompt for the installation folder. Click next.
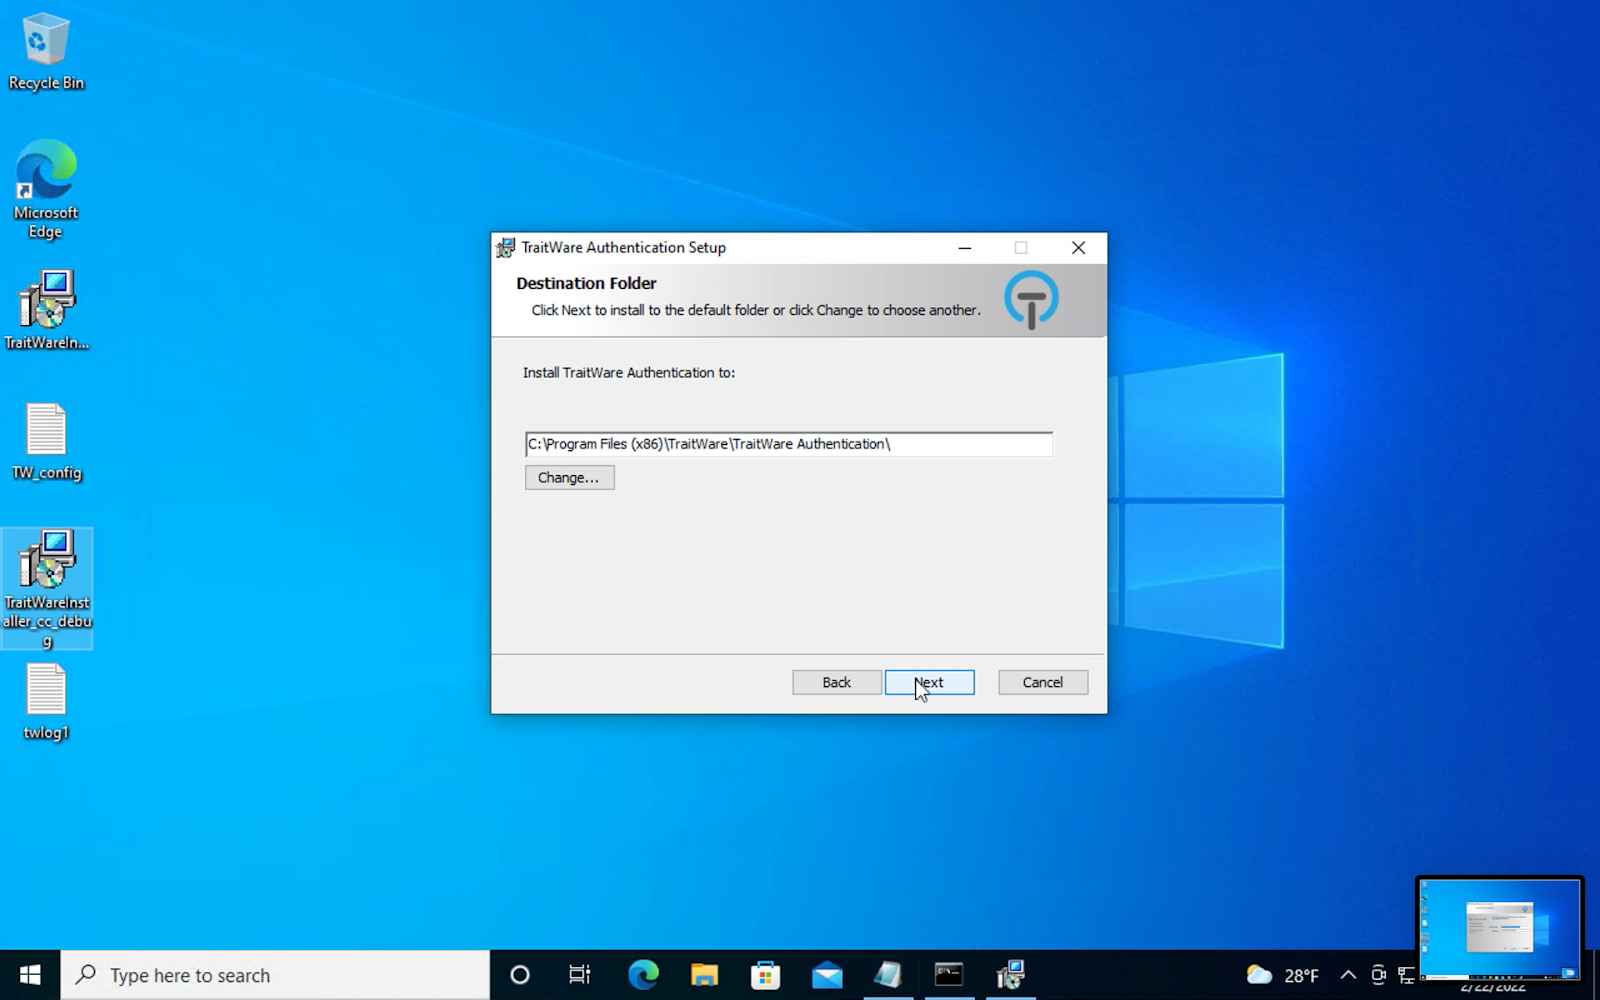
Click Install.

Allow App to make changes on your device? Select Yes.

Installation will begin.
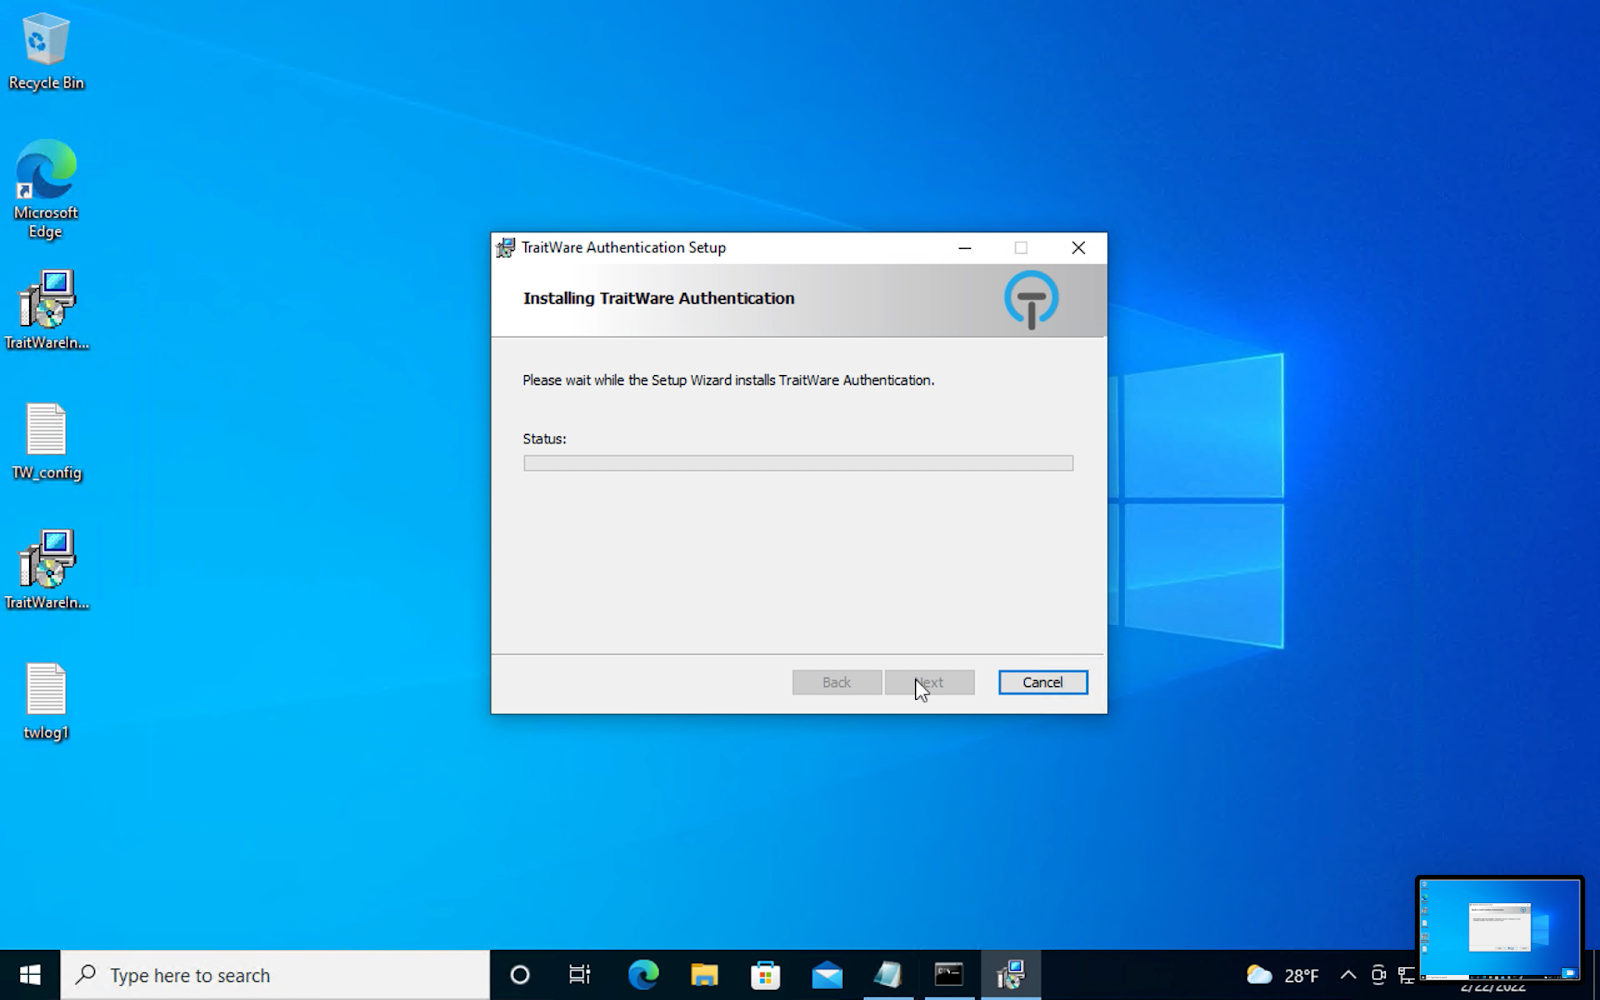
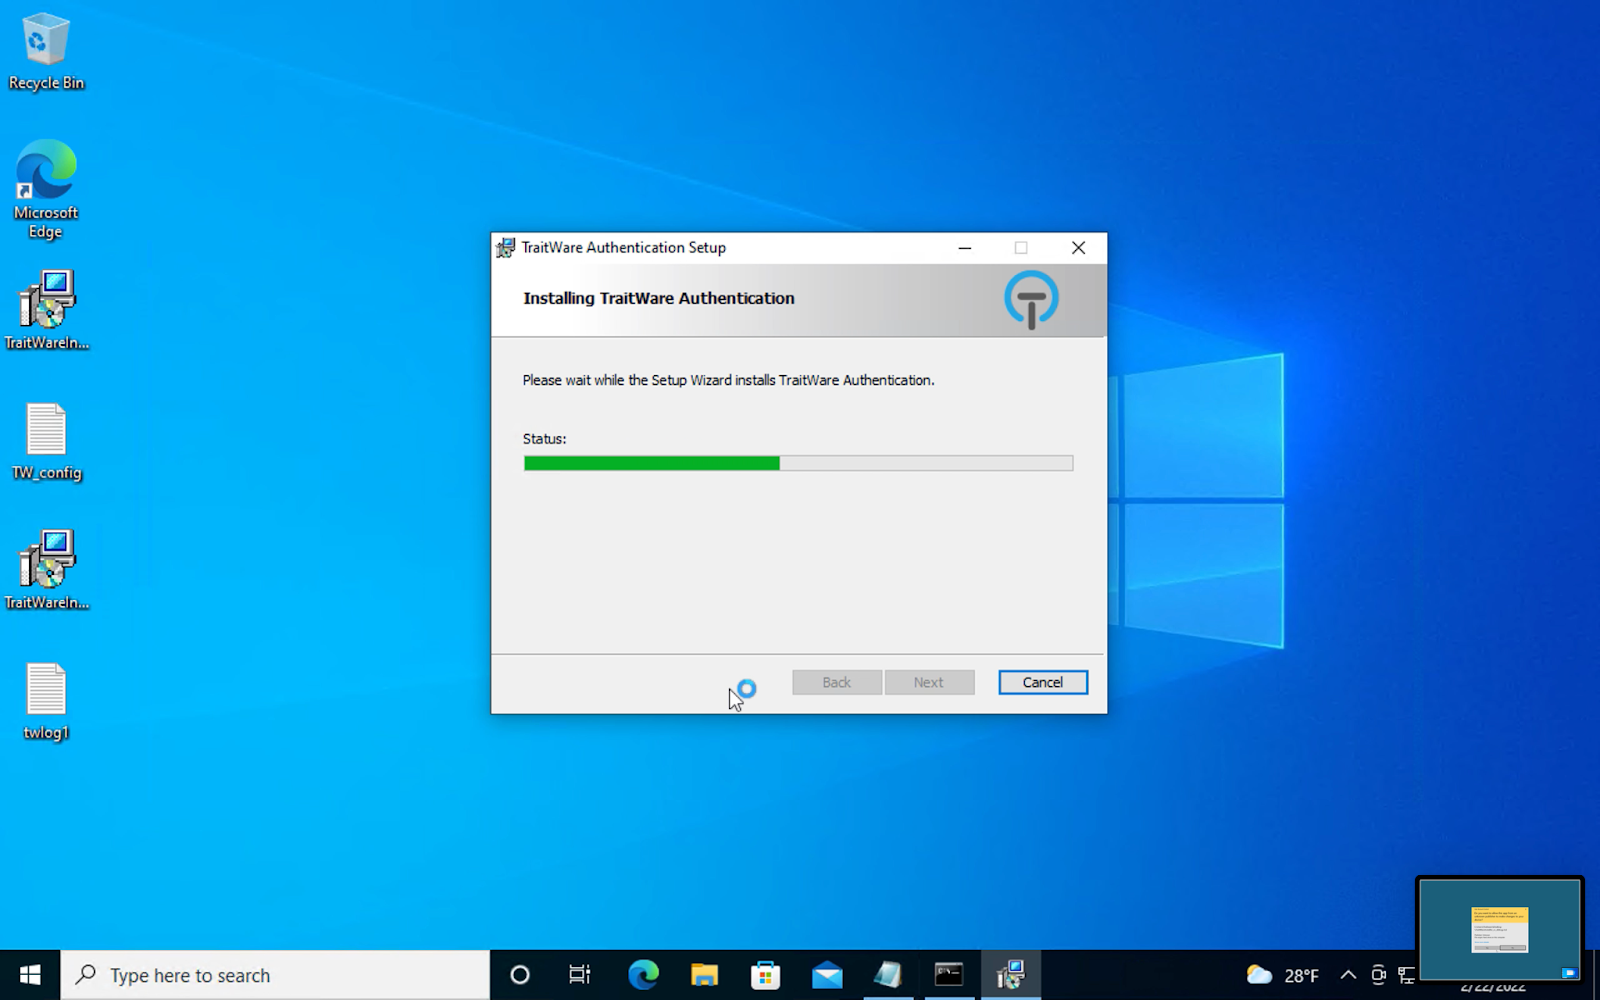
When the installation completes, click Finish.
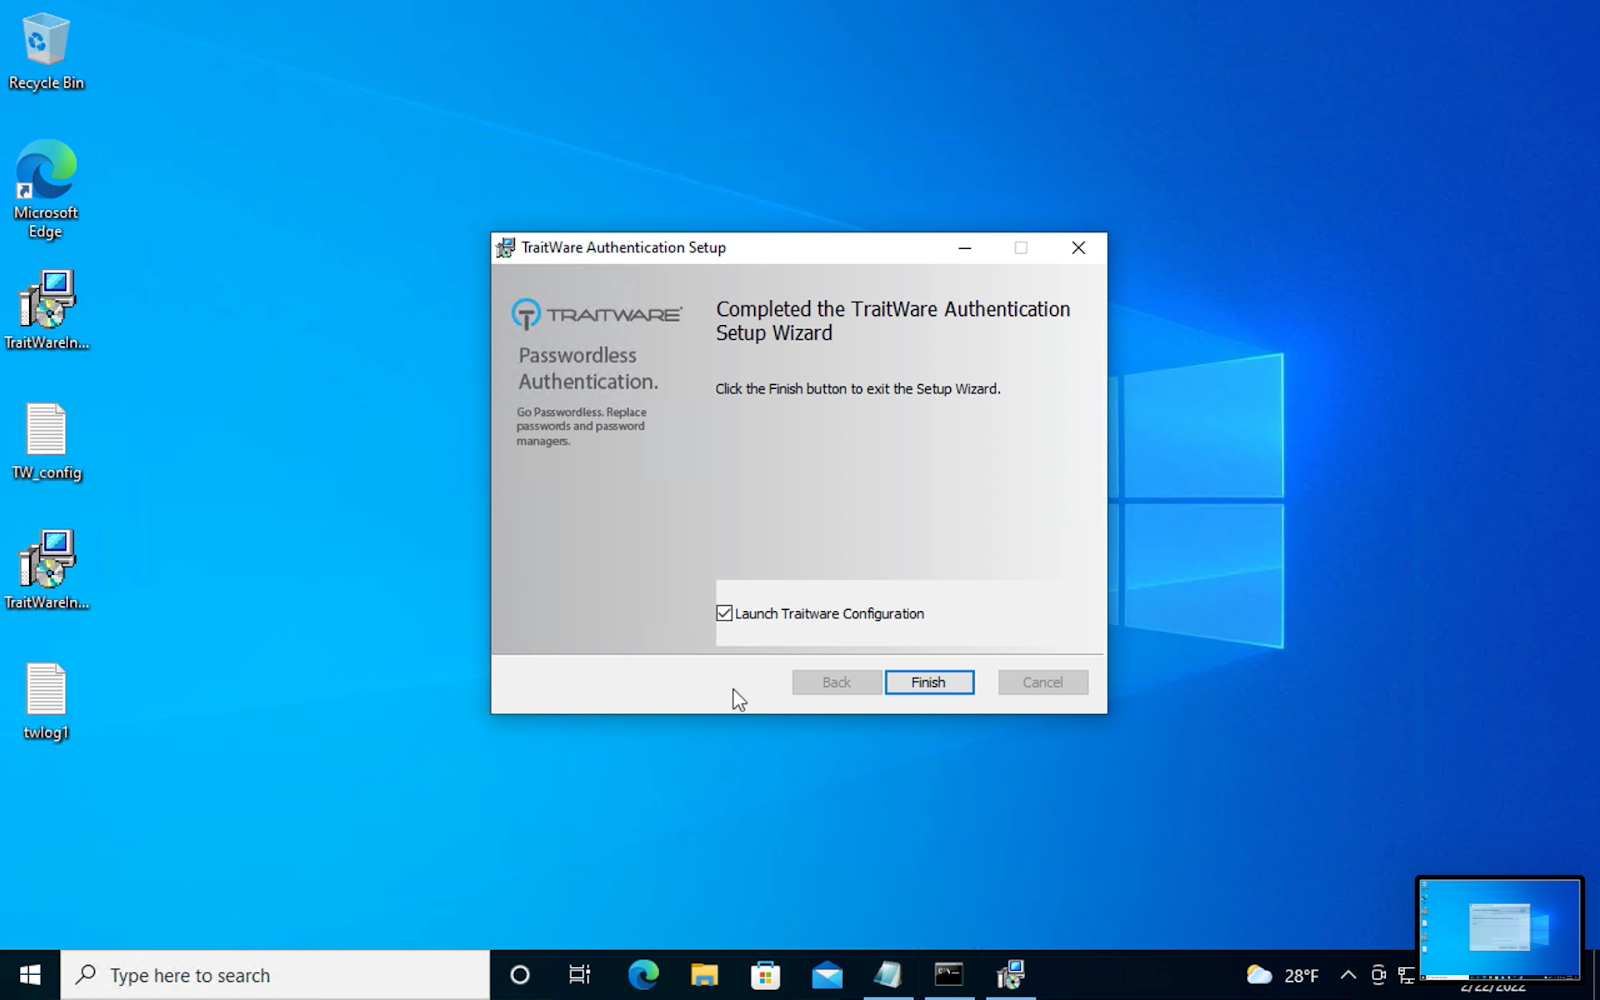
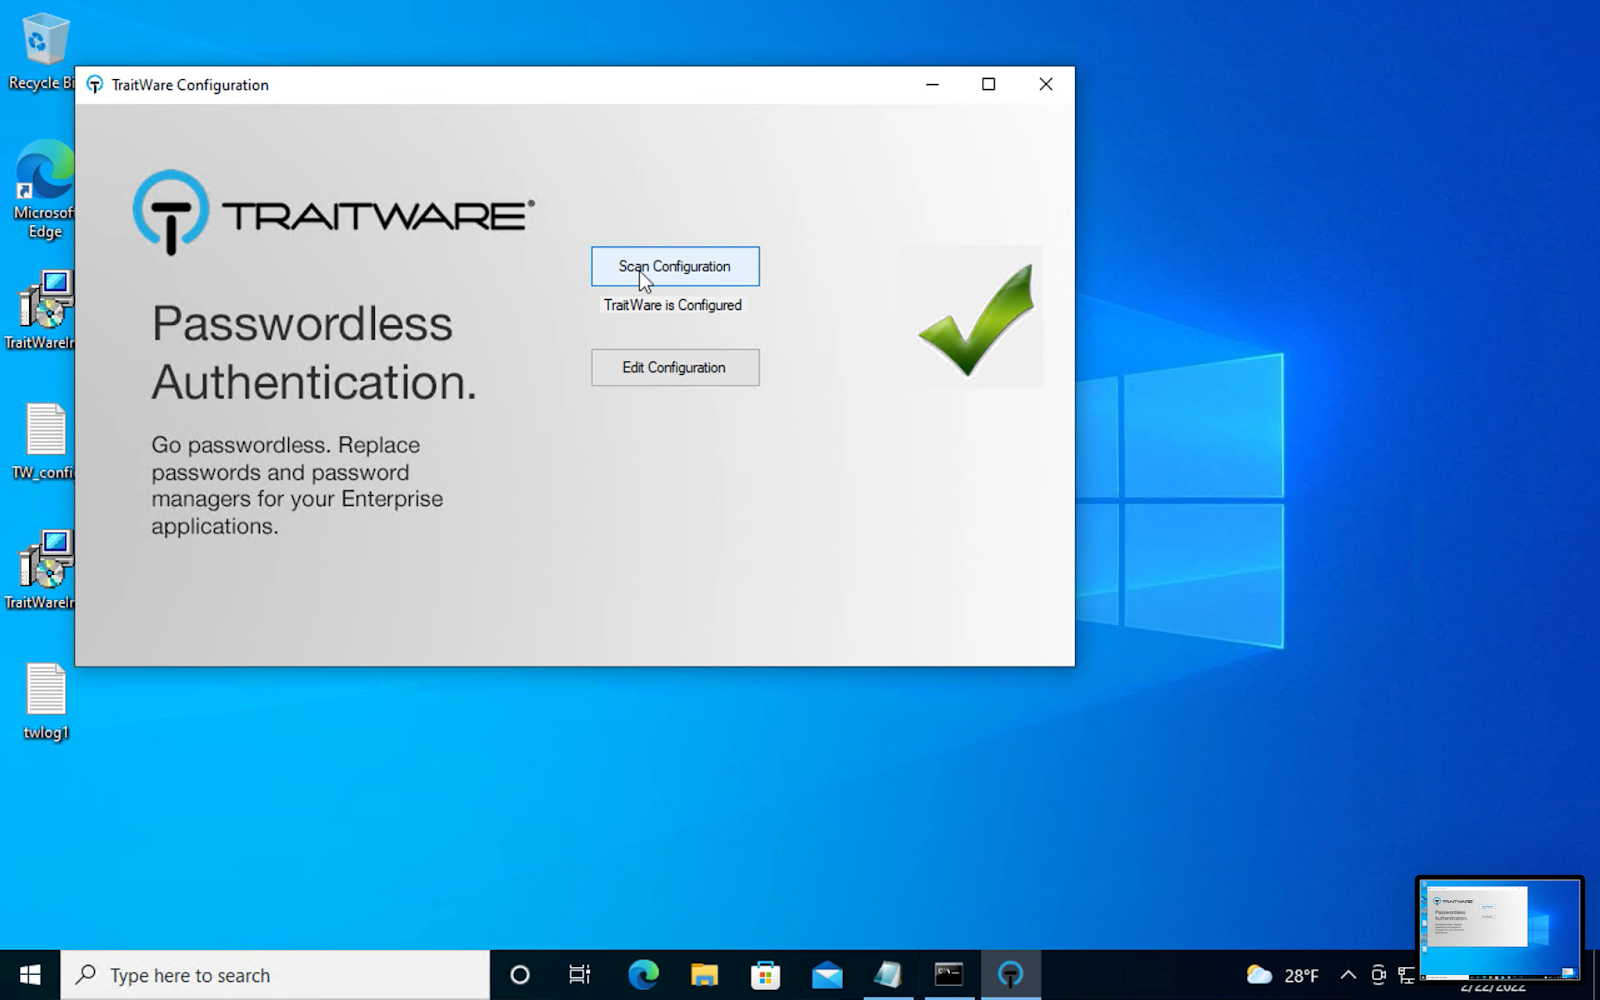
TraitWare Configuration will open. Click Scan Configuration to confirm the settings.
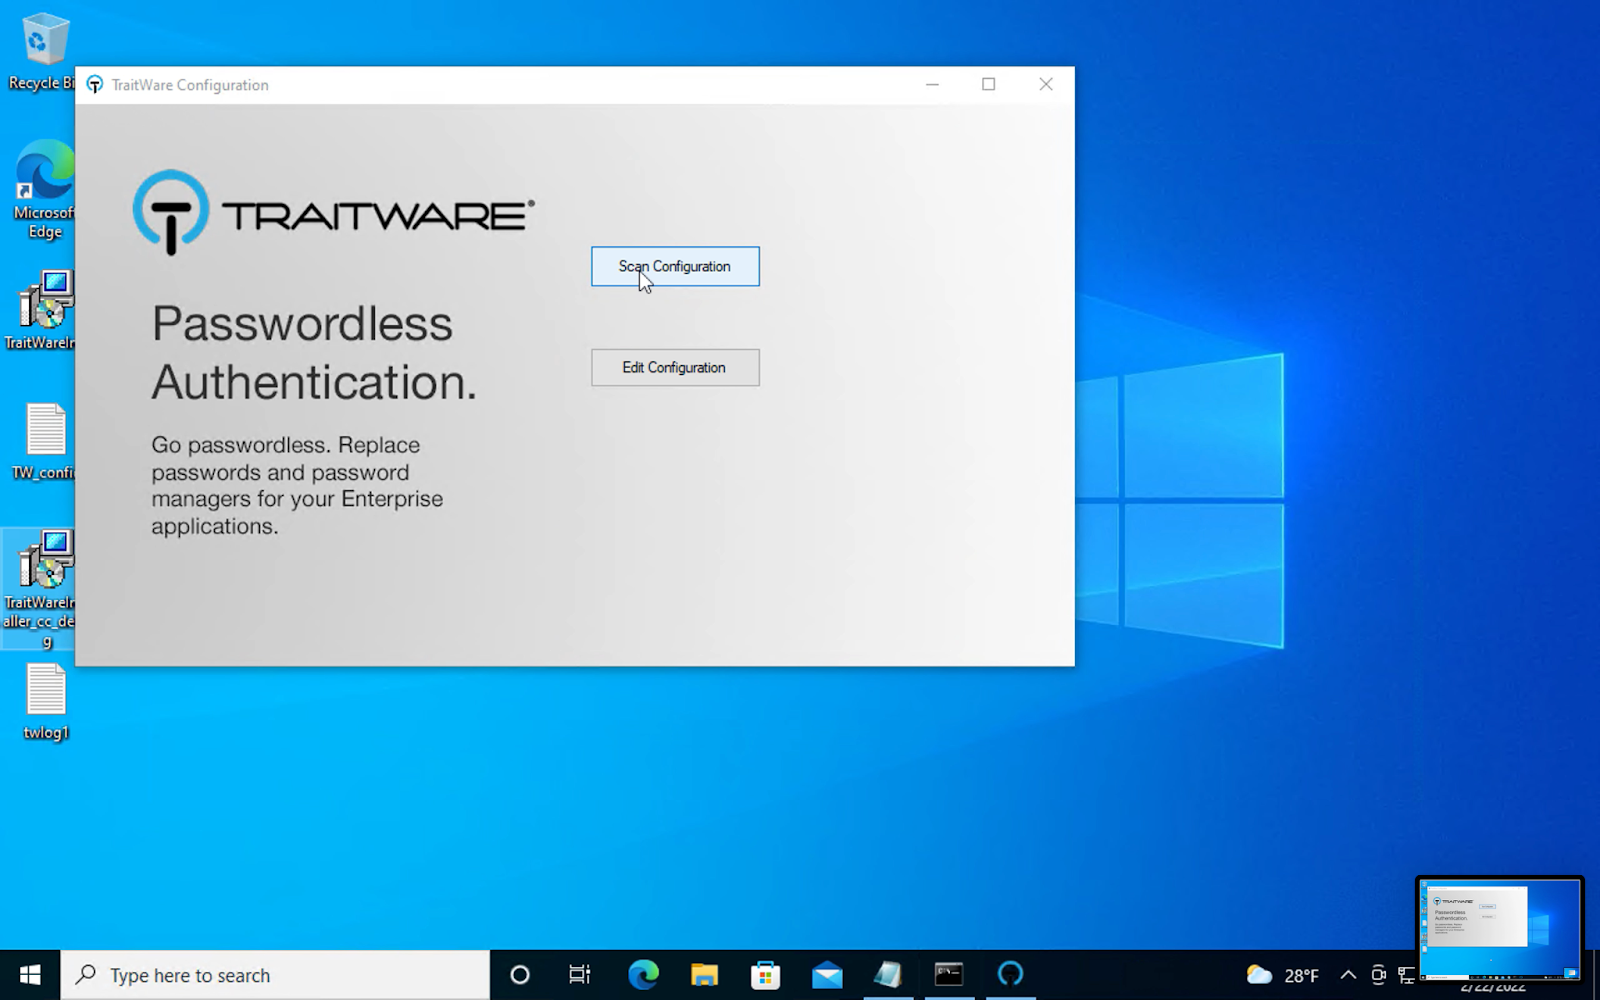
Successful installation. TraitWare is configured. You are now ready to sign into your Windows Desktop with Passwordless MFA.
GUI – Entra ID Domain Joined
Administrator guided installation
CLI
Overview
This is an overview of how to preconfigure the installer via the CLI. Below are the Installation Command, the Context for entering the command and step by step instructions for executing the command line installation.
Install Command
msiexec /i Installer.msi TRAITWARECLIENTID=[TraitWare Client ID] TRAITWAREUSERID=[TraitWare user email]
TRAITWARESERVERSECRET=[TraitWare Client Secret] TRAITWARESERVER=https://api.traitware.com LOGINCRED=[Domain\username] LOGINPASS=[Windows User Password]
To find the domain: echo %userdomain%
To find username: echo %username%
Install Command Context
| TraitWare Installer | Example |
| TRAITWARECLIENTID | TraitWare Client ID |
| TRAITWAREUSERID | TraitWare user email |
| TRAITWARESERVERSECRET | TraitWare Client Secret |
| TRAITWARESERVER | https://api.traitware.com |
| LOGINCRED | Domain\username |
| LOGINPASS | Windows User Password |
Example
Command Line Example
msiexec /i TraitWareInstaller.msi TRAITWARECLIENTID=5713989626 TRAITWAREUSERID=twmfa-w10@twmfa.net TRAITWARESERVERSECRET=BlHexBRw_-YnuNVAT1AErfgtaX9STkXQ9-KjR4Qxic3 TRAITWARESERVER=https://api.traitware.com LOGINCRED=TRAITWARE-W10-T\Traitware LOGINPASS=Passwordsaredumb
Example Context
| TraitWare Installer | Example |
| TRAITWARECLIENTID | 5713989626 |
| TRAITWAREUSERID | twmfa-w10@twmfa.net |
| TRAITWARESERVERSECRET | BlHexBRw_-YnuNVAT1AErfgtaX9STkXQ9-KjR4Qxic3 |
| TRAITWARESERVER | https://api.traitware.com |
| LOGINCRED | TRAITWARE-W10-T\Traitware |
| LOGINPASS | Passwordsaredumb |
Open Windows command prompt. 
Navigate to the directory where the TraitWare installer is located. In this case, the TraitWare installer is located on the Desktop.
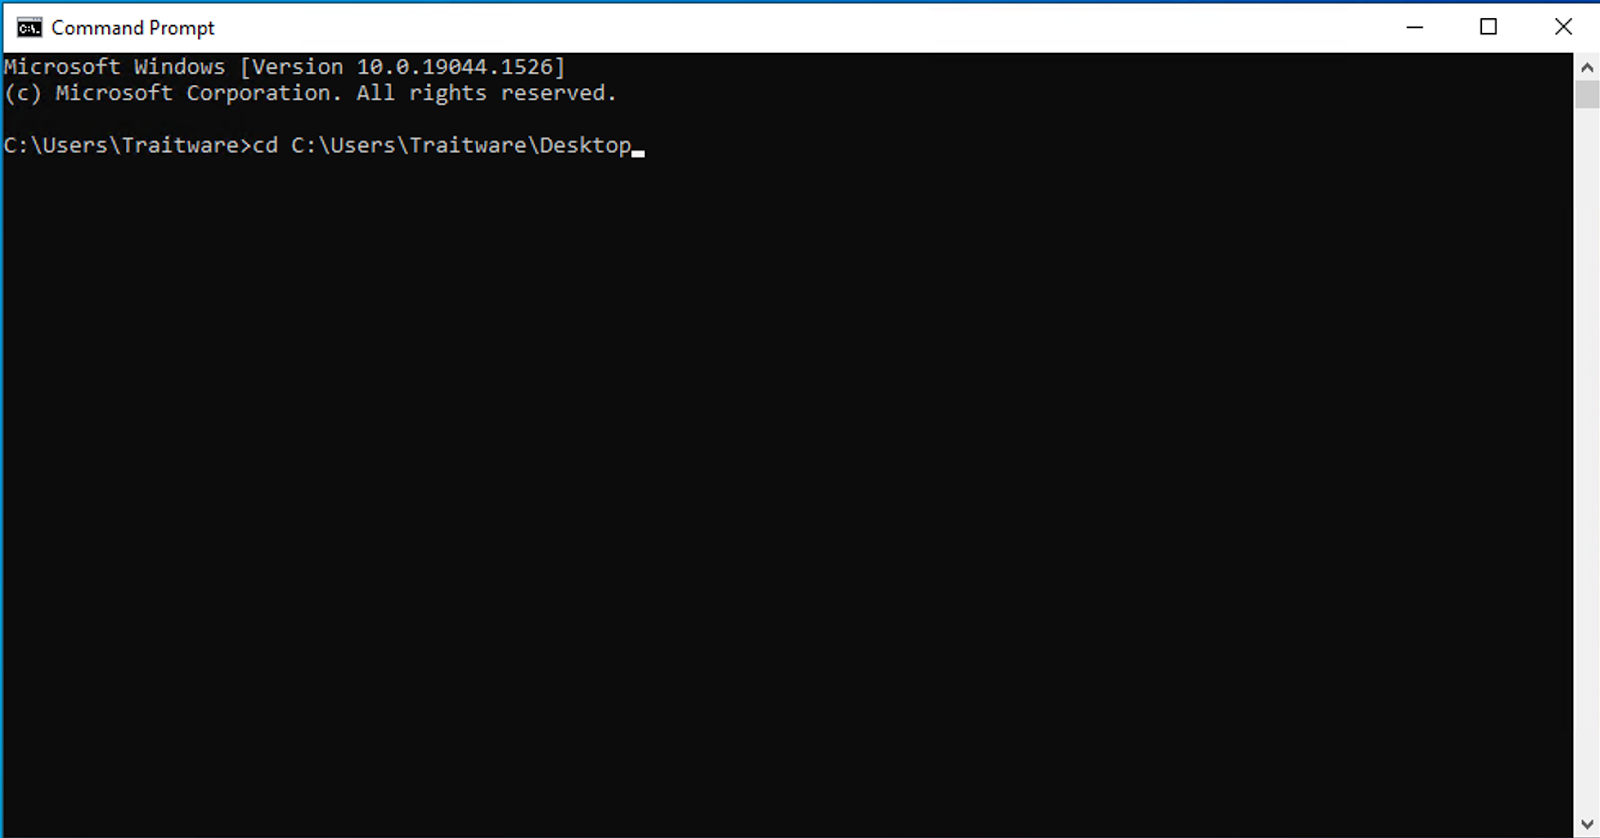
Insert the following command into the CLI. Input the customer information in place of the bracketed description ([description]).
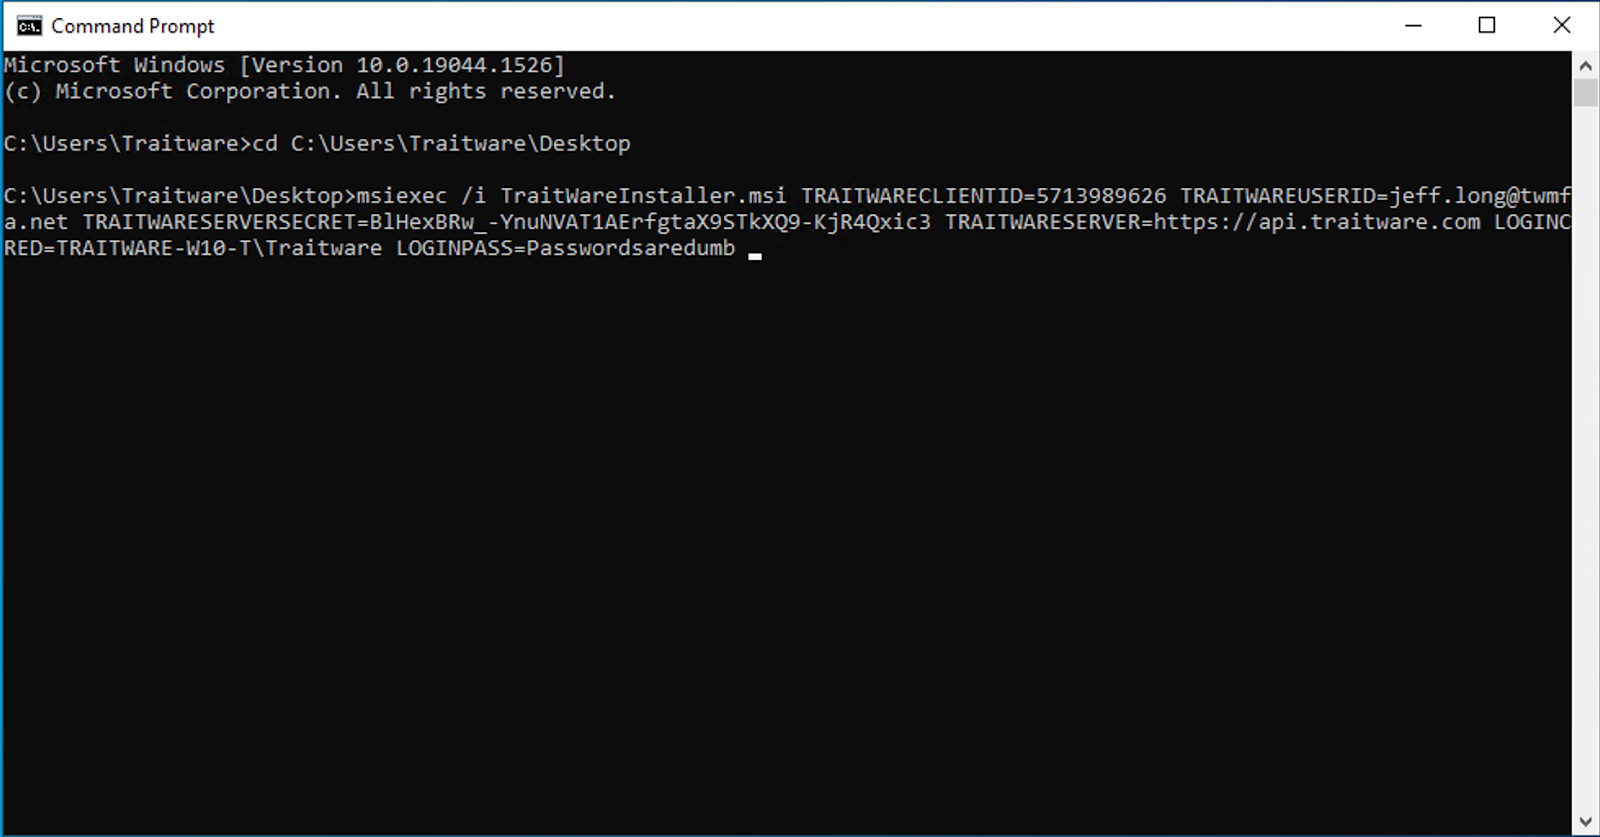
Enter the command and press Enter.
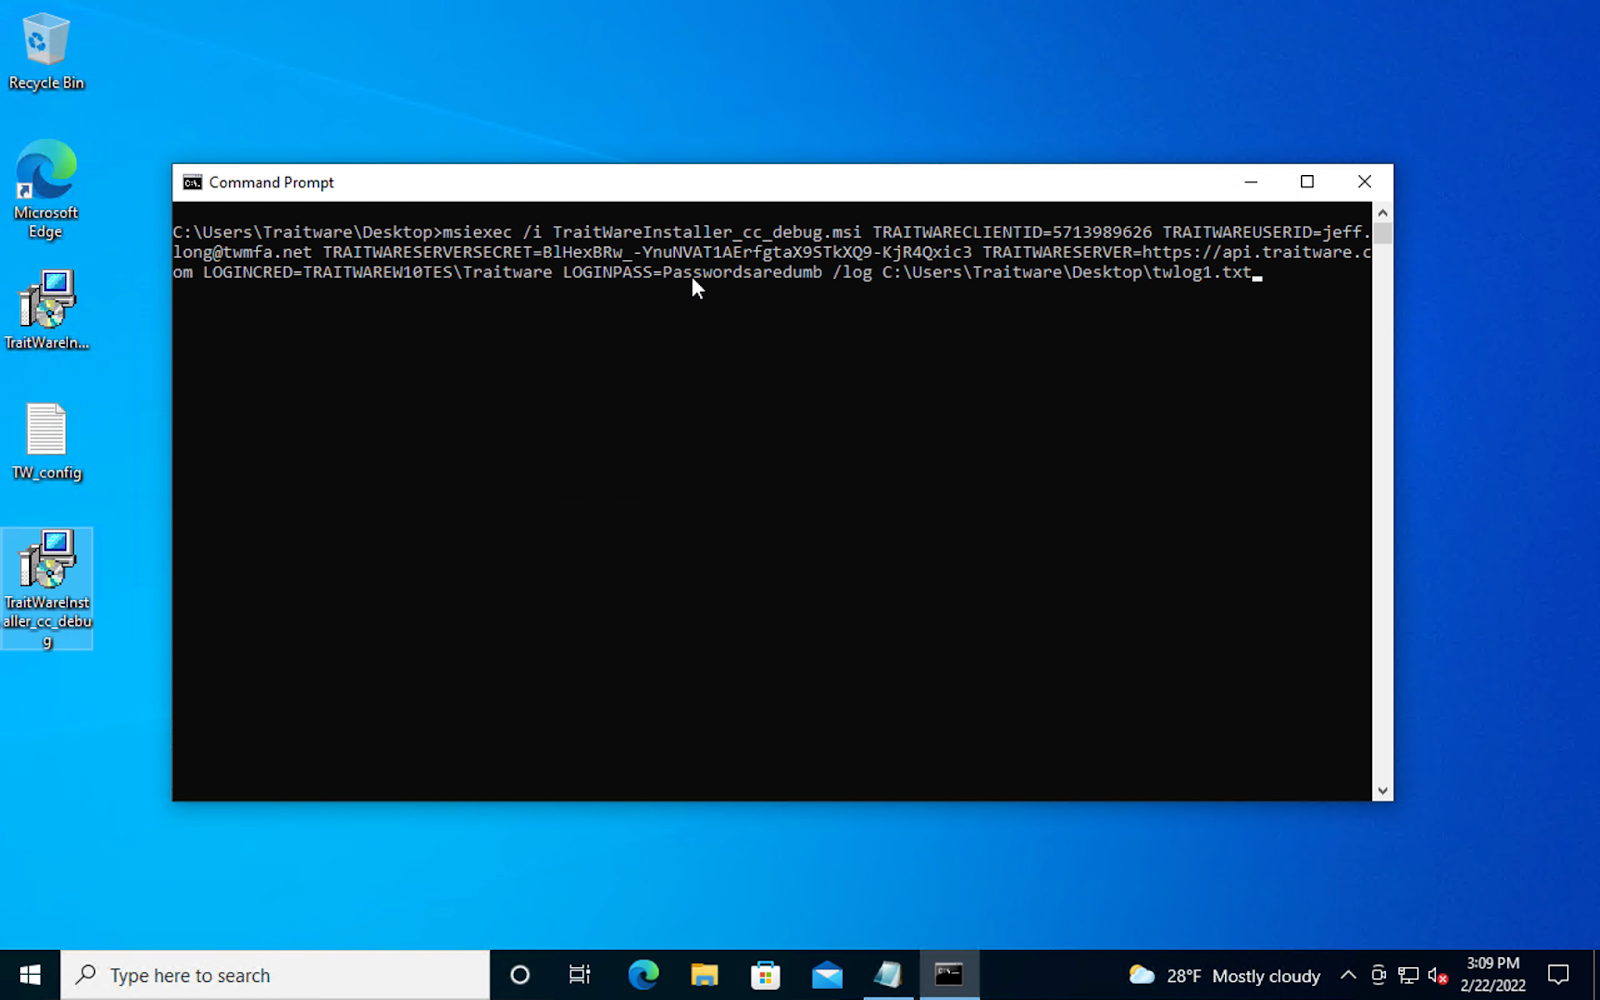
The TraitWare installer will open and be pre-populated with the attributes entered in the command.
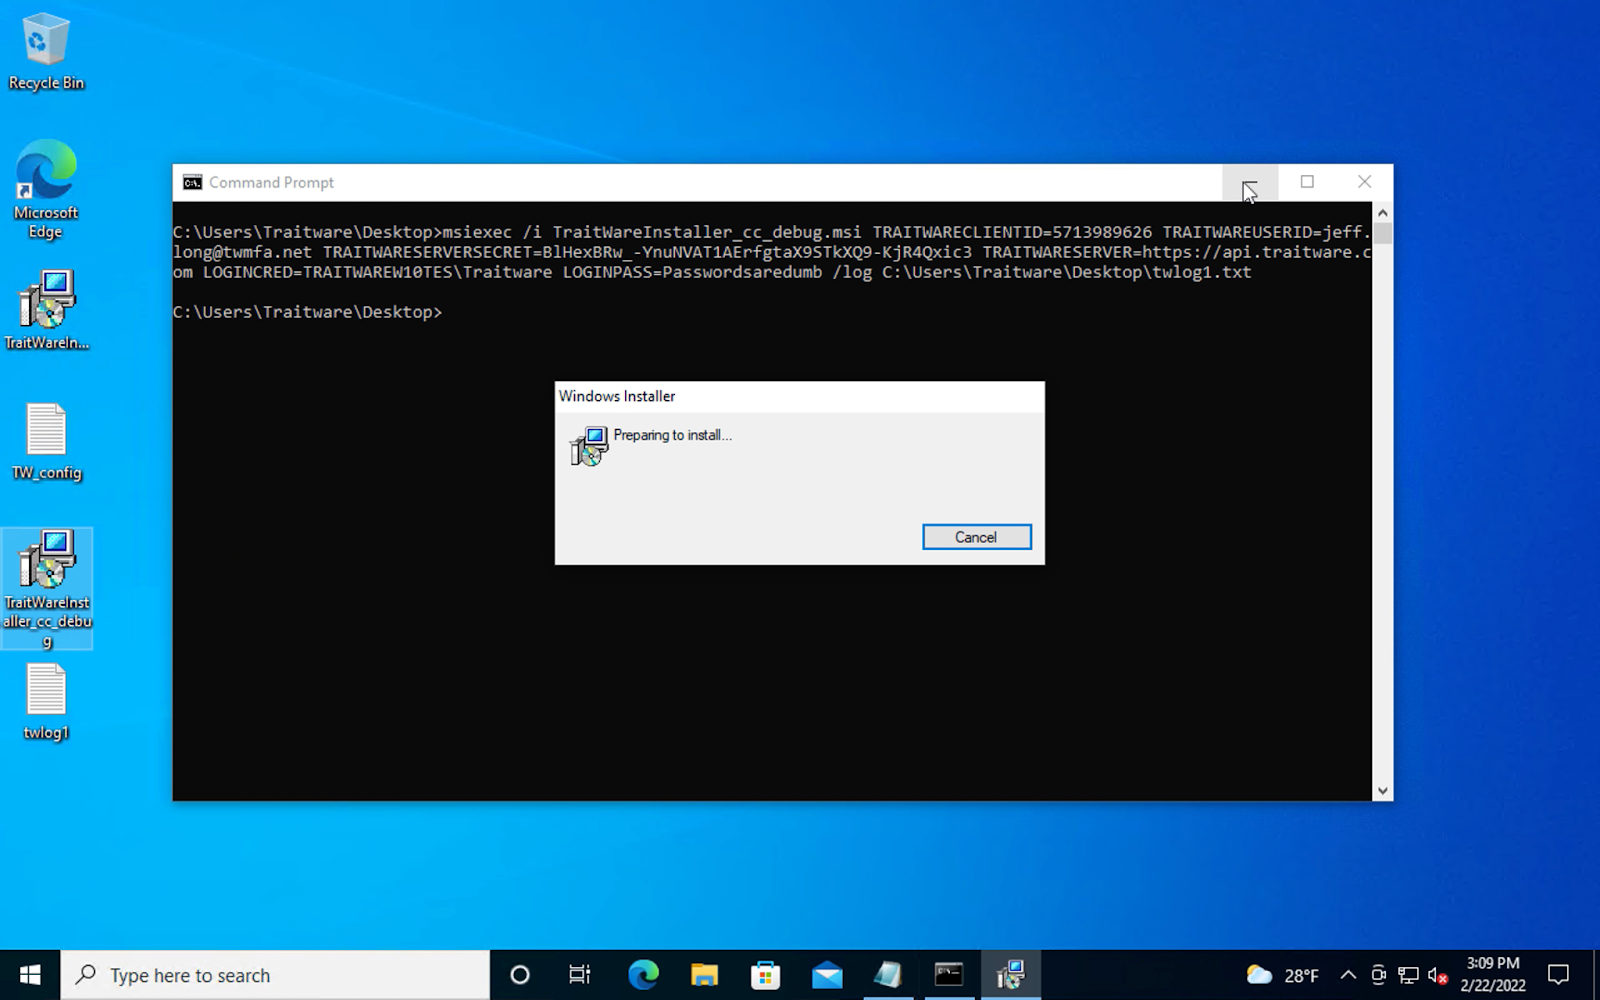
Click Next
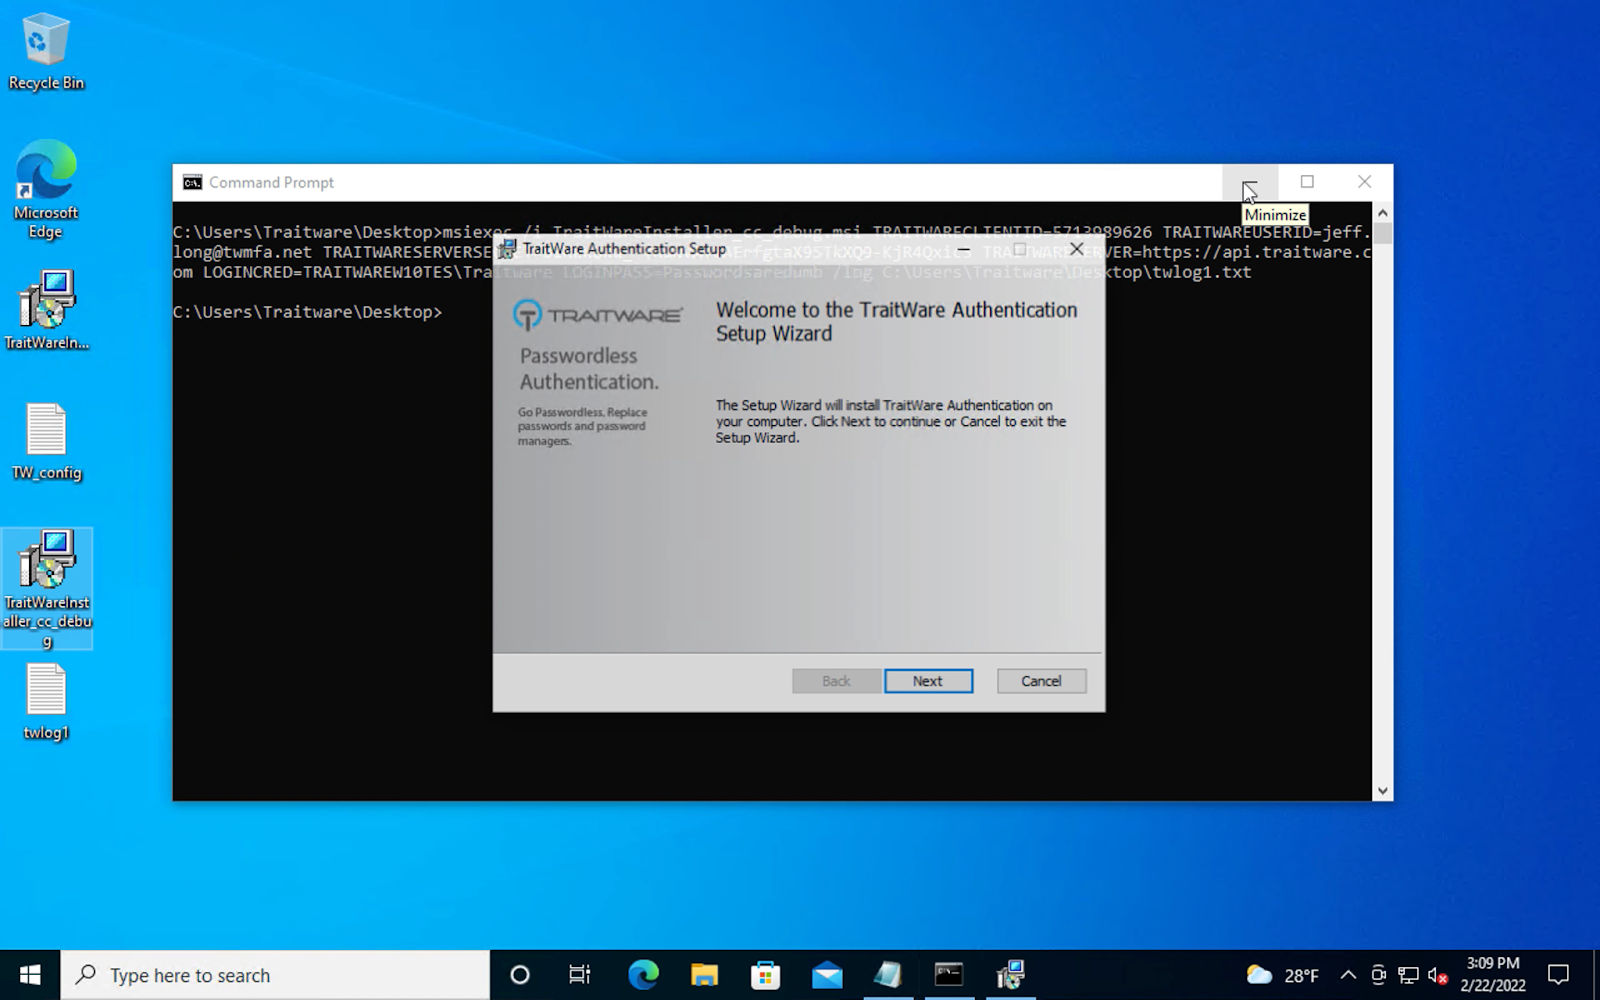
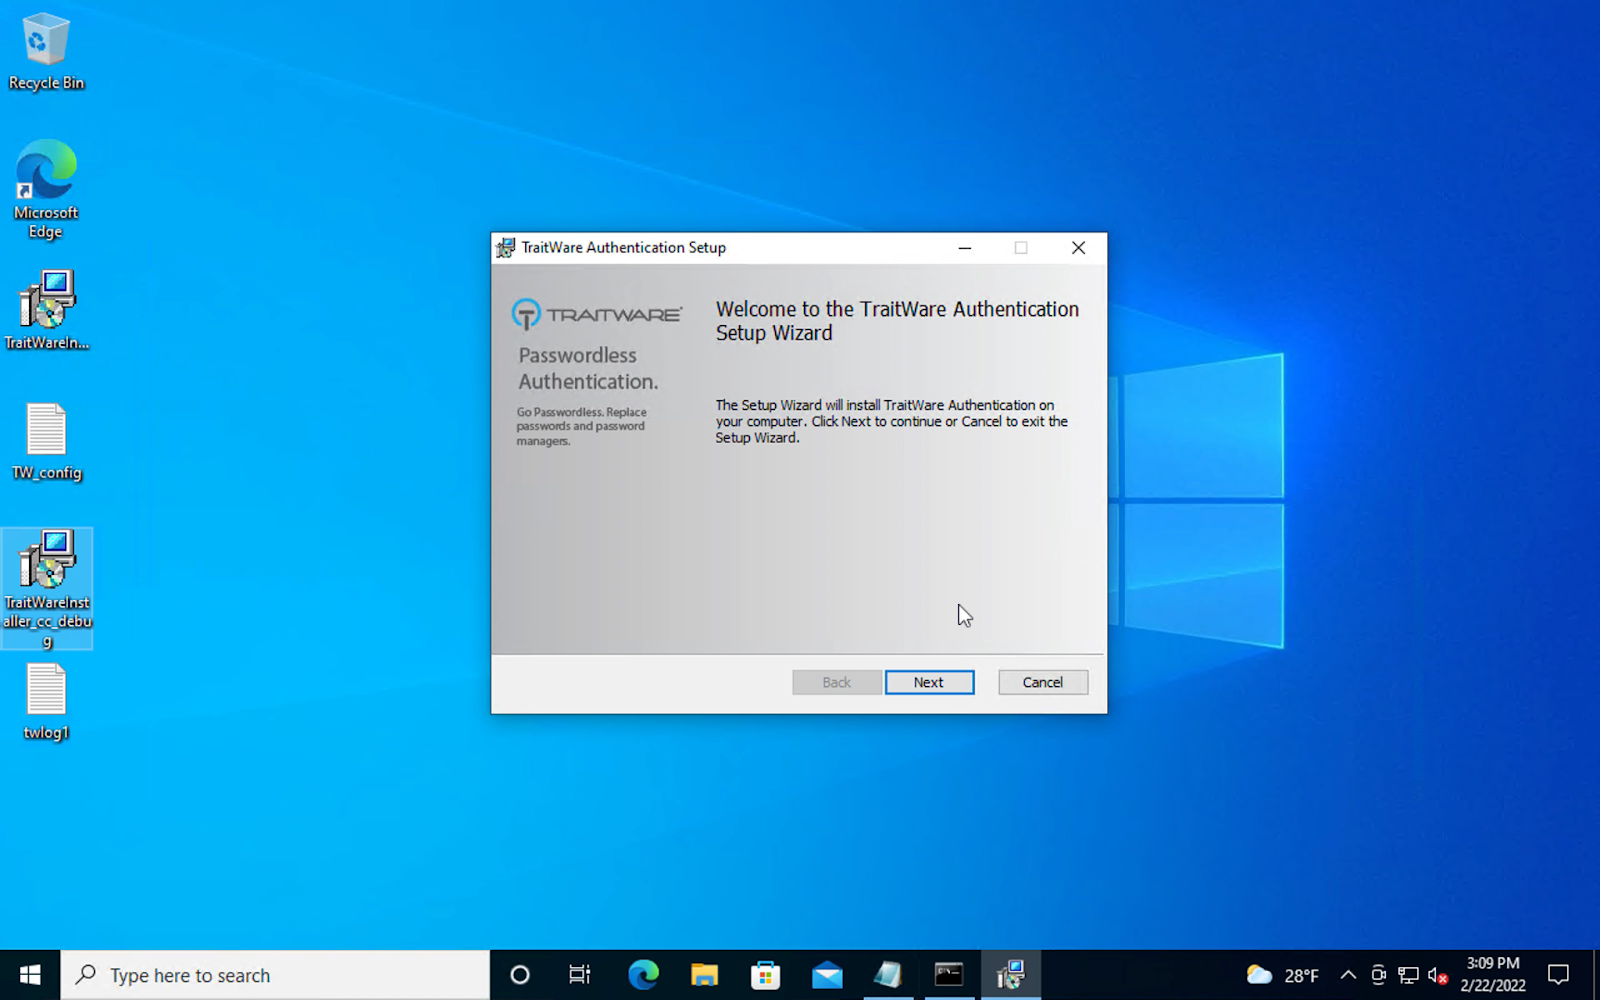
Click Next to continue with the installation.
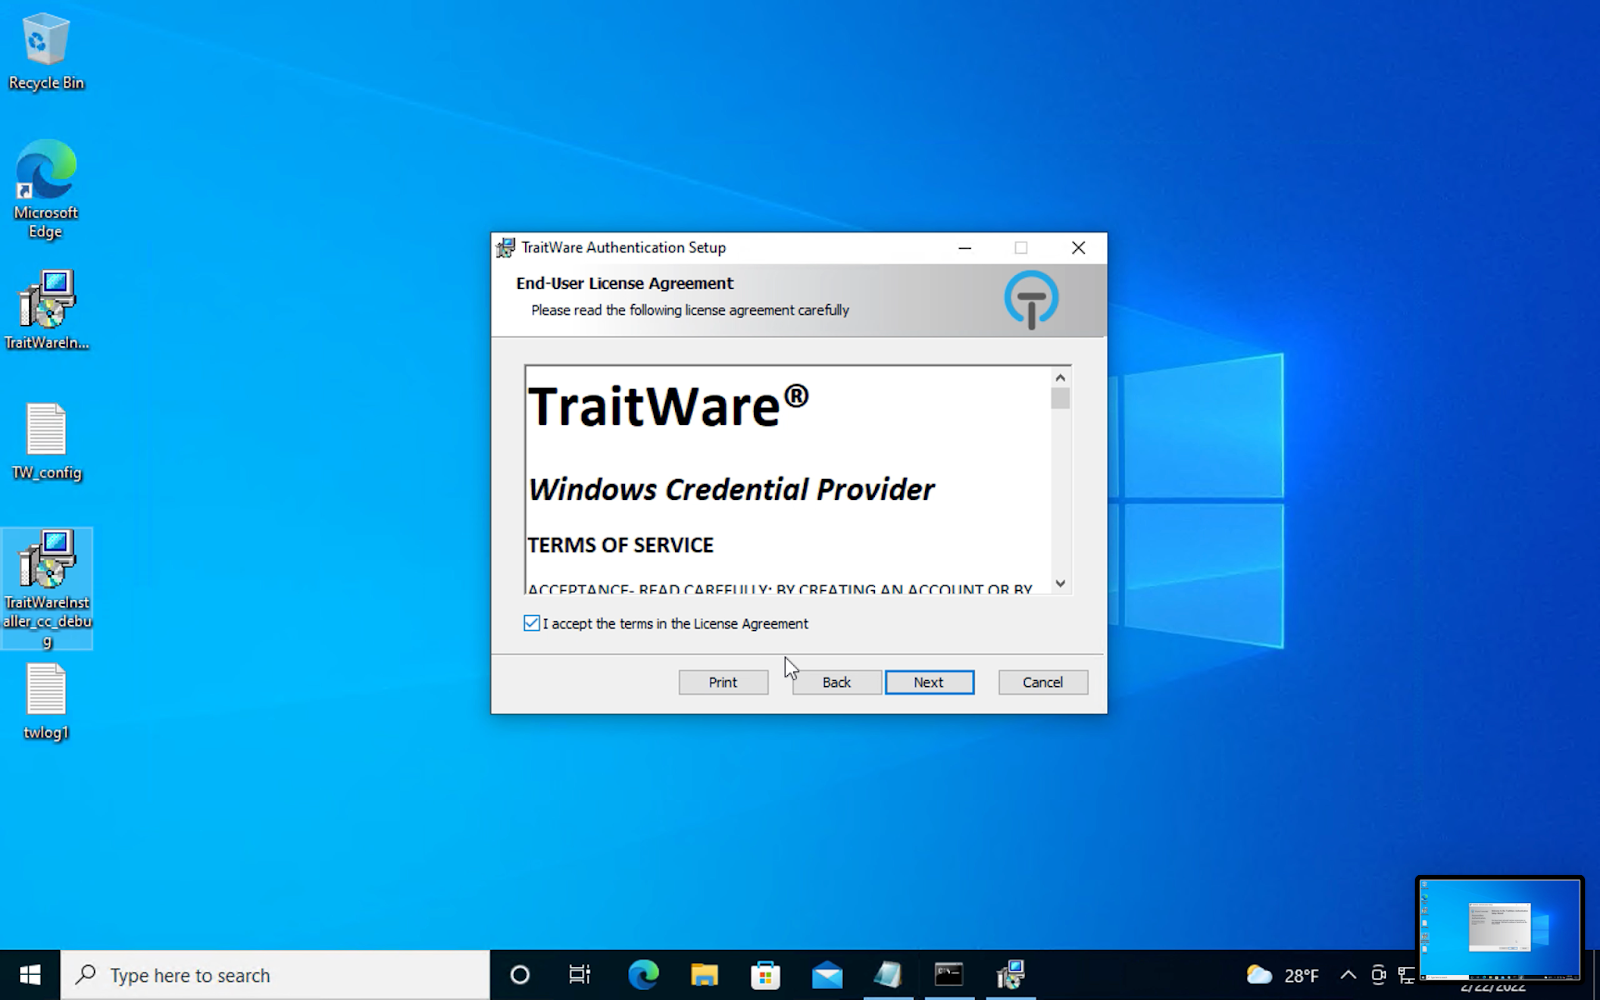
Read the EULA and accept the terms of the License Agreement.
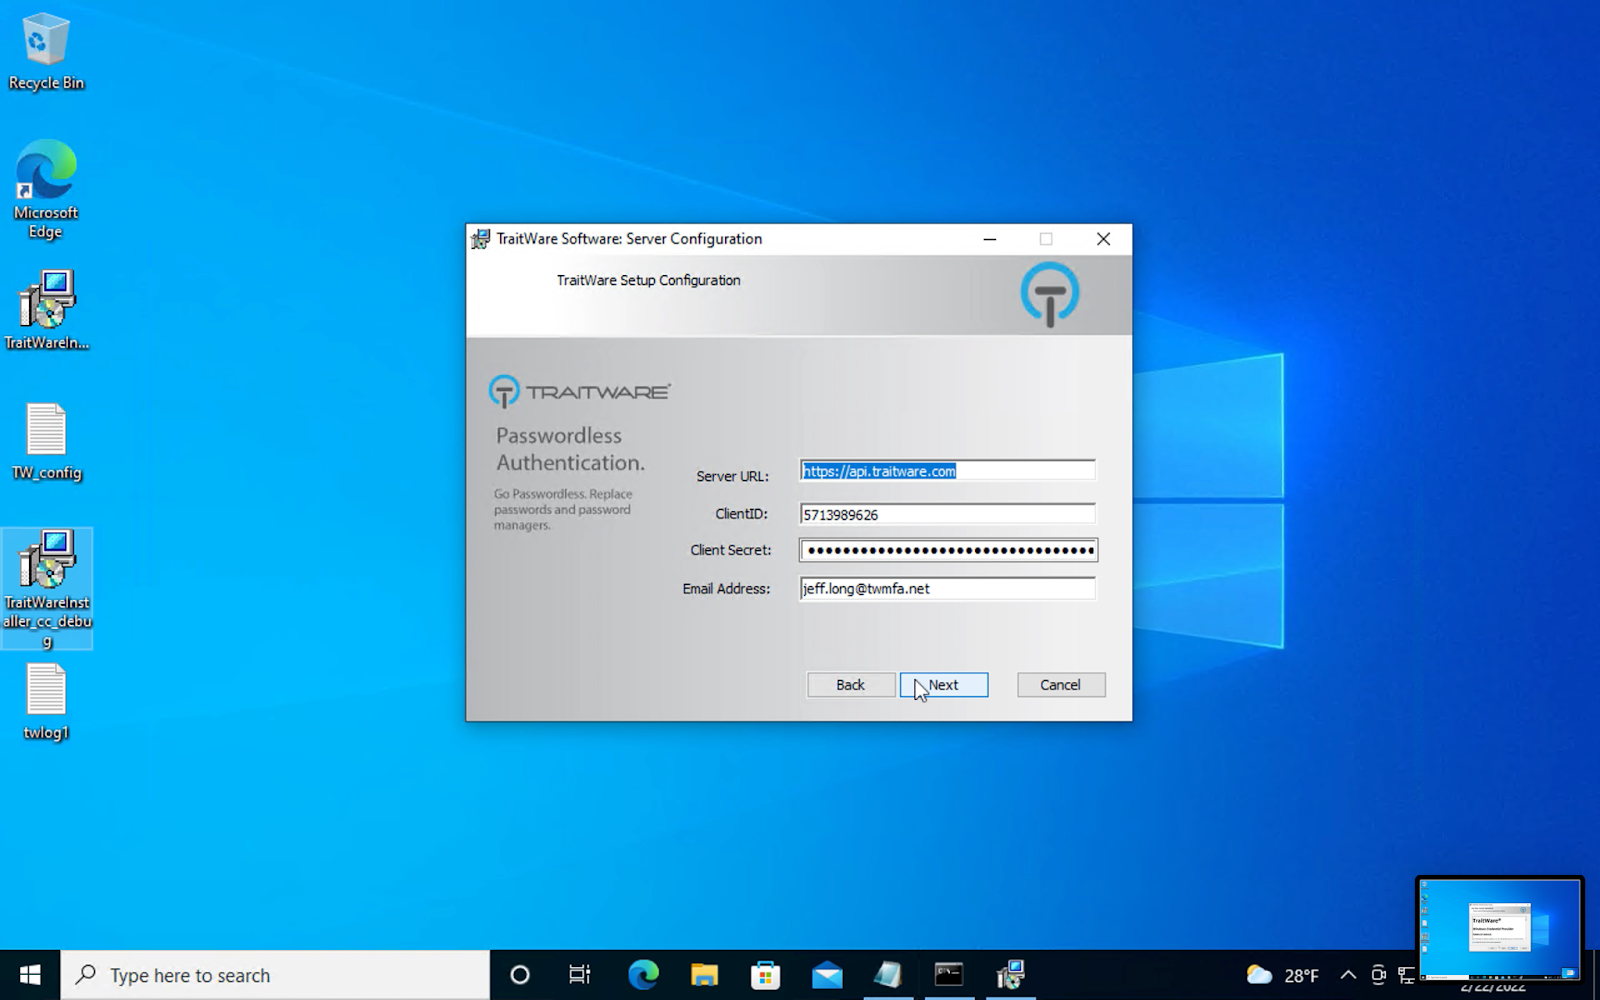
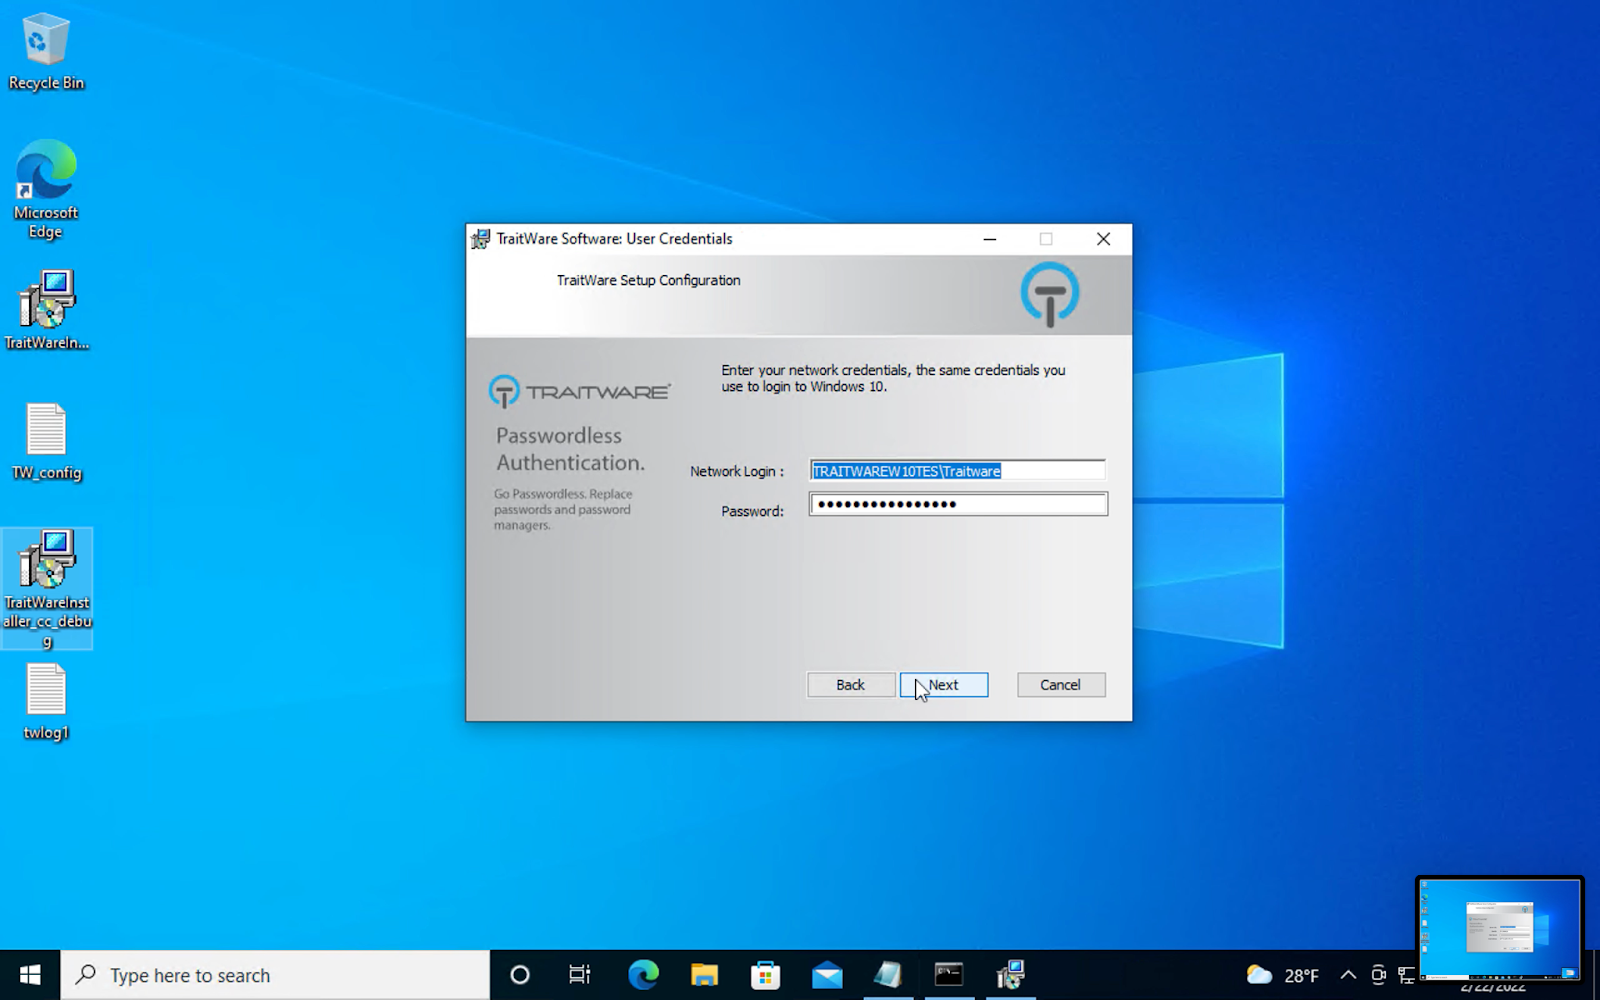
Note: It is best practice to create a strong password prior to the installation of WindowsMFA.
TraitWare will prompt for the installation folder. Click next.
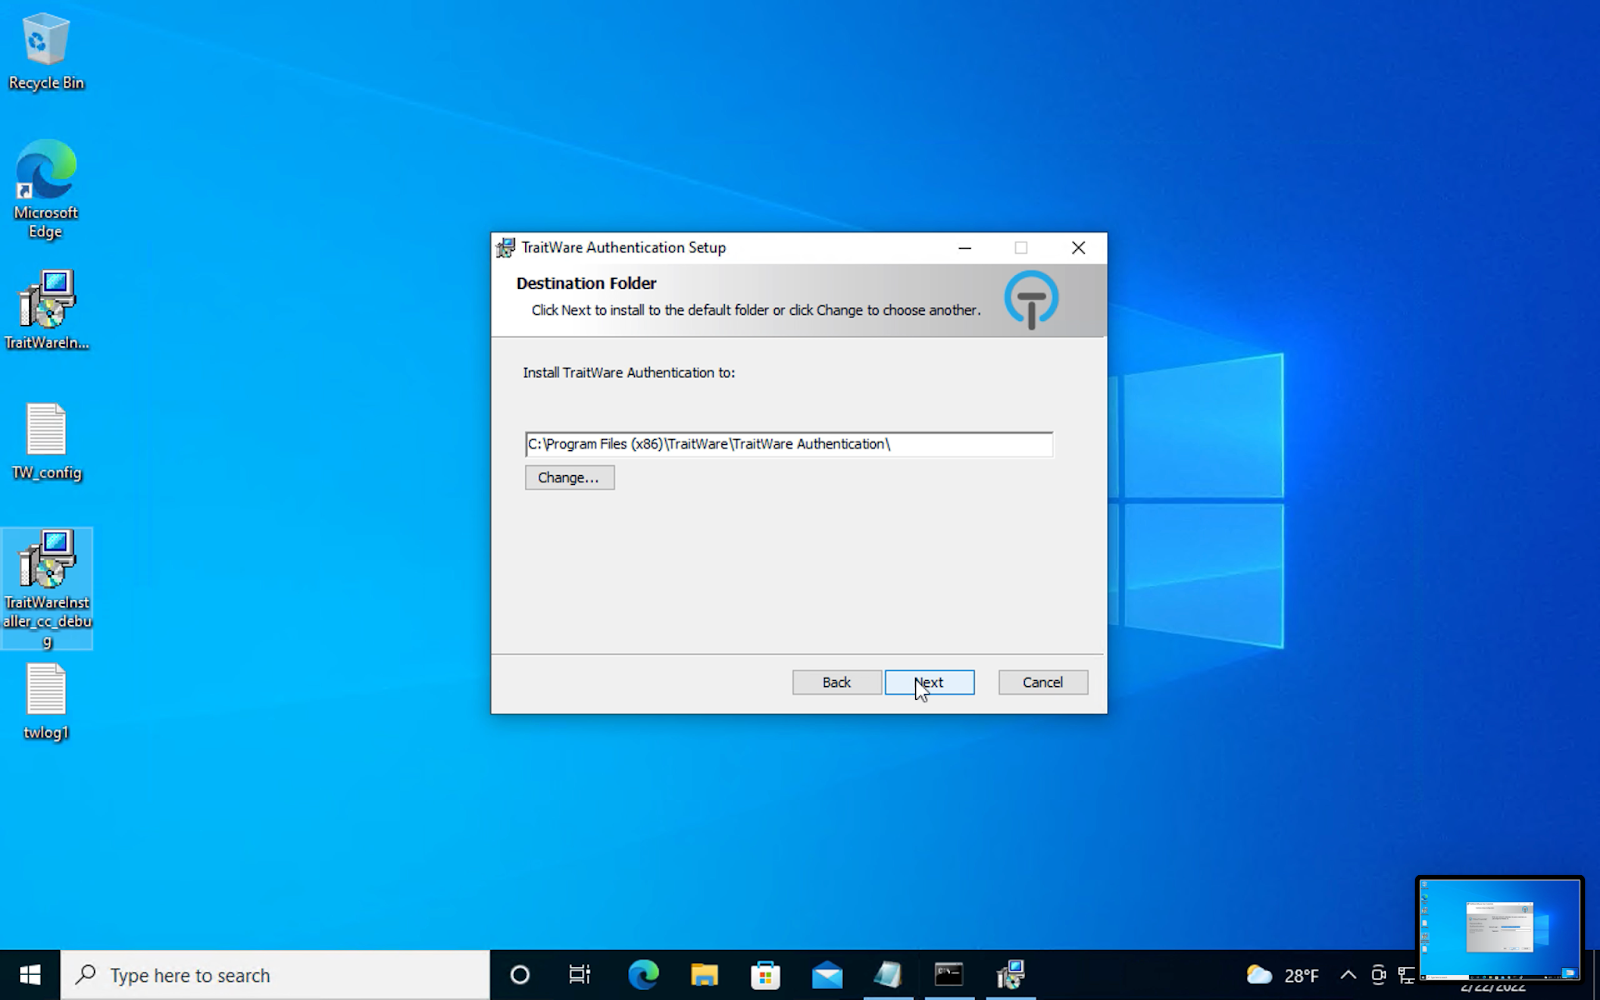
Click Install.
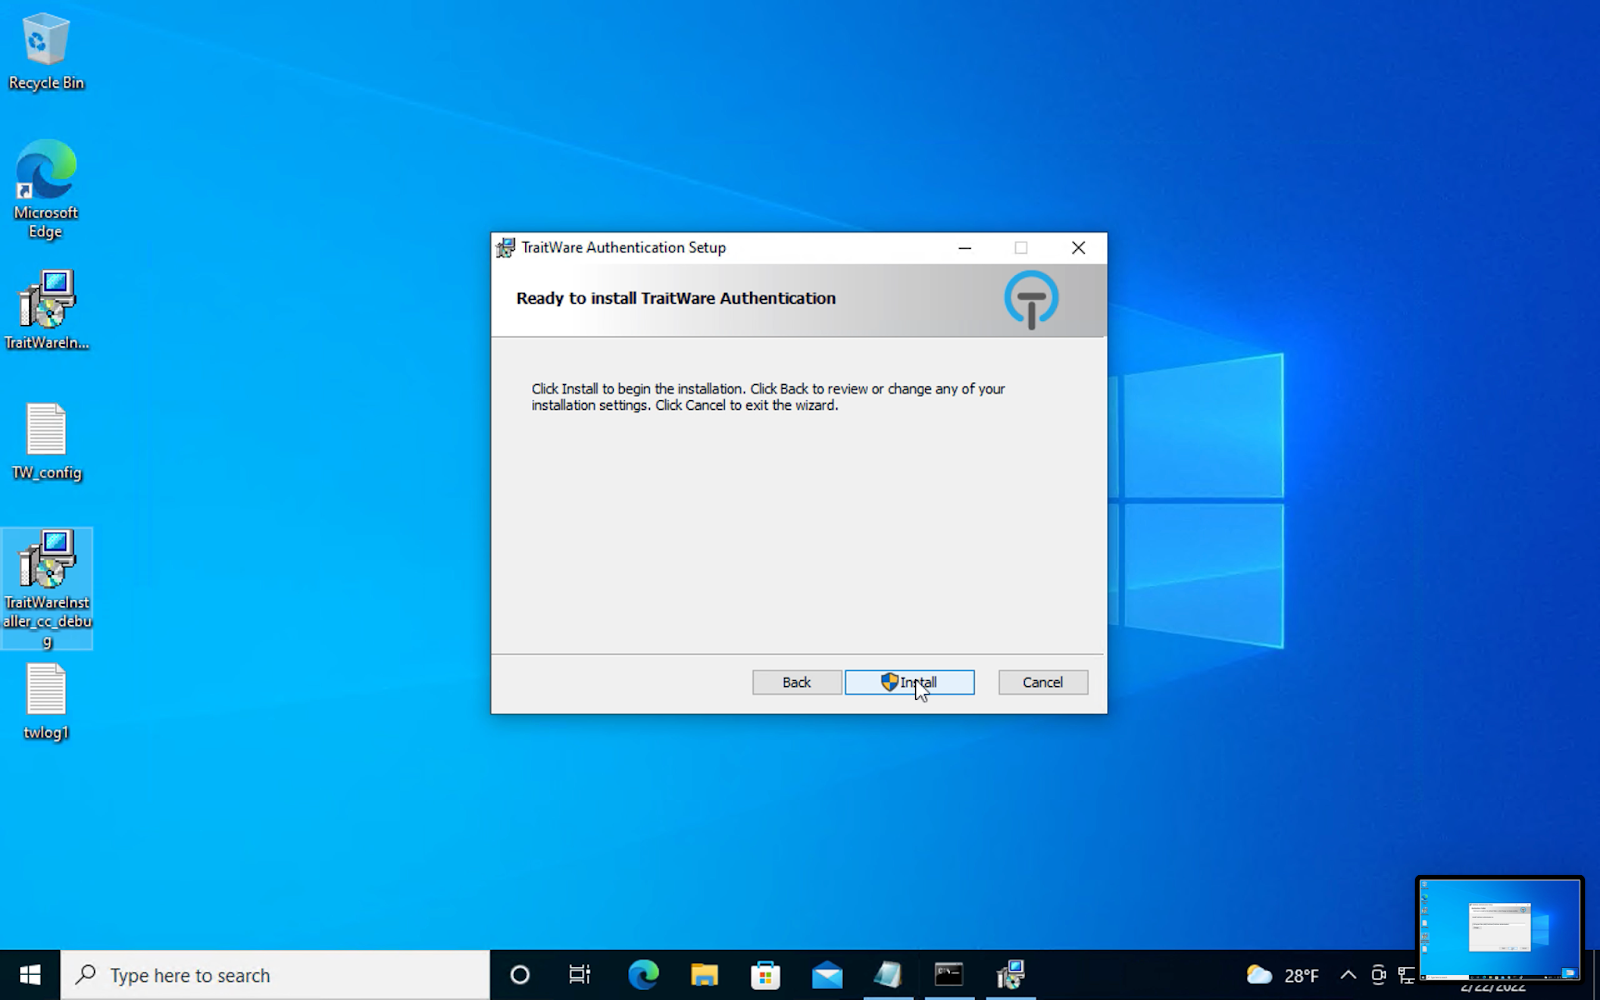
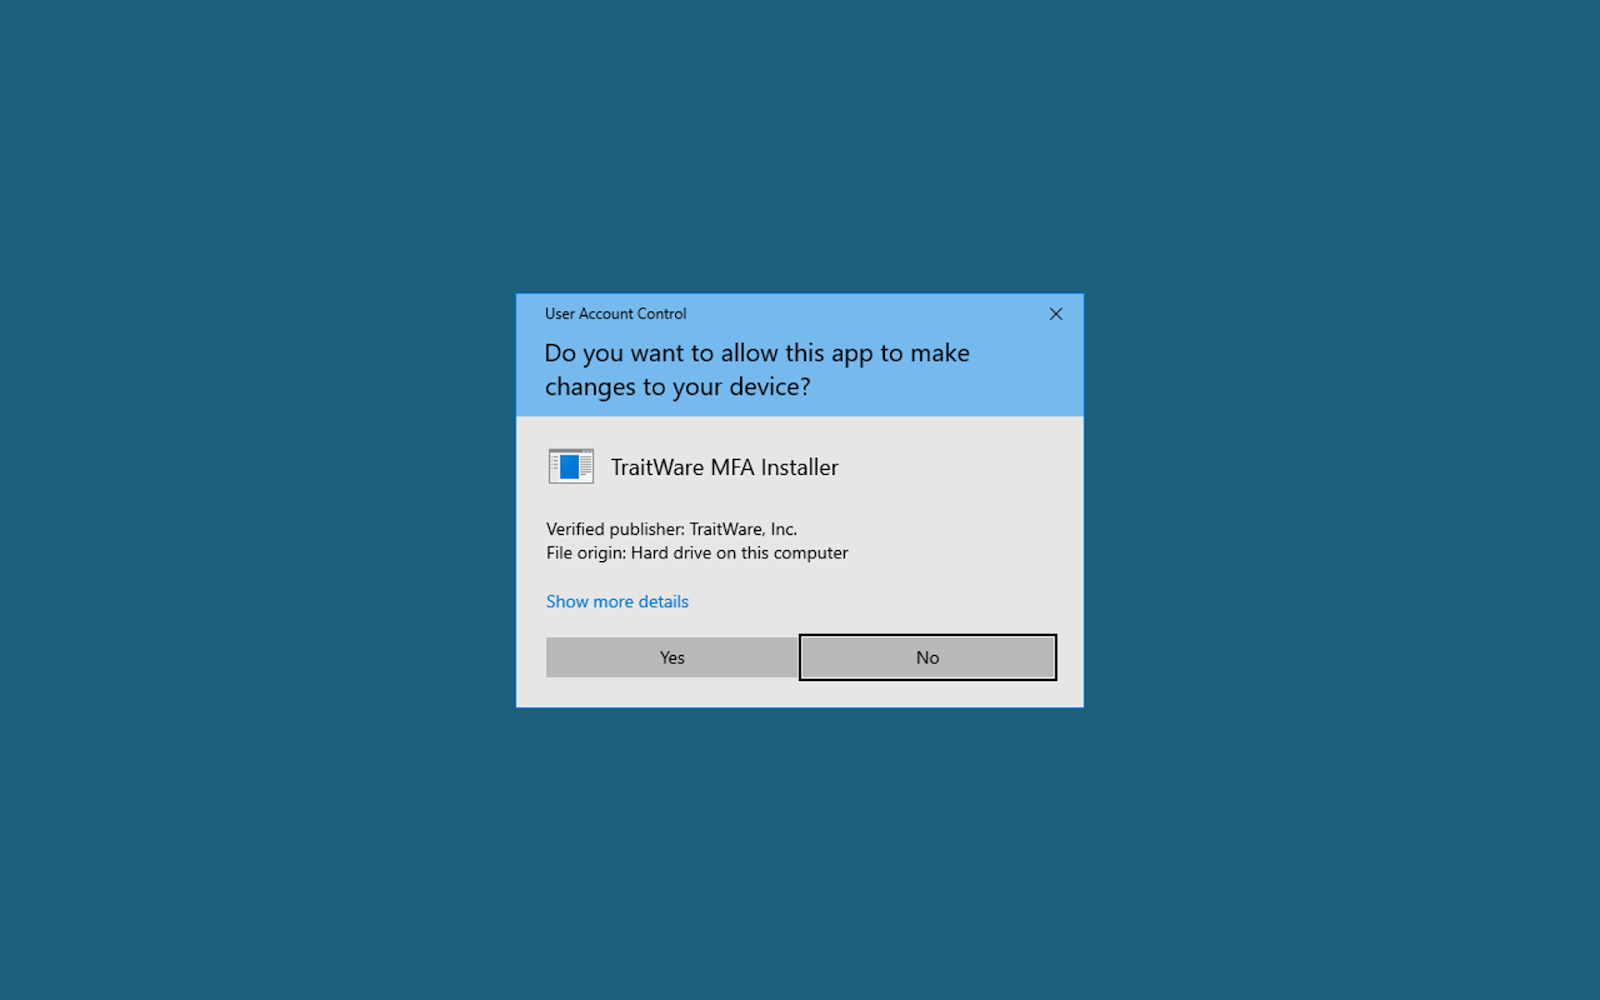
Allow App to make changes on your device? Select Yes.
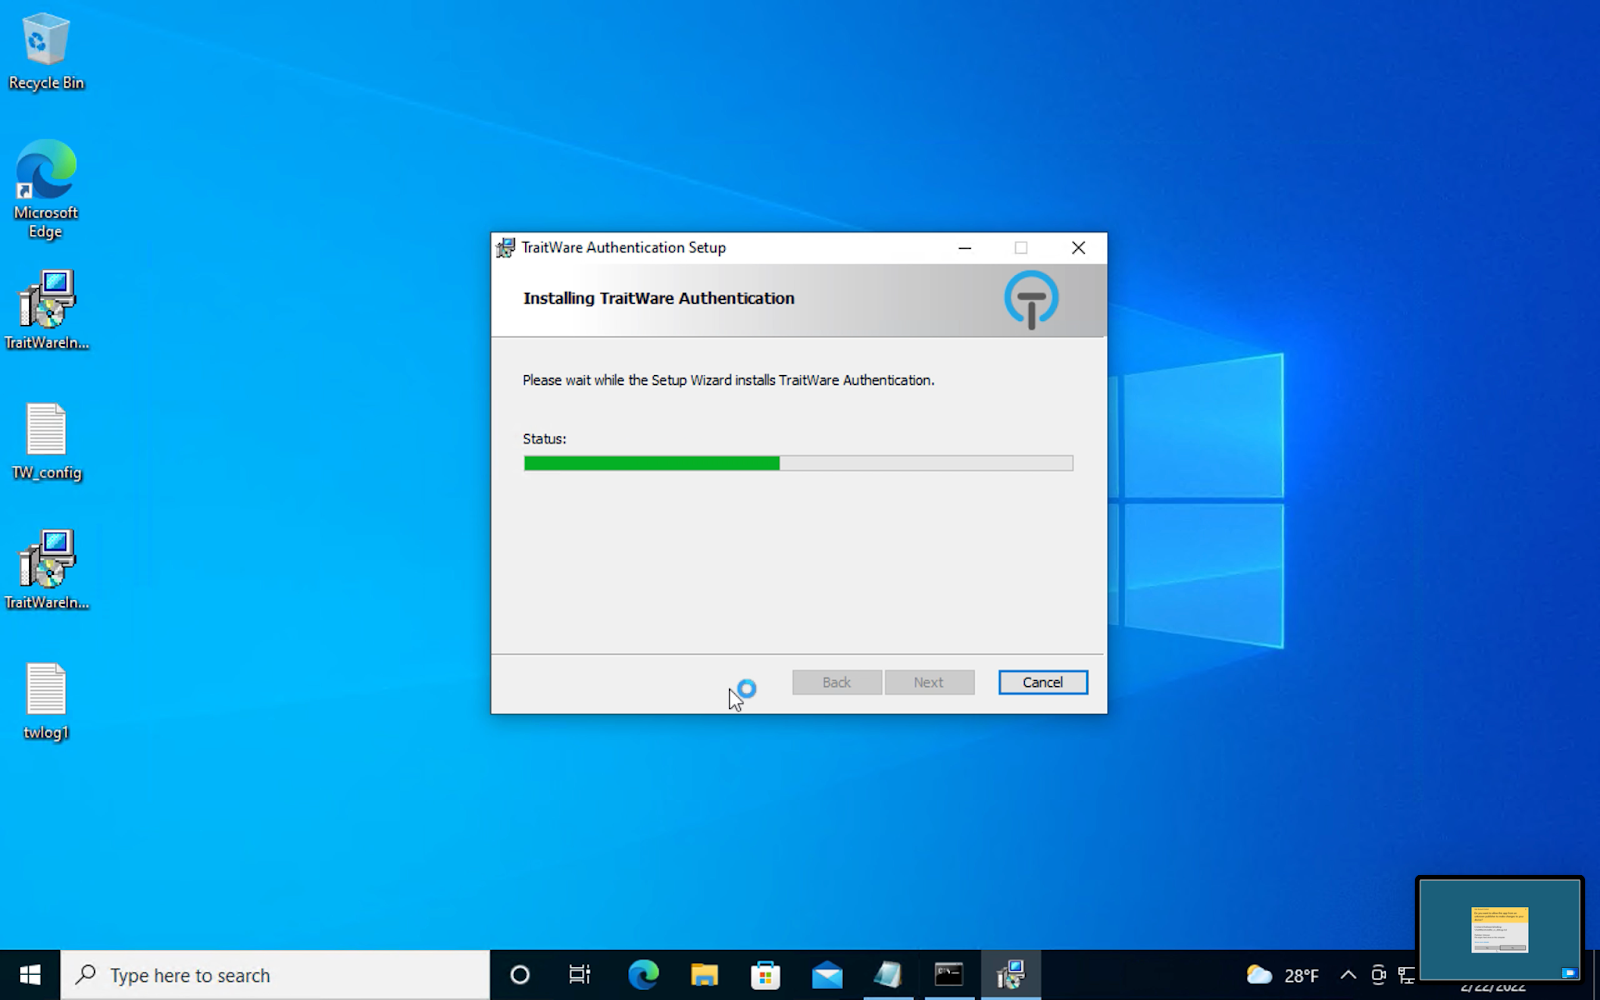
Installation will begin.

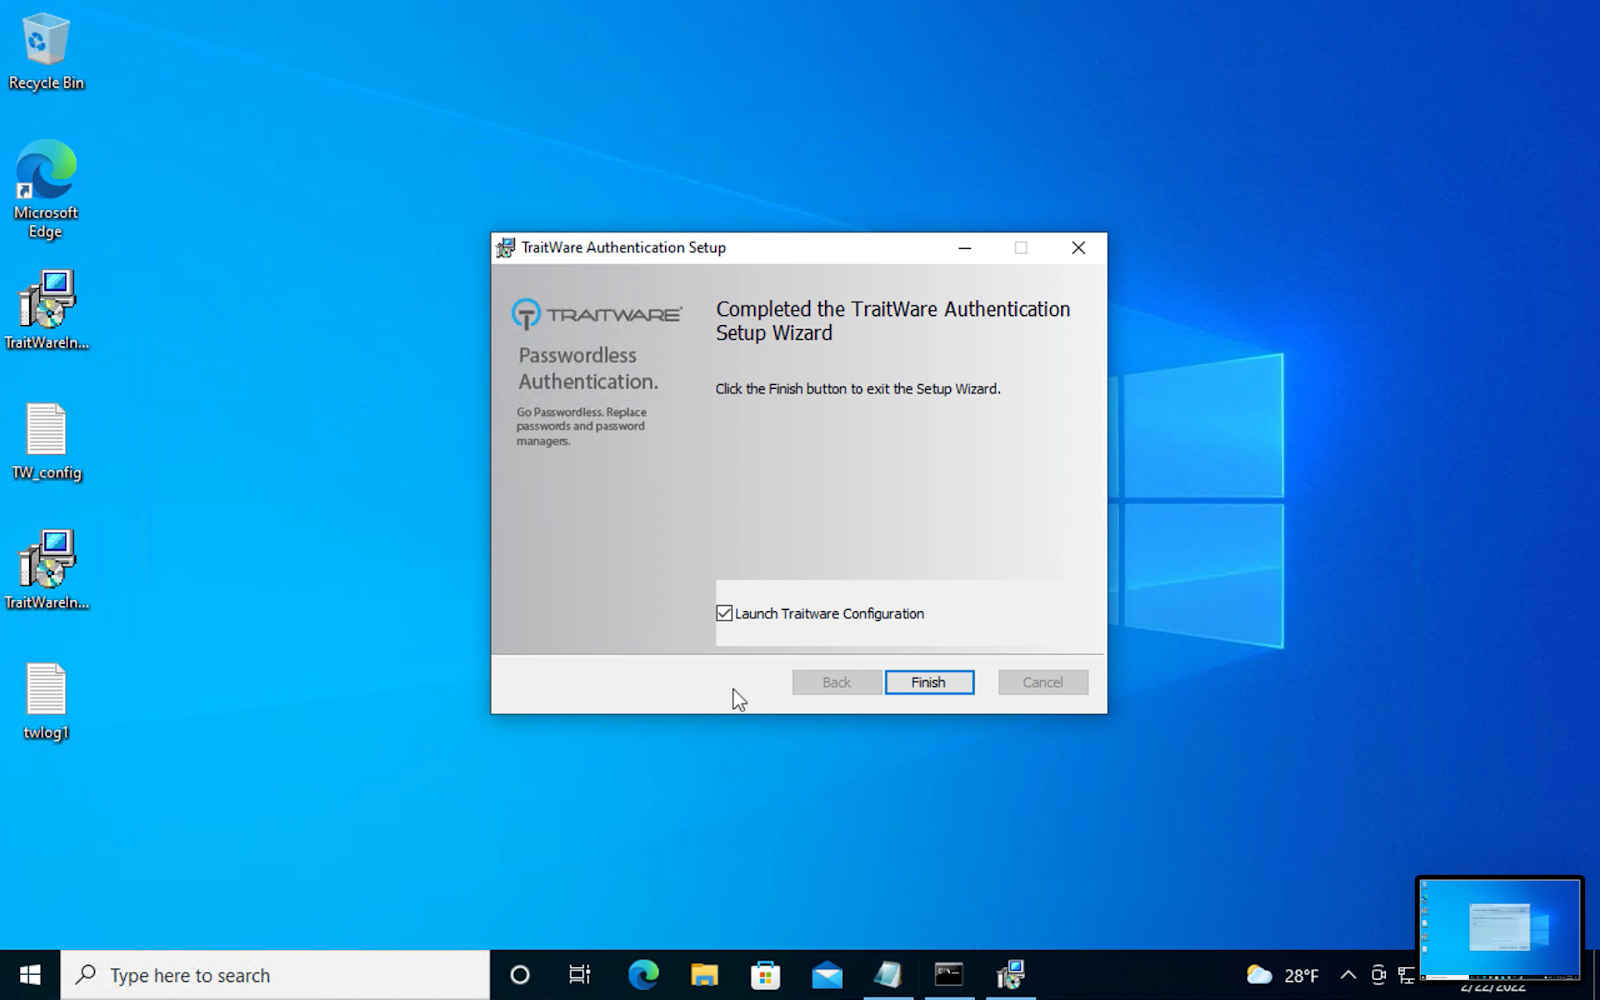
When the installation completes, click Finish.
TraitWare Configuration will open. Click Scan Configuration to confirm the settings.

Successful installation. TraitWare is configured. You are now ready to sign into your Windows Desktop with Passwordless MFA.

Using Windows MFA
Online Mode
Click the arrow to sign in.

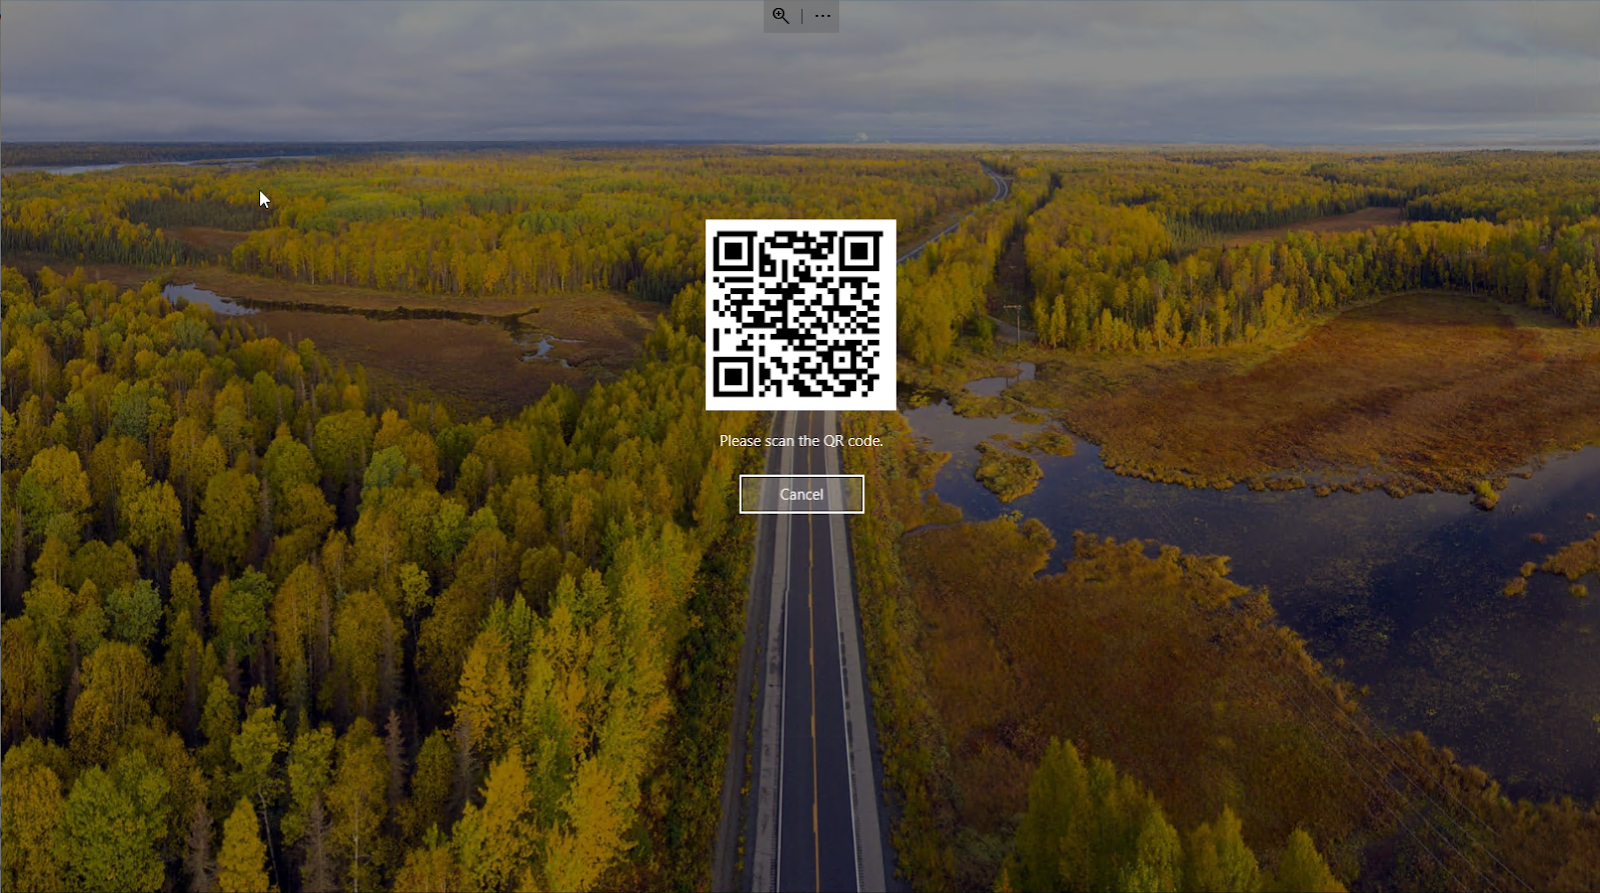
A QR code will present on the screen.

On your mobile device, open the TraitWare App. Select the Account and Scan the QR Code on the screen with your App.
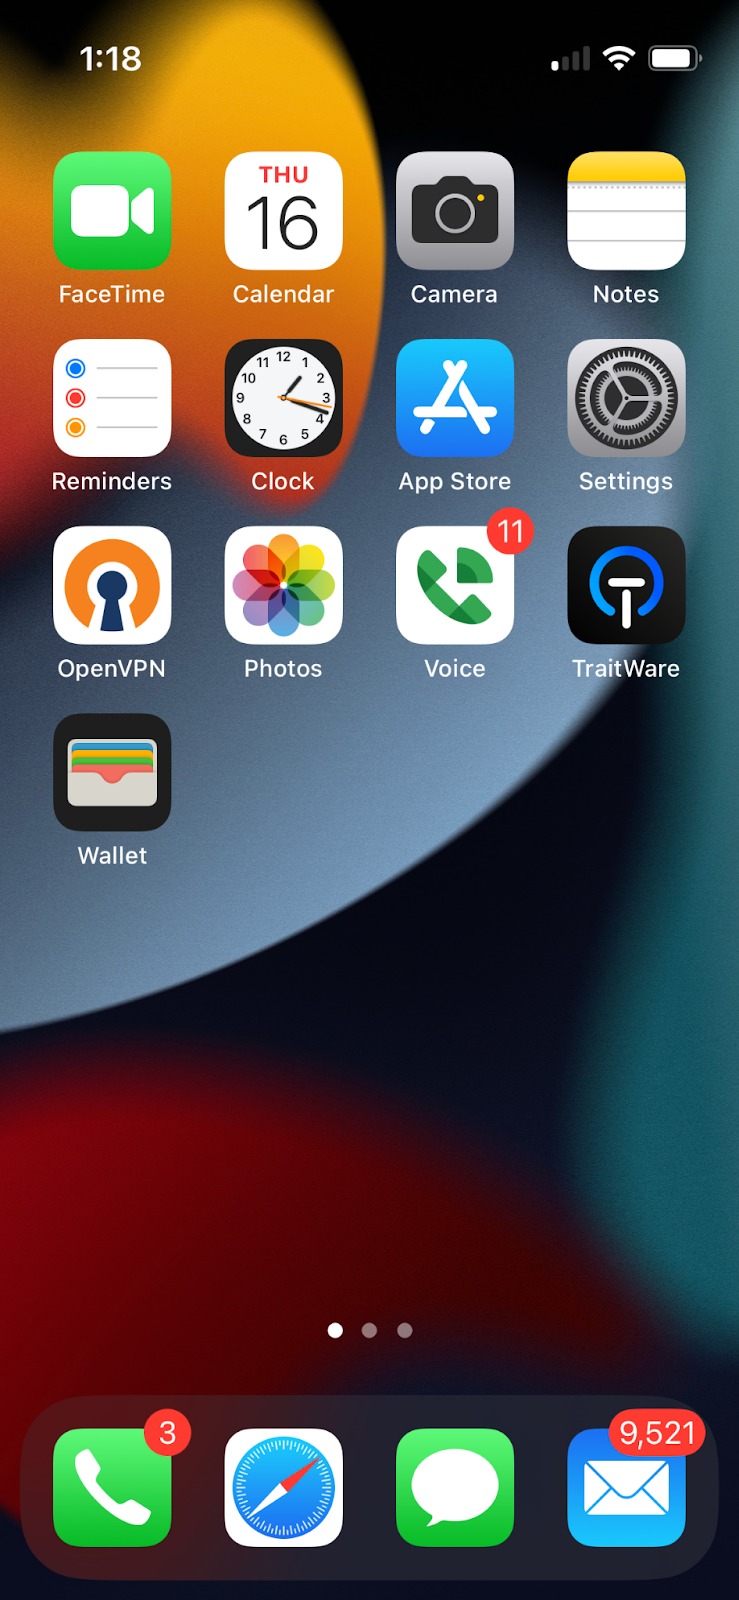

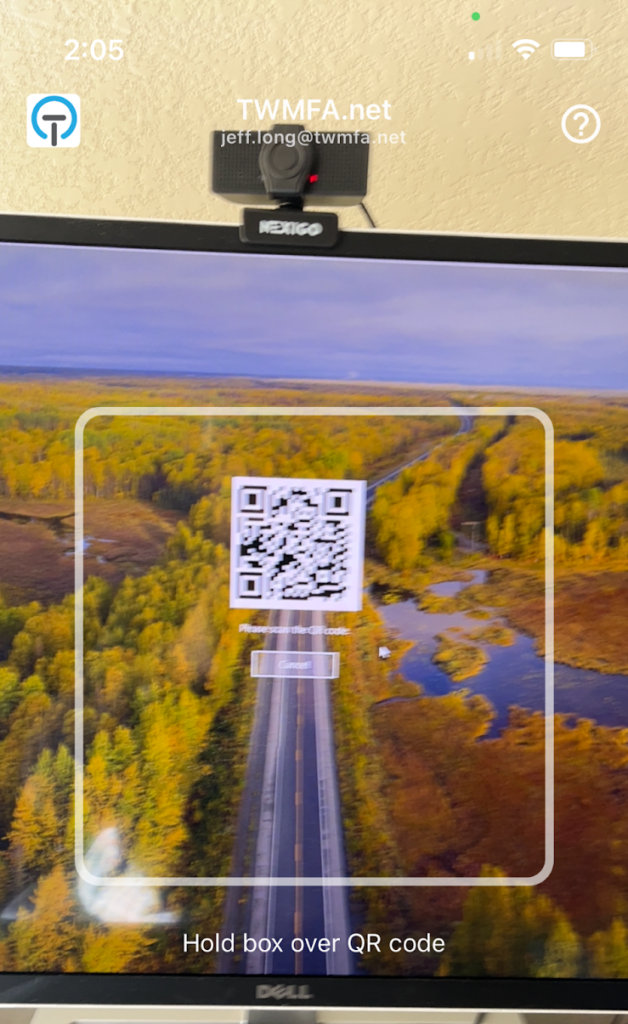
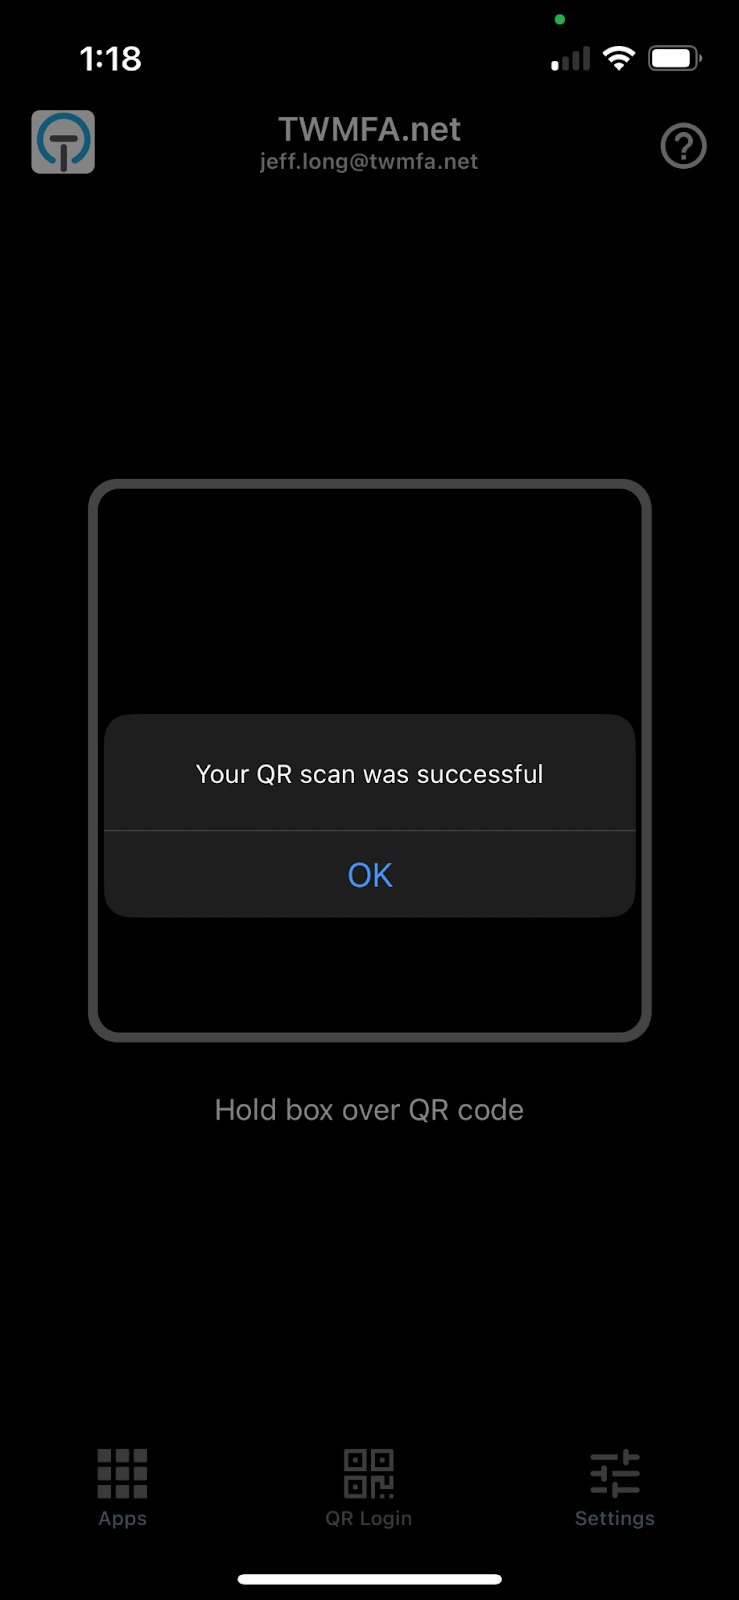
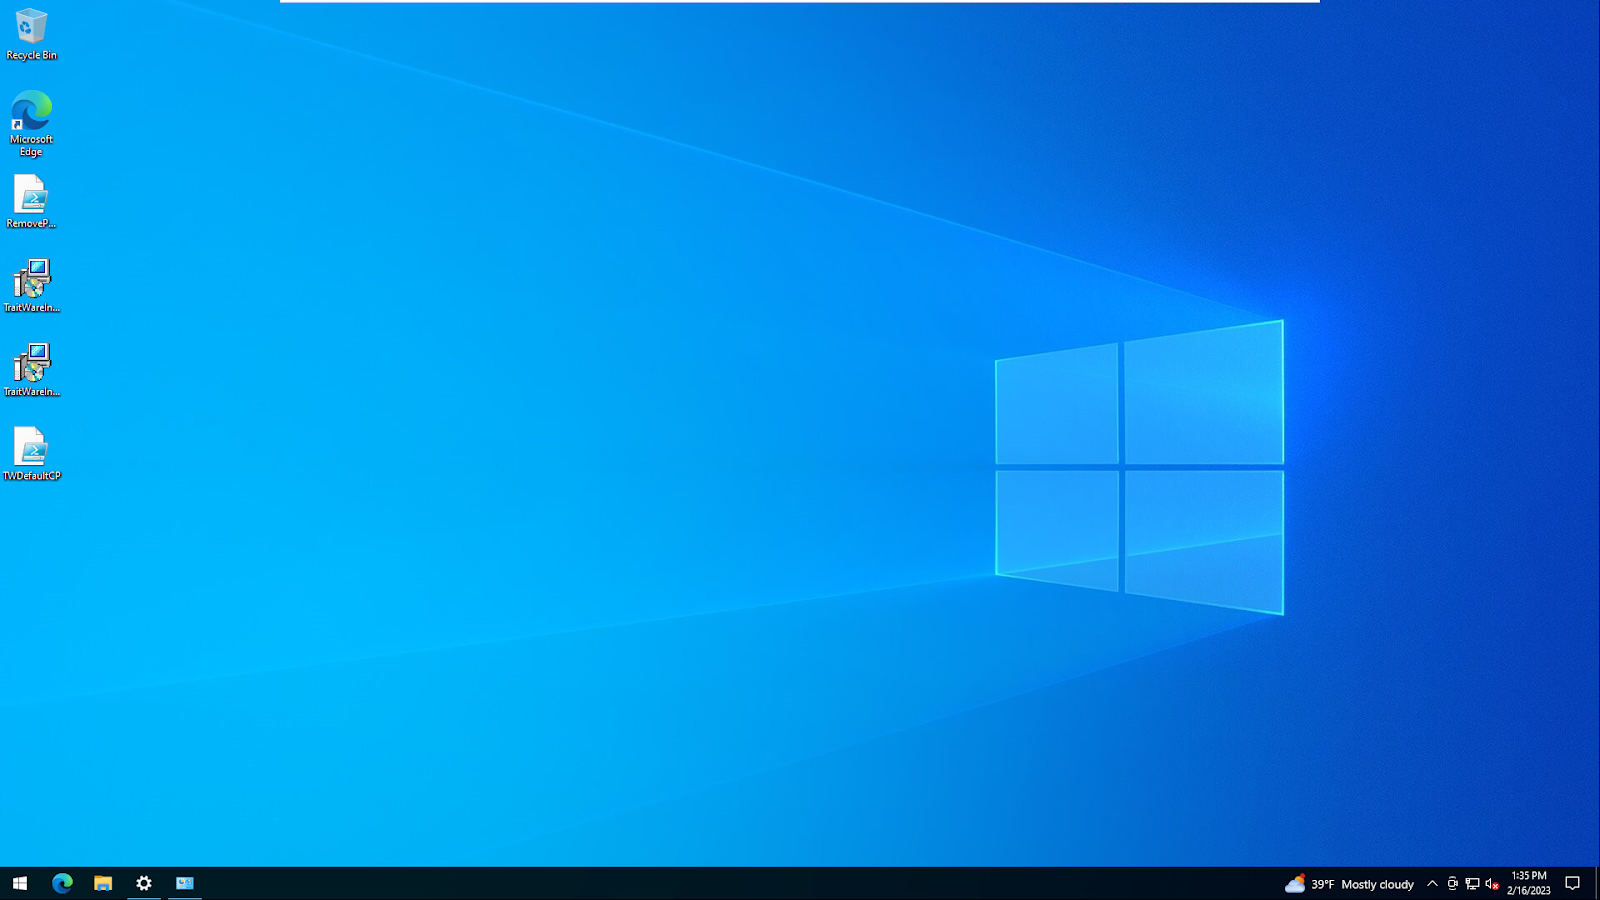
You have now signed into Windows using Passwordless MFA
Offline Mode
Note: You must have one successful ONLINE login before you can use Offline Mode.
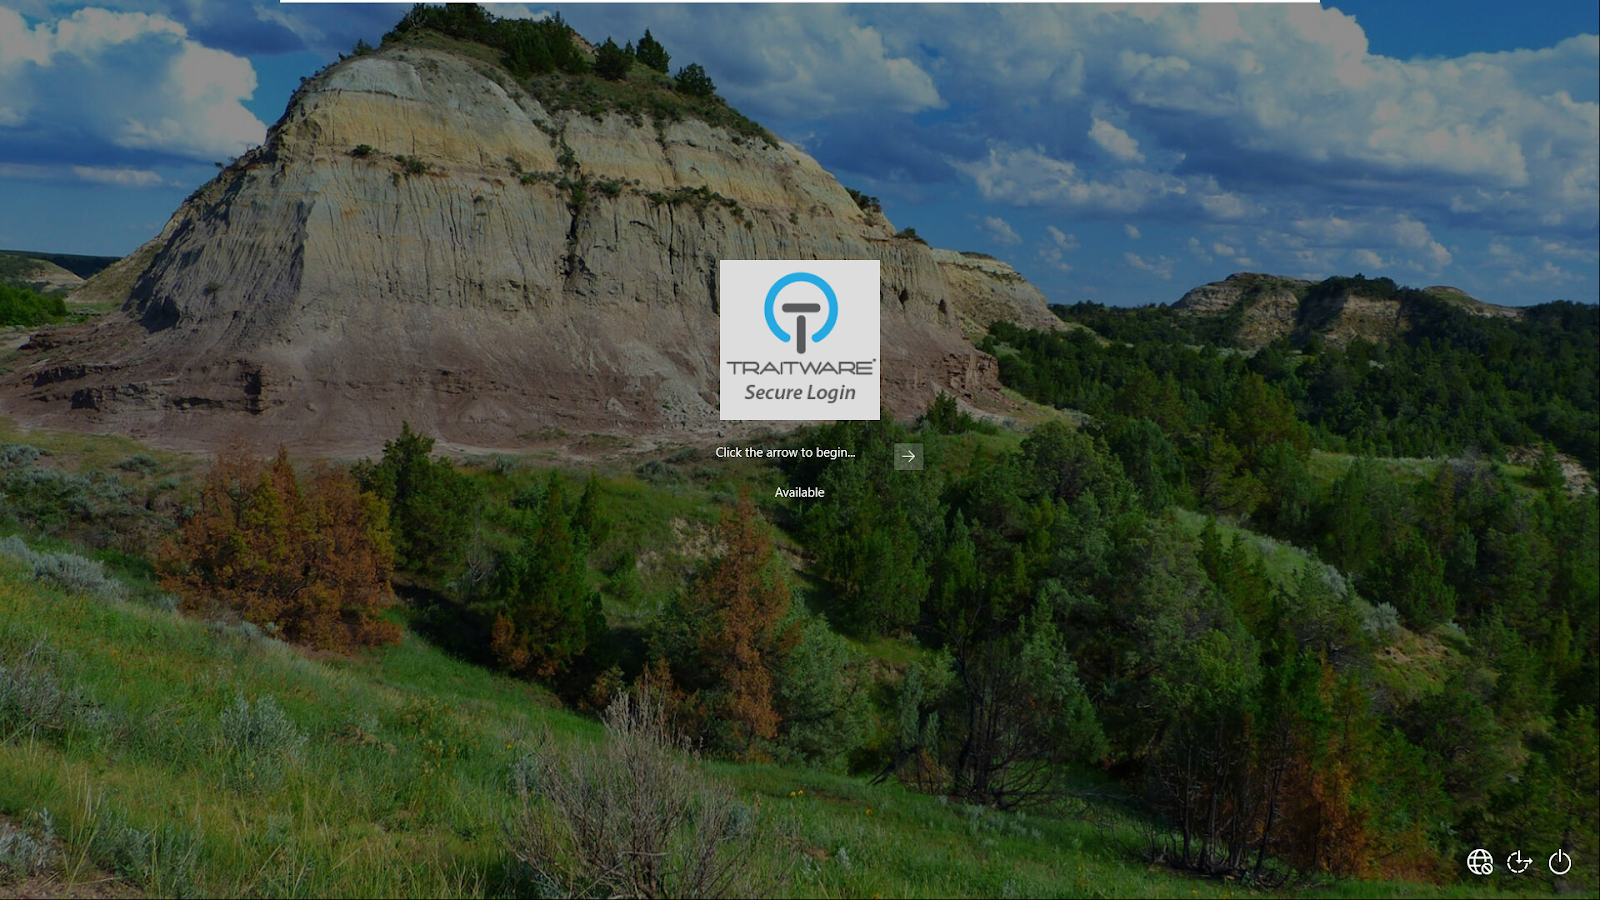
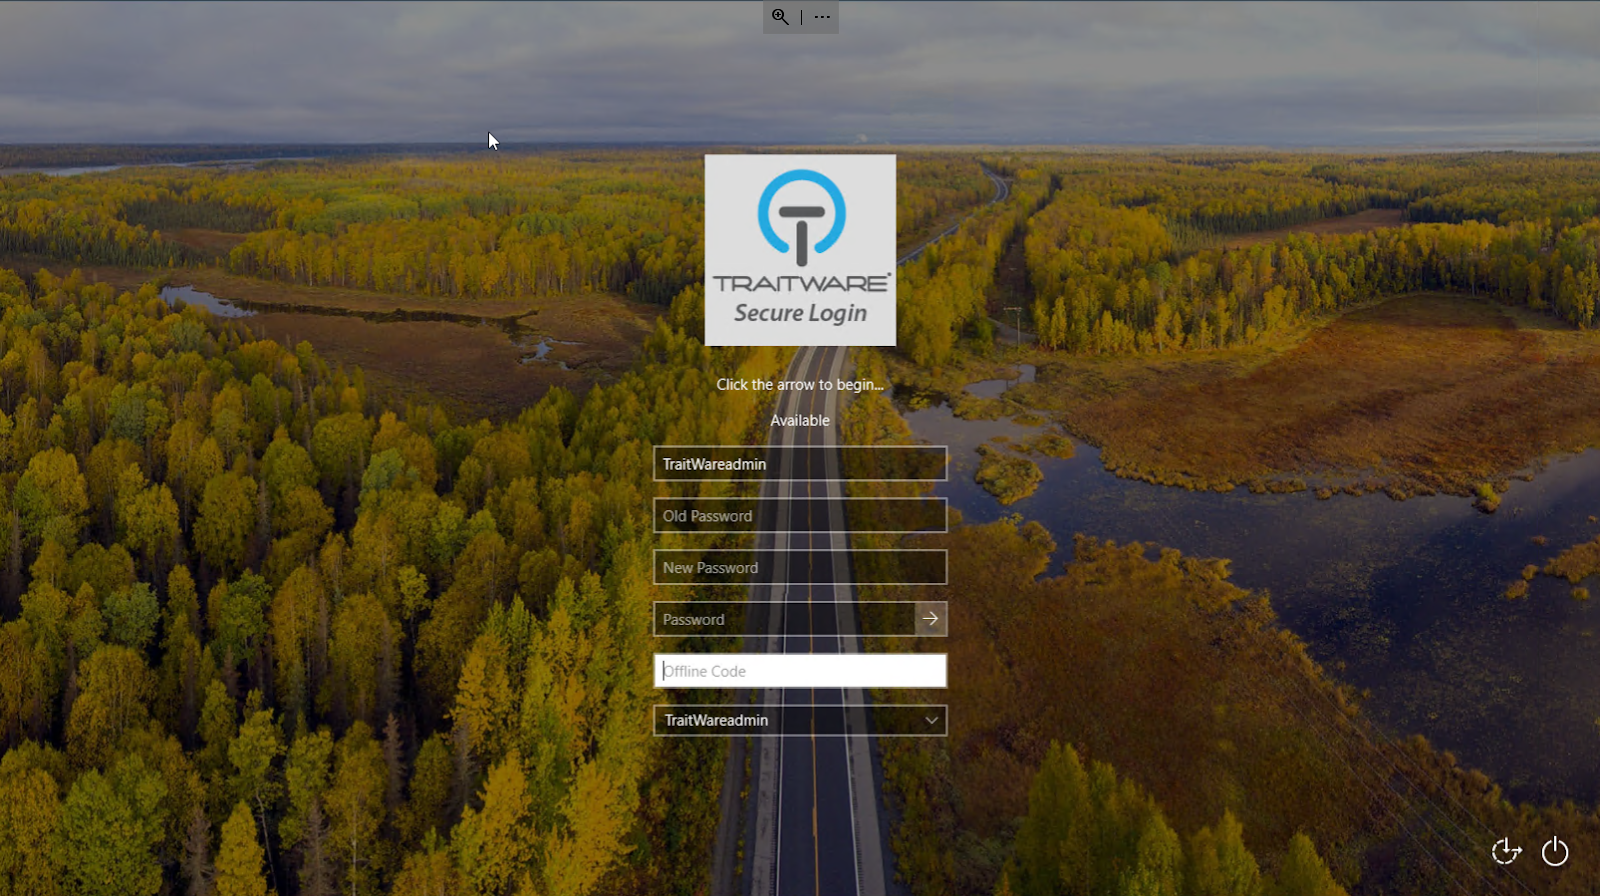
Click the arrow to sign in.
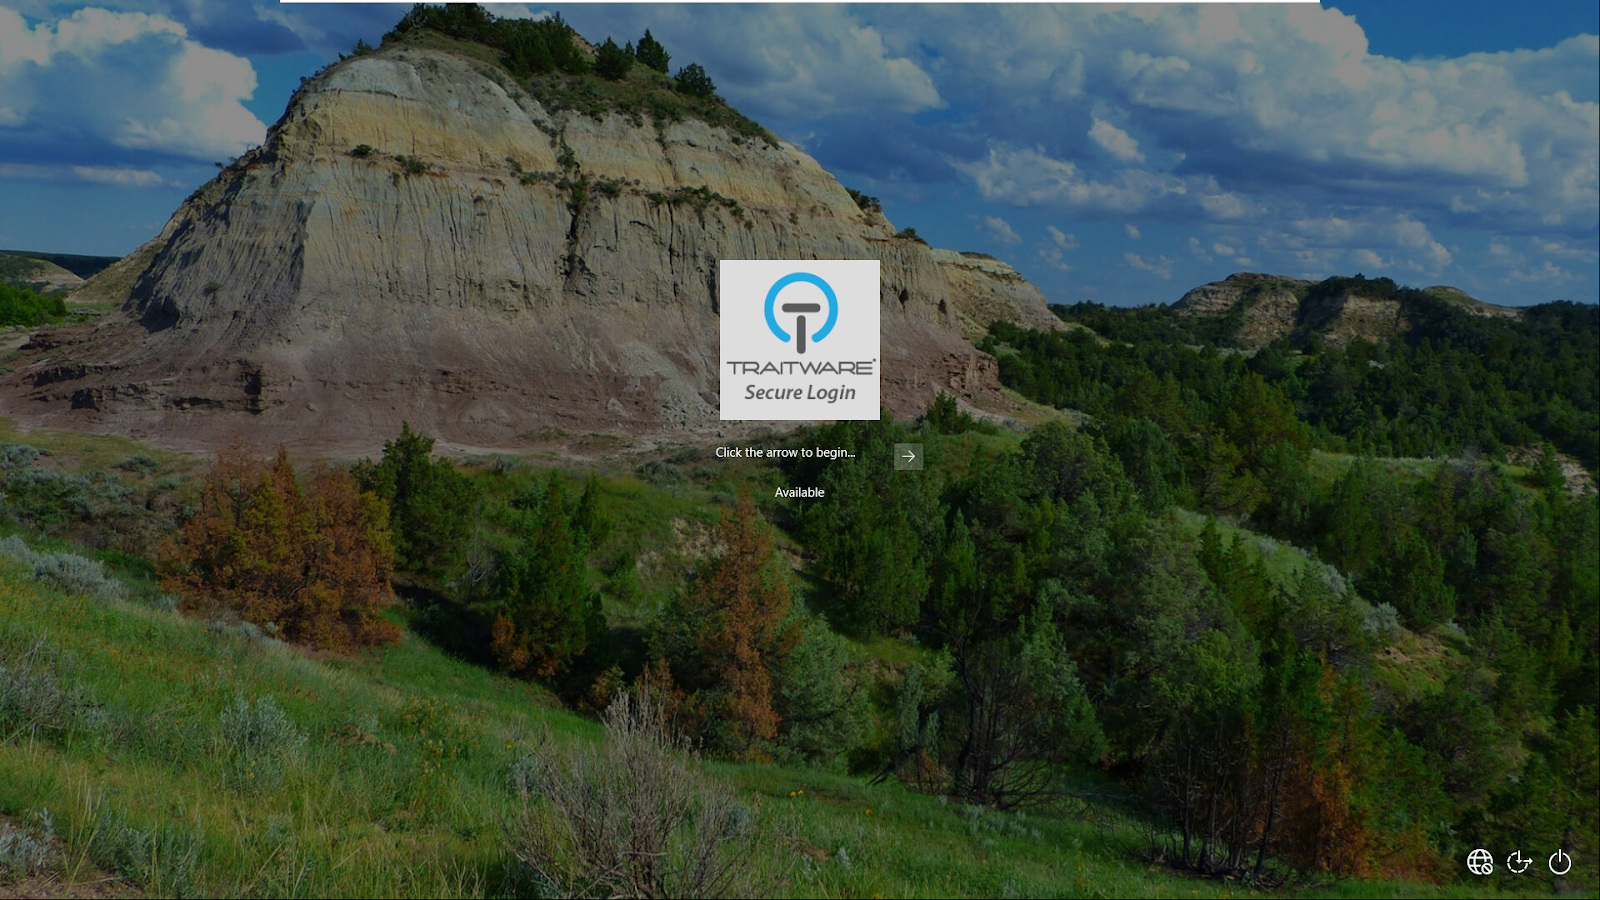
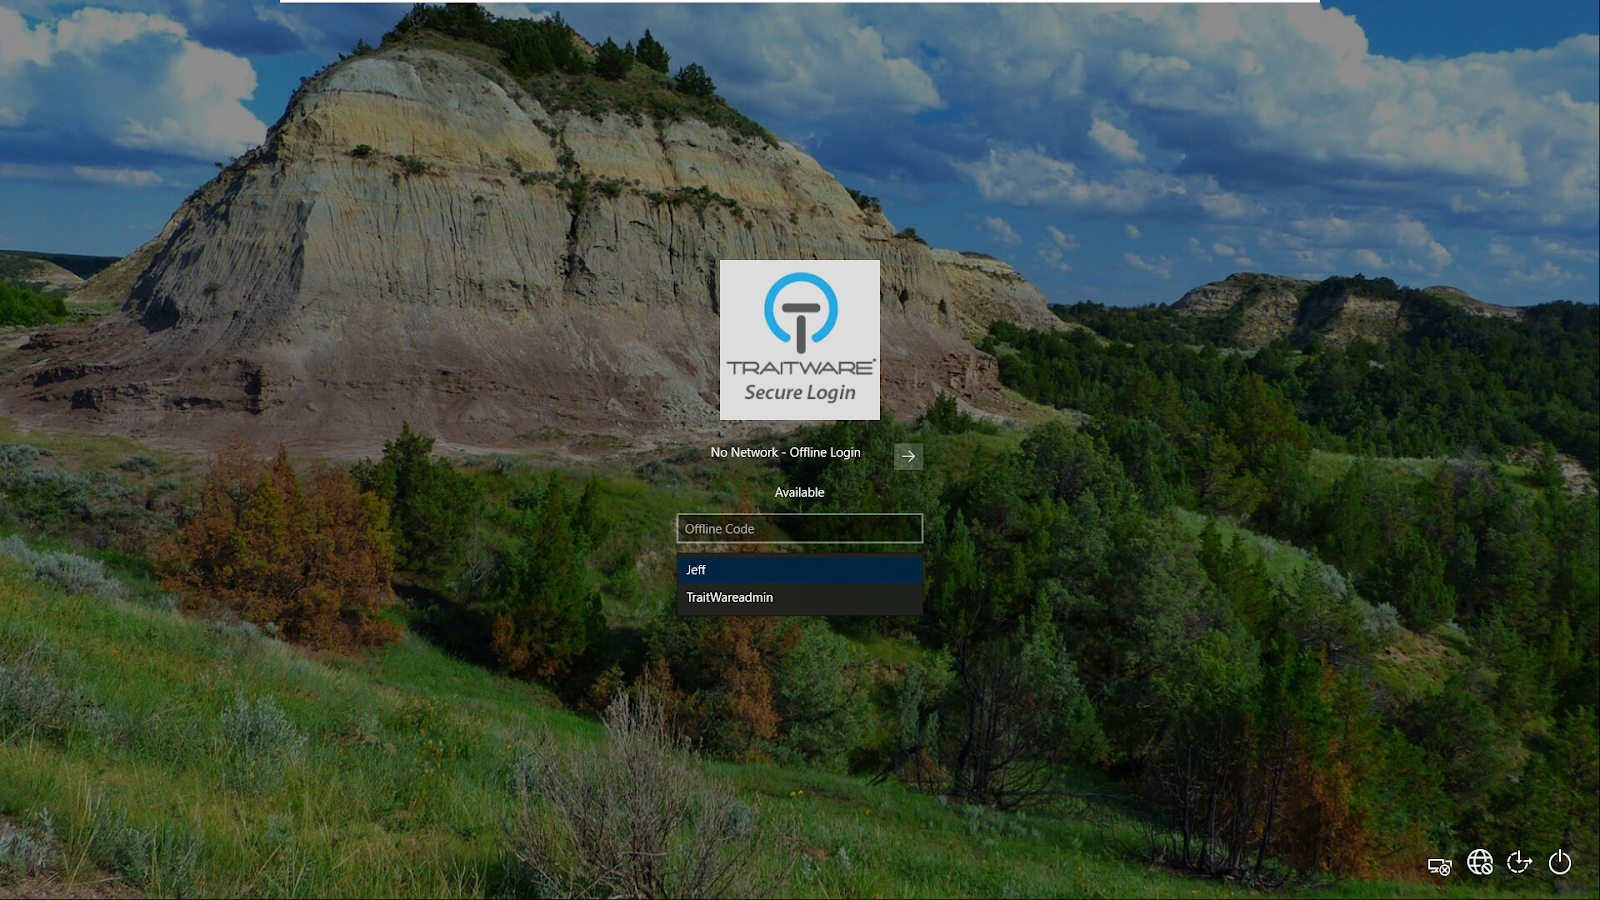
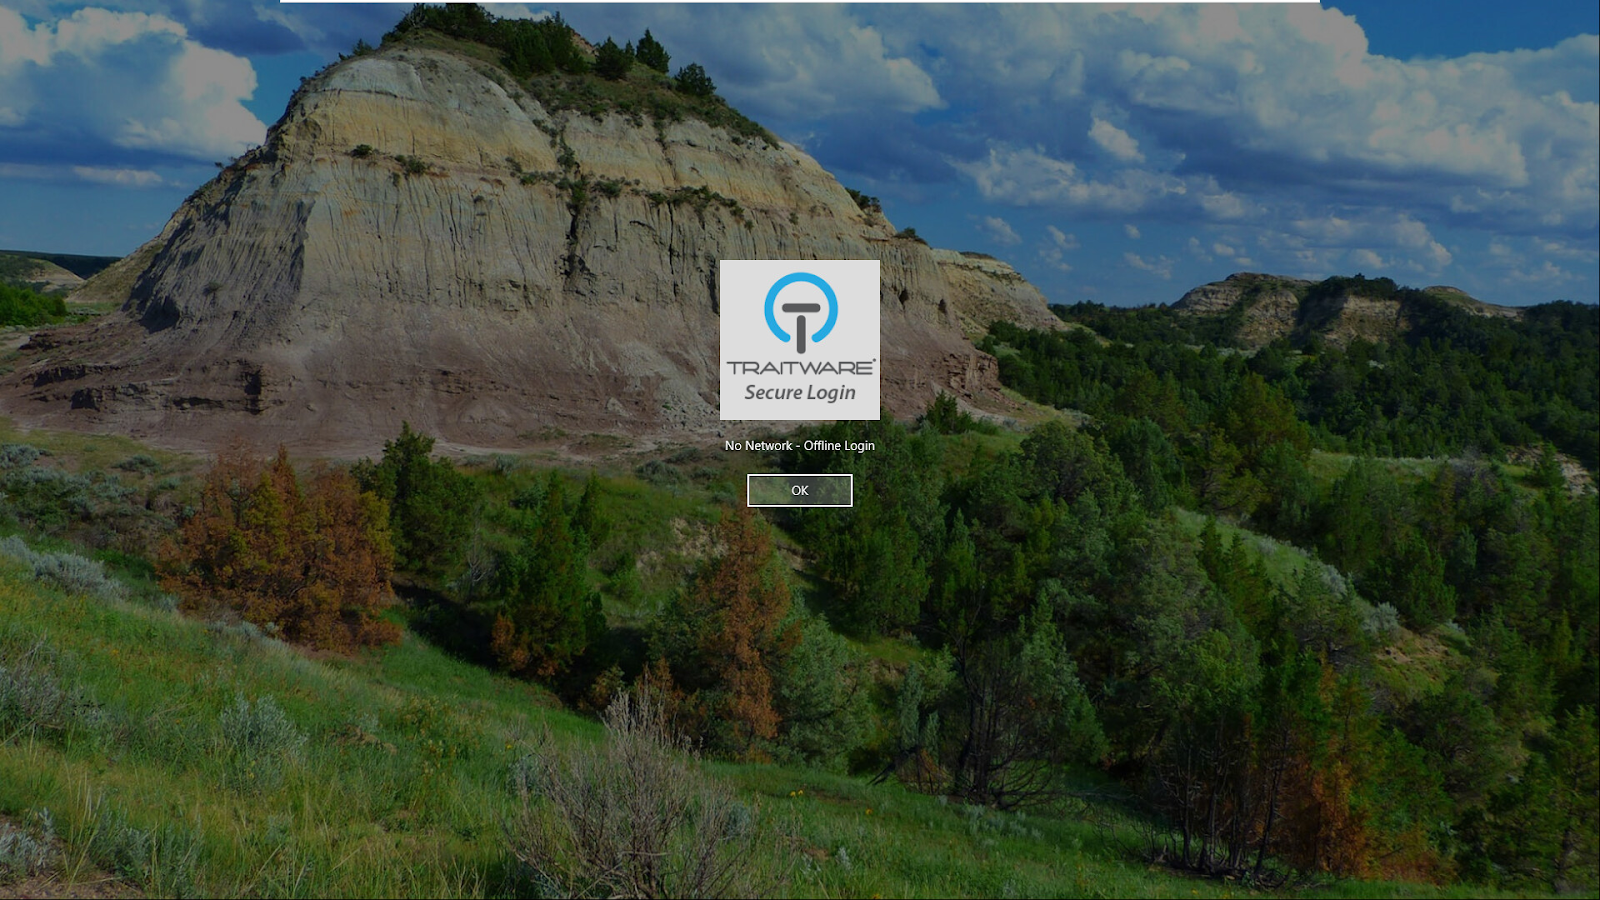
If offline, the Login screen will note, No Network – Offline Login. Click OK.

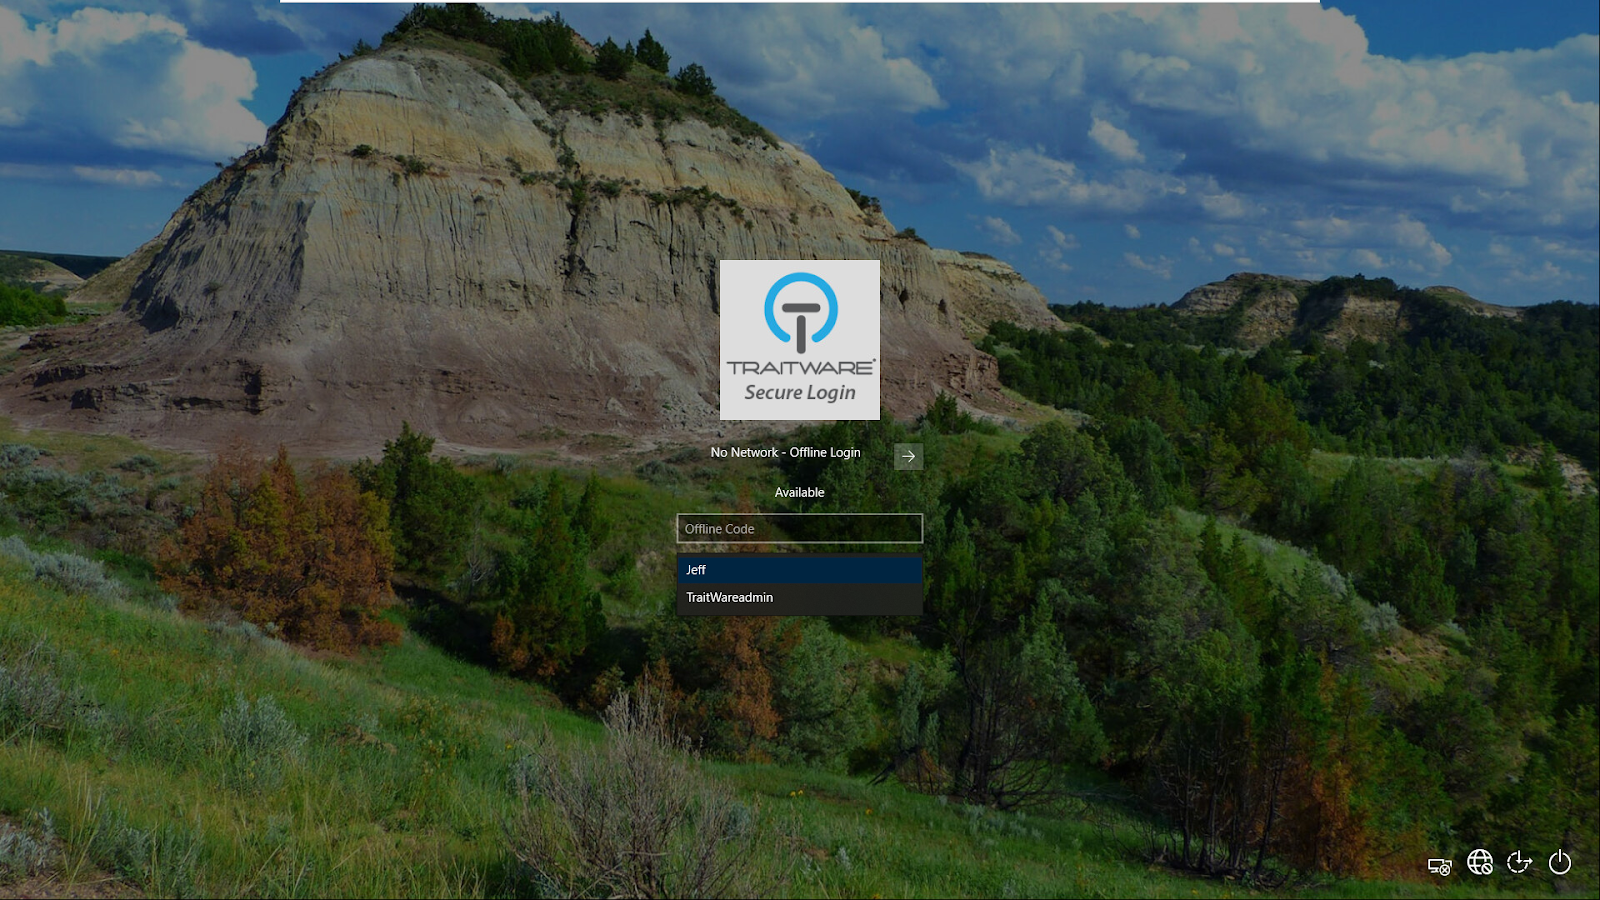
Select the Account in the drop down menu, then click the arrow.
Phone online
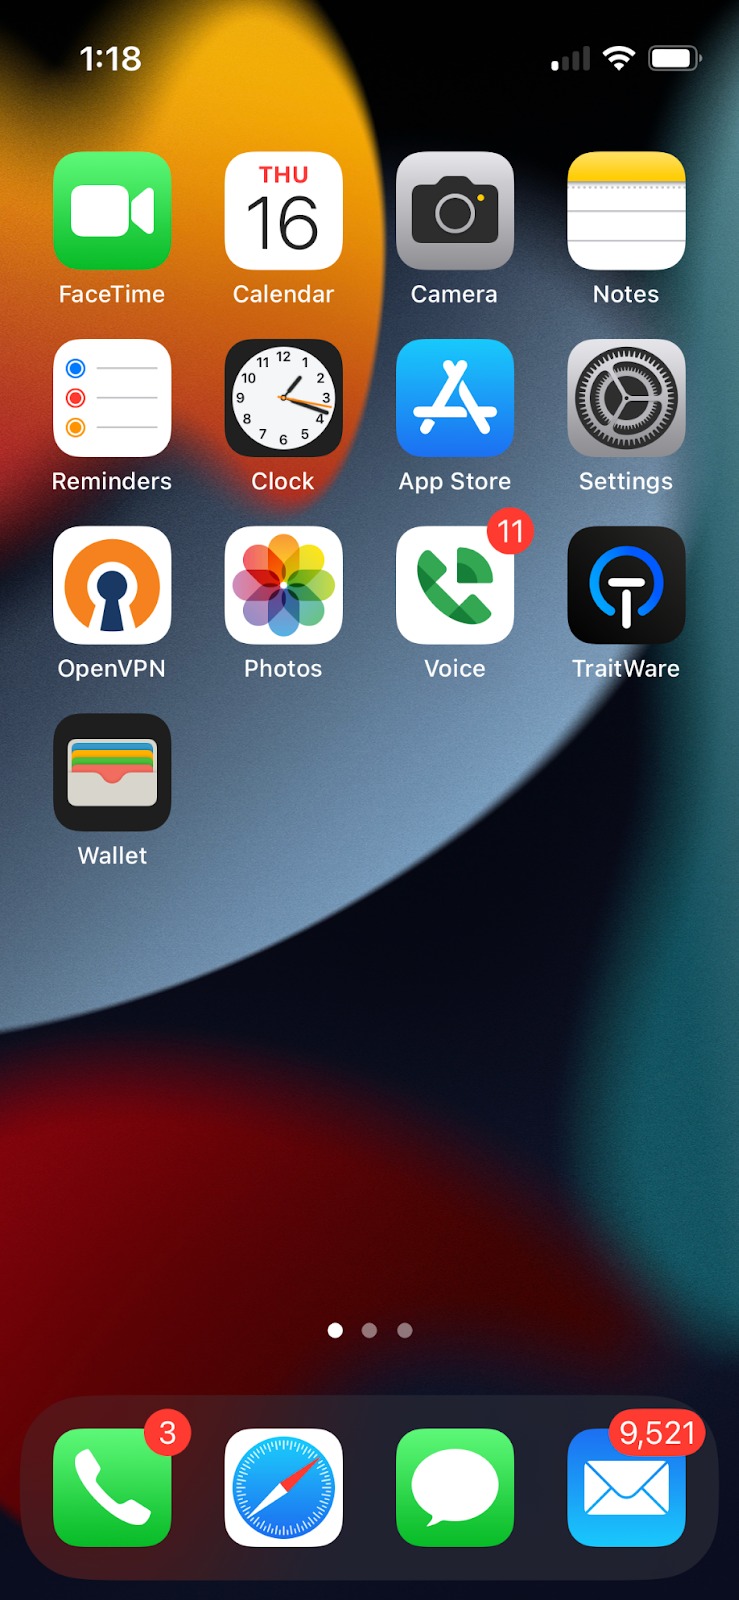
On your mobile device, open the TraitWare App. Select the Account and Scan the QR Code on the screen with your App. Your device will automatically recognize that the Windows device is offline and present a 12-Digit code that will be entered on the Windows device.


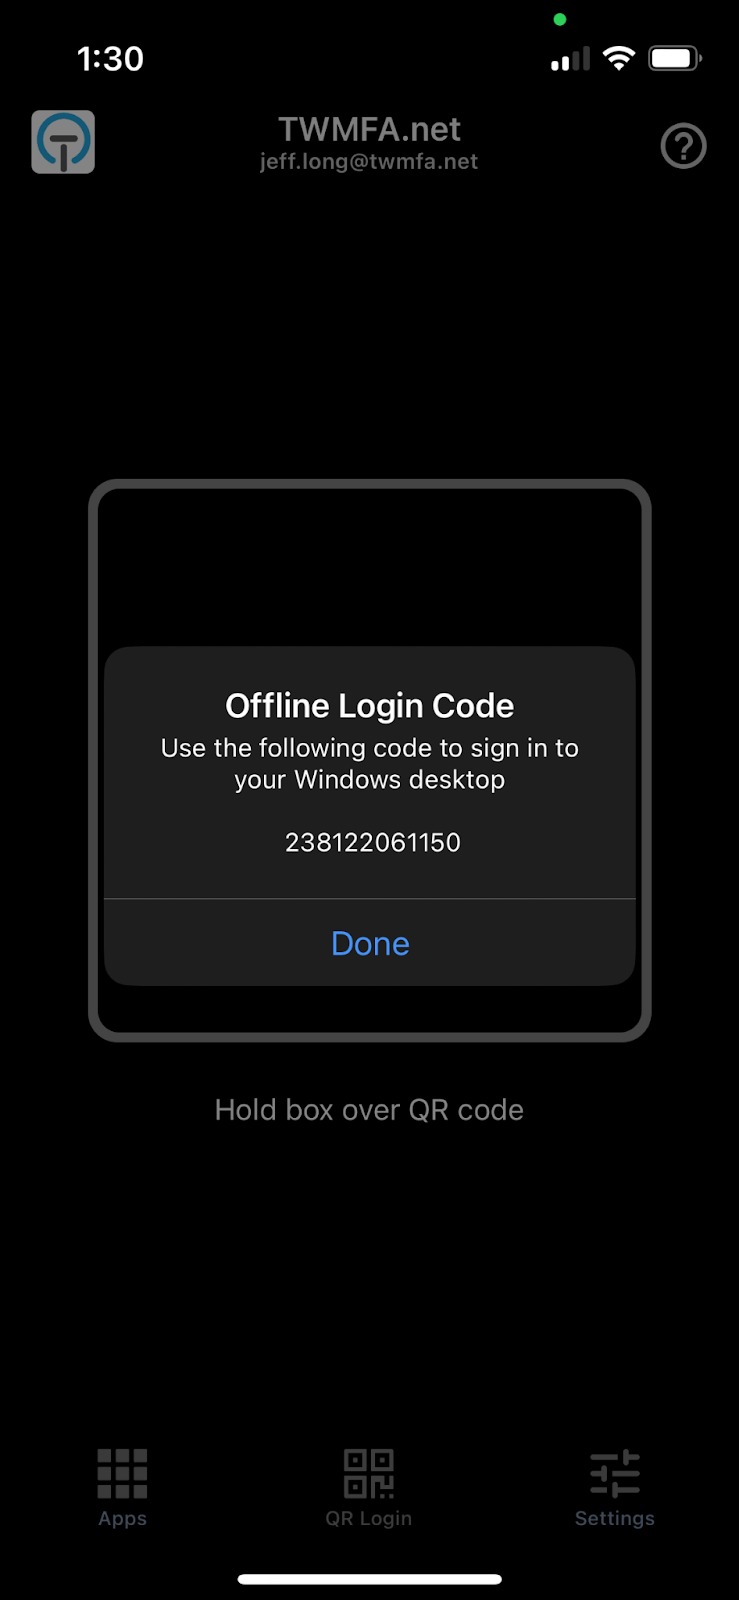
Enter the 12-digit code in the Offline Code box. When finished, click the arrow to sign in.
Phone offline
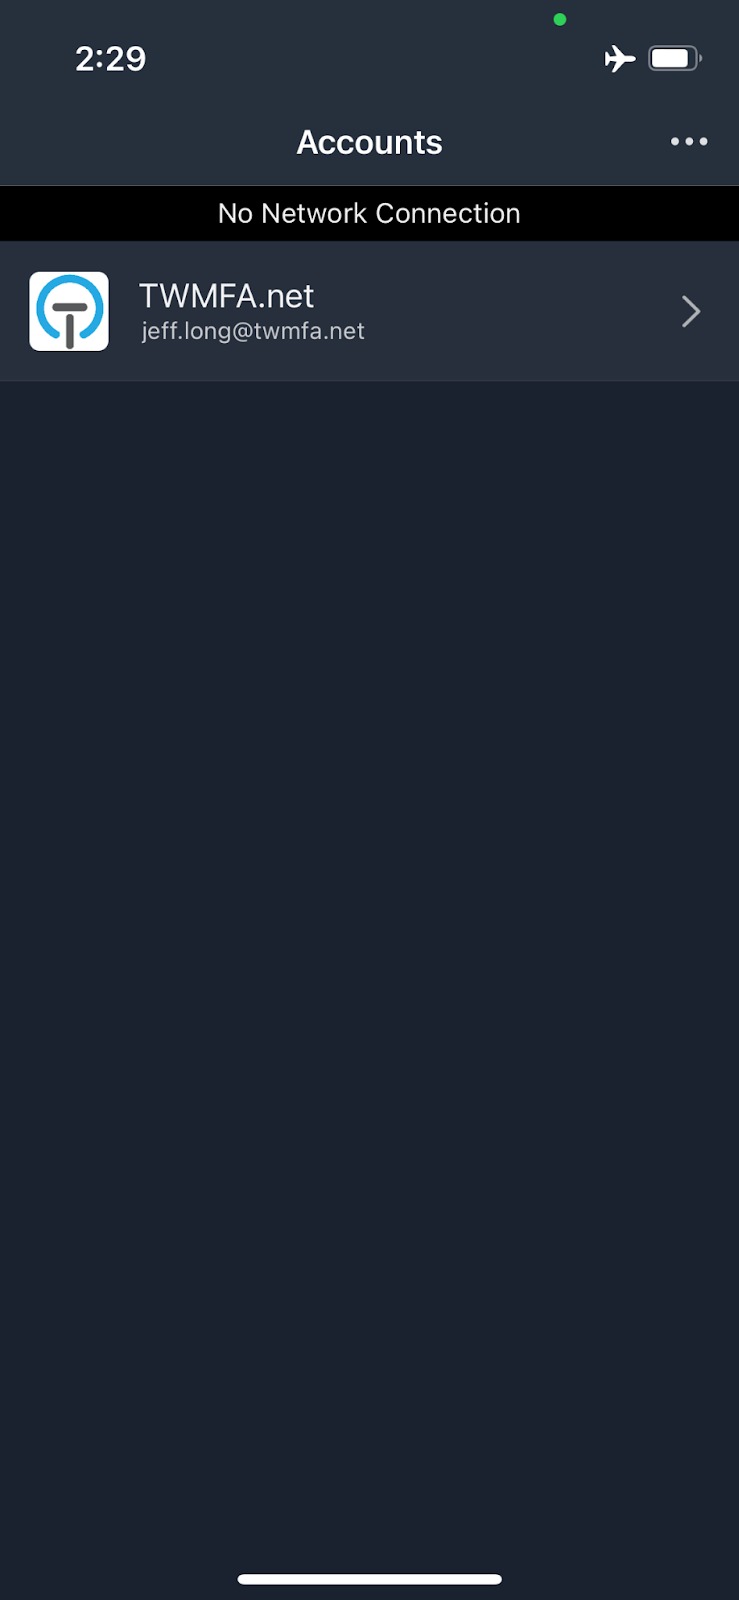
On your mobile device, open the TraitWare App. The App will display a No Network Connection banner above listed Accounts. Select the Account.
Offline Mode
Note: You must have one successful ONLINE login before you can use Offline Mode.
Click the arrow to sign in.
If offline, the Login screen will note, No Network – Offline Login. Click OK.
Select the Account in the drop down menu, then click the arrow.
Phone online
On your mobile device, open the TraitWare App. Select the Account and Scan the QR Code on the screen with your App. Your device will automatically recognize that the Windows device is offline and present a 12-Digit code that will be entered on the Windows device.
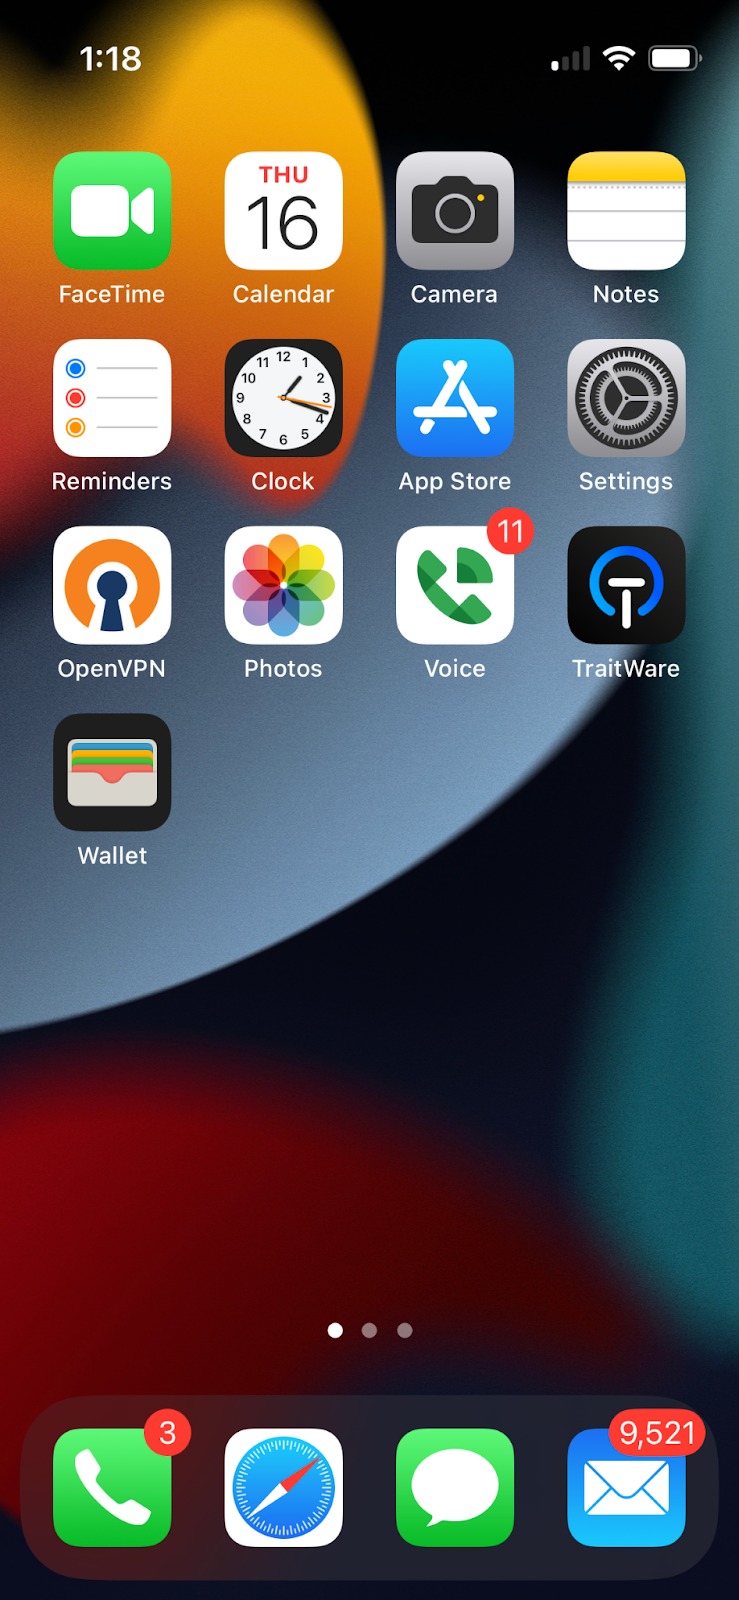


Enter the 12-digit code in the Offline Code box. When finished, click the arrow to sign in.
Phone offline
On your mobile device, open the TraitWare App. The App will display a No Network Connection banner above listed Accounts. Select the Account.

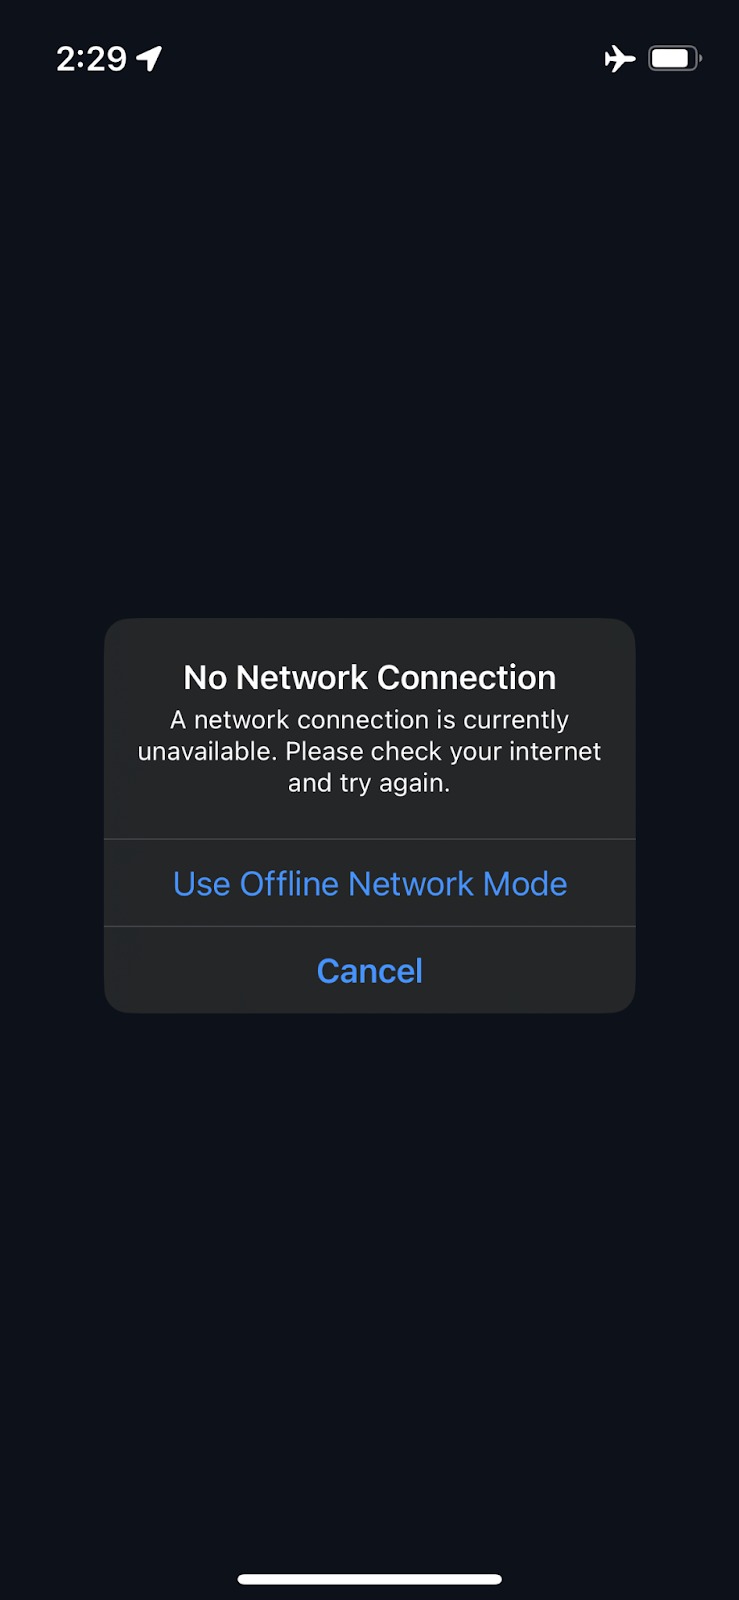
The App will prompt to Use Offline Network Mode or Cancel. Select Use Offline Network Mode. Scan the QR Code on the screen with your App. Your device will display a single-use 12-digit code that will be entered on the Windows device.

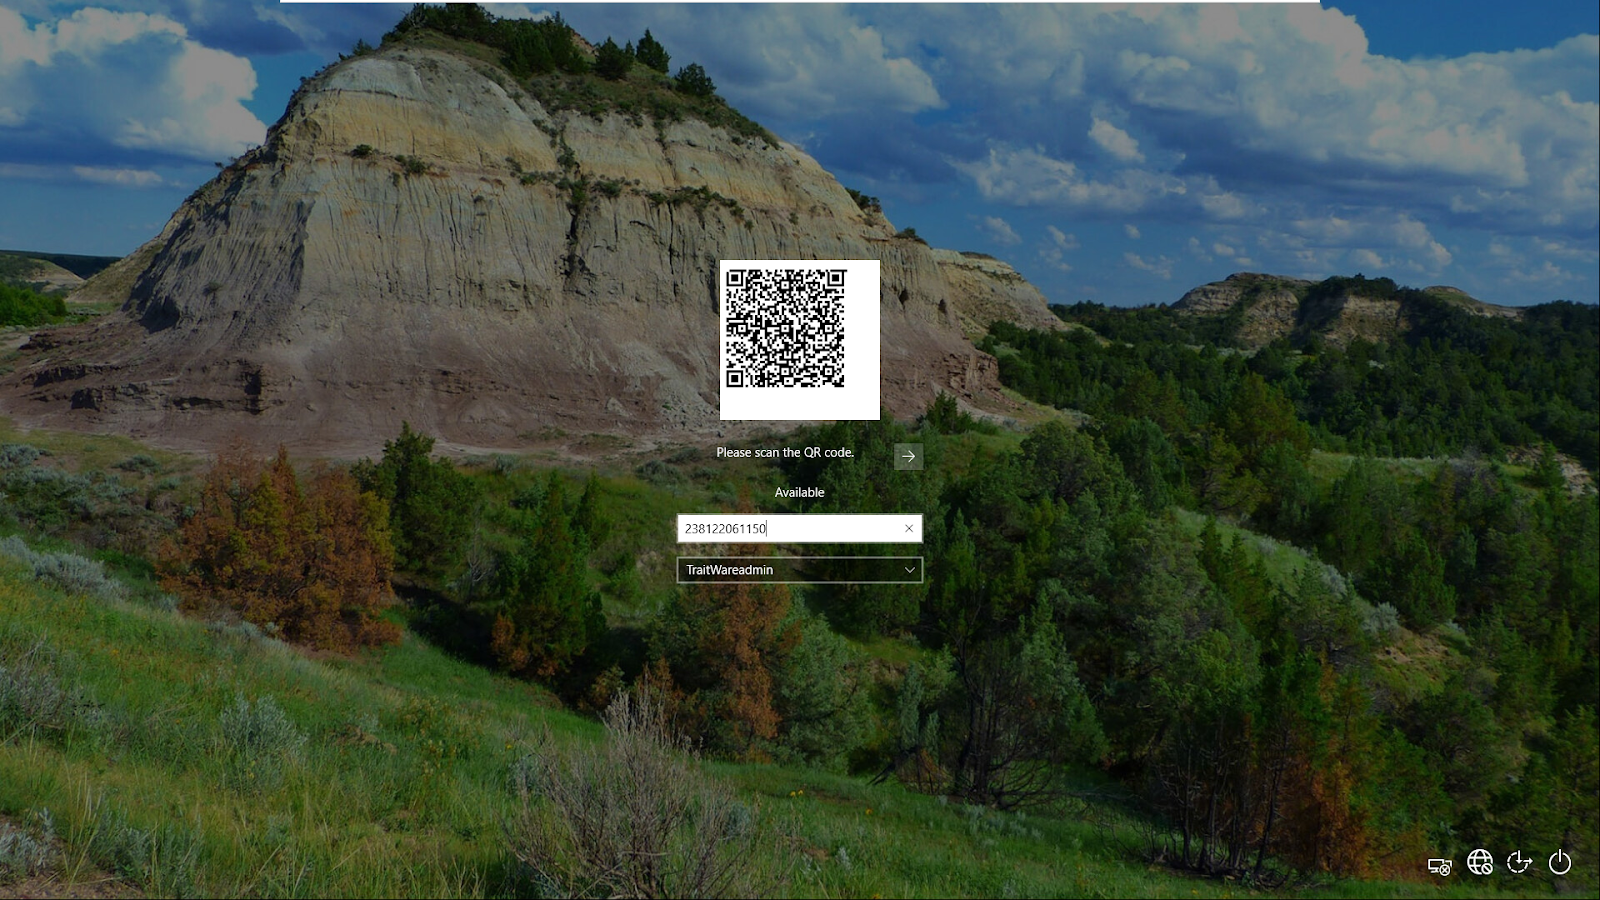
Enter the 12-digit code displayed in your TraitWare App in the Offline Code line and press the arrow.
You have now signed into Windows using Passwordless MFA without an internet connection.
Remote Desktop (Host)
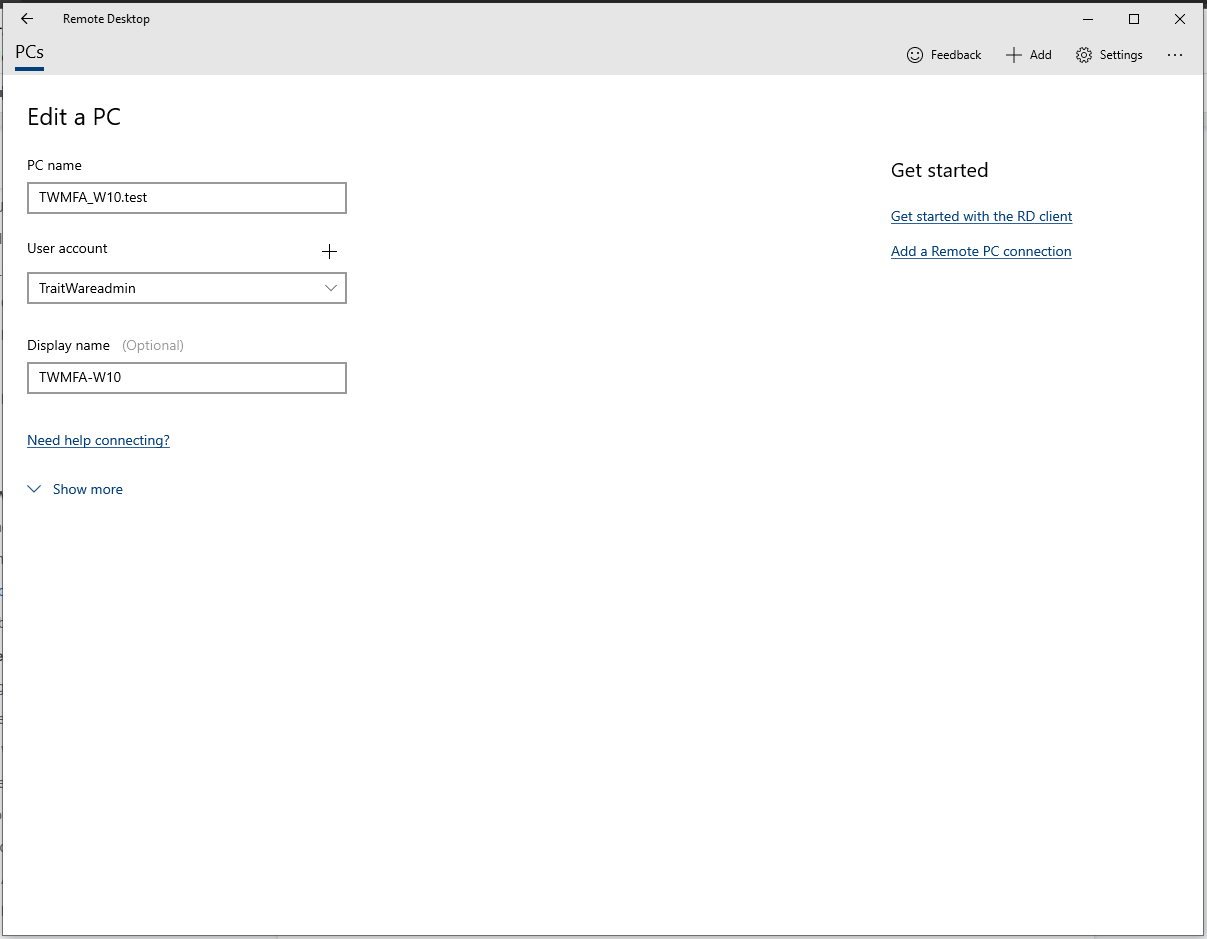


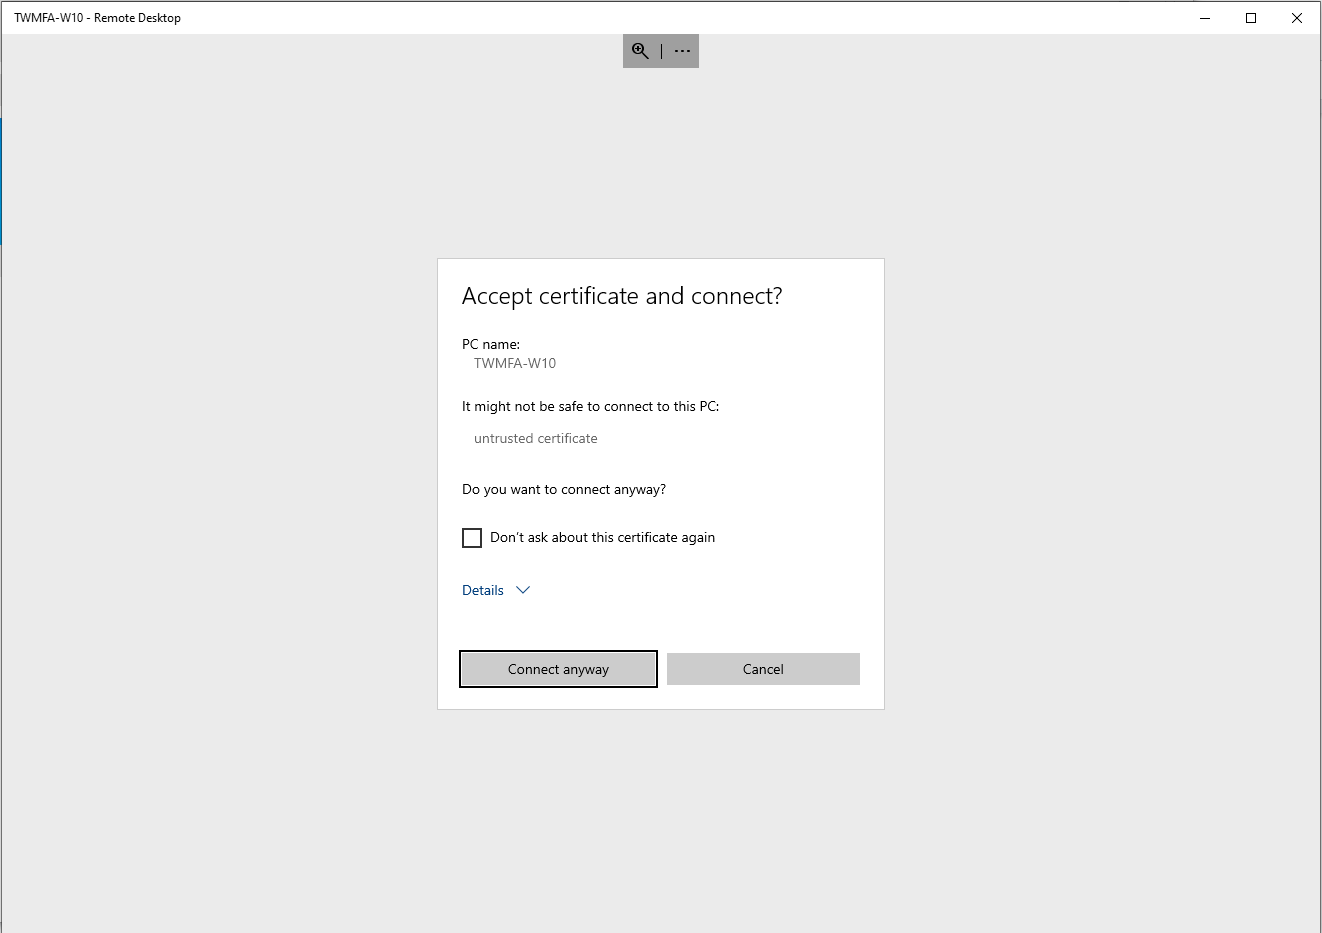
Remote Desktop (Client)
Go to Control Panel and select User Accounts
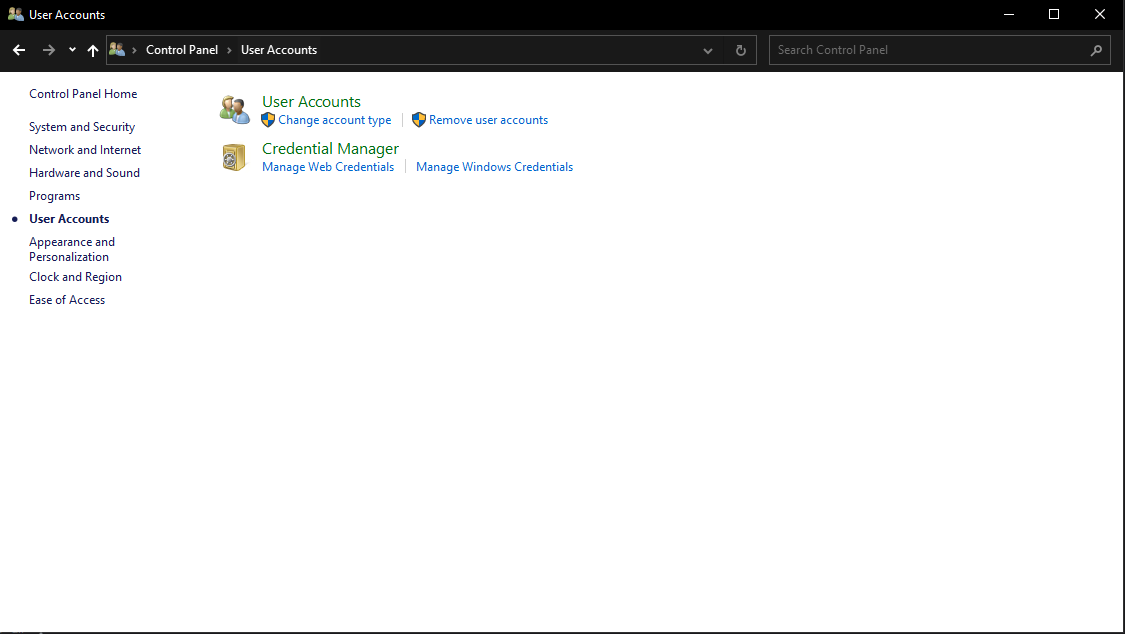
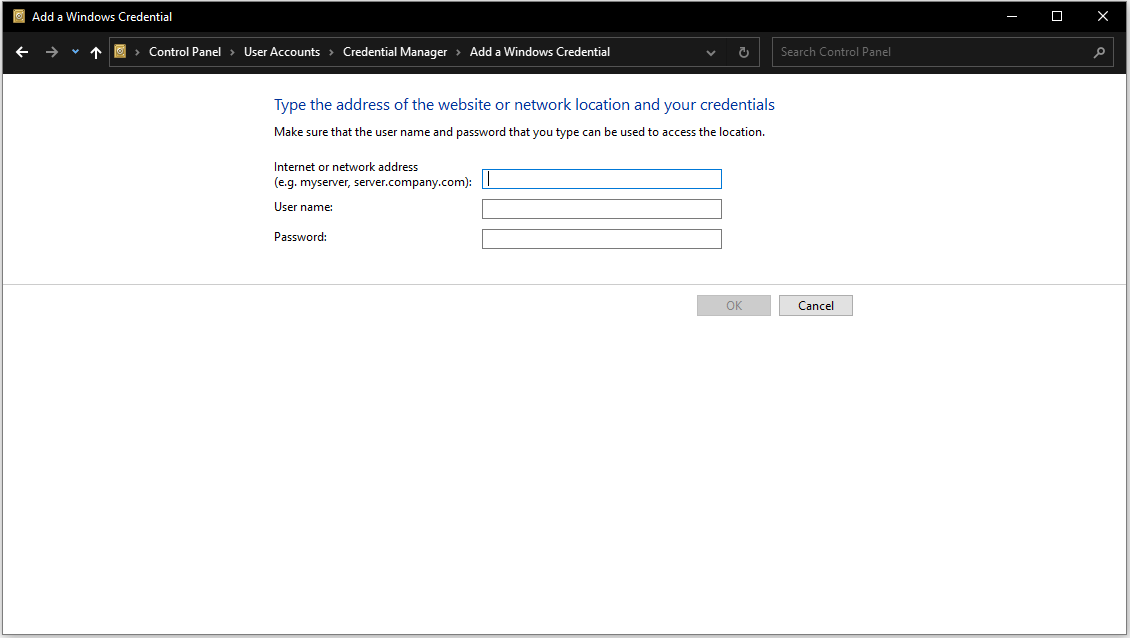
Click Credential Manager. Select Add a Windows Credential
Add the address or domain name of the remote computer, username and password.
Adding another user (Single User – Single Profile)
Create a user as described in the Single User – Single Profile section of this document.
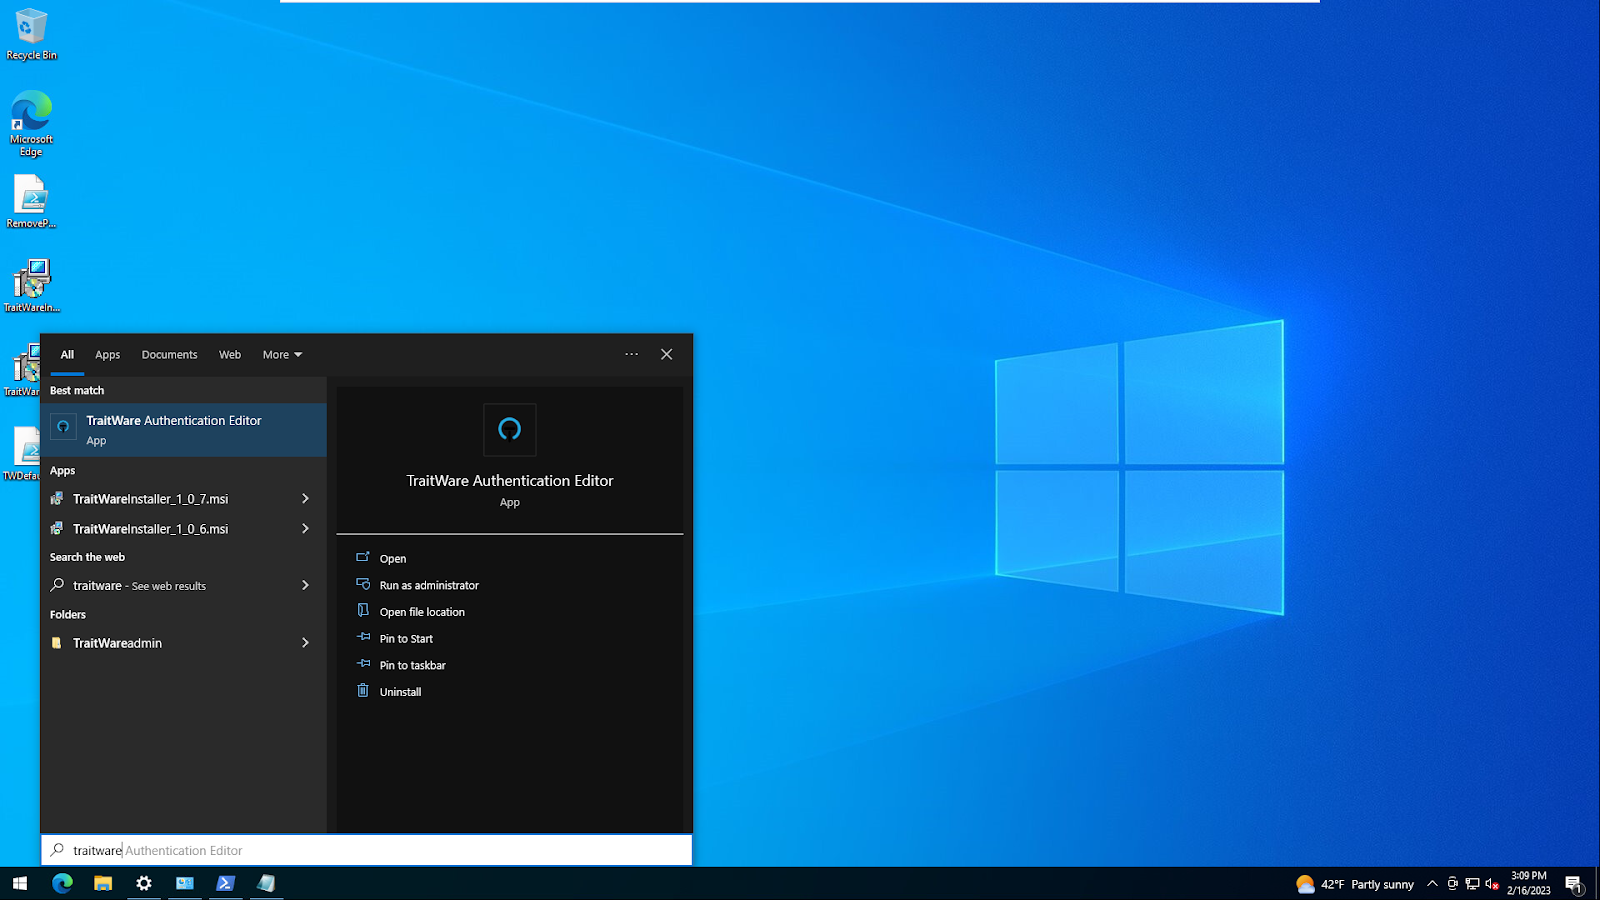
On the TraitWare MFA-protected Windows endpoint, click Start and find TraitWare Authentication Editor and Run as an administrator.
Click Yes on the prompt.

Click Edit Configuration.
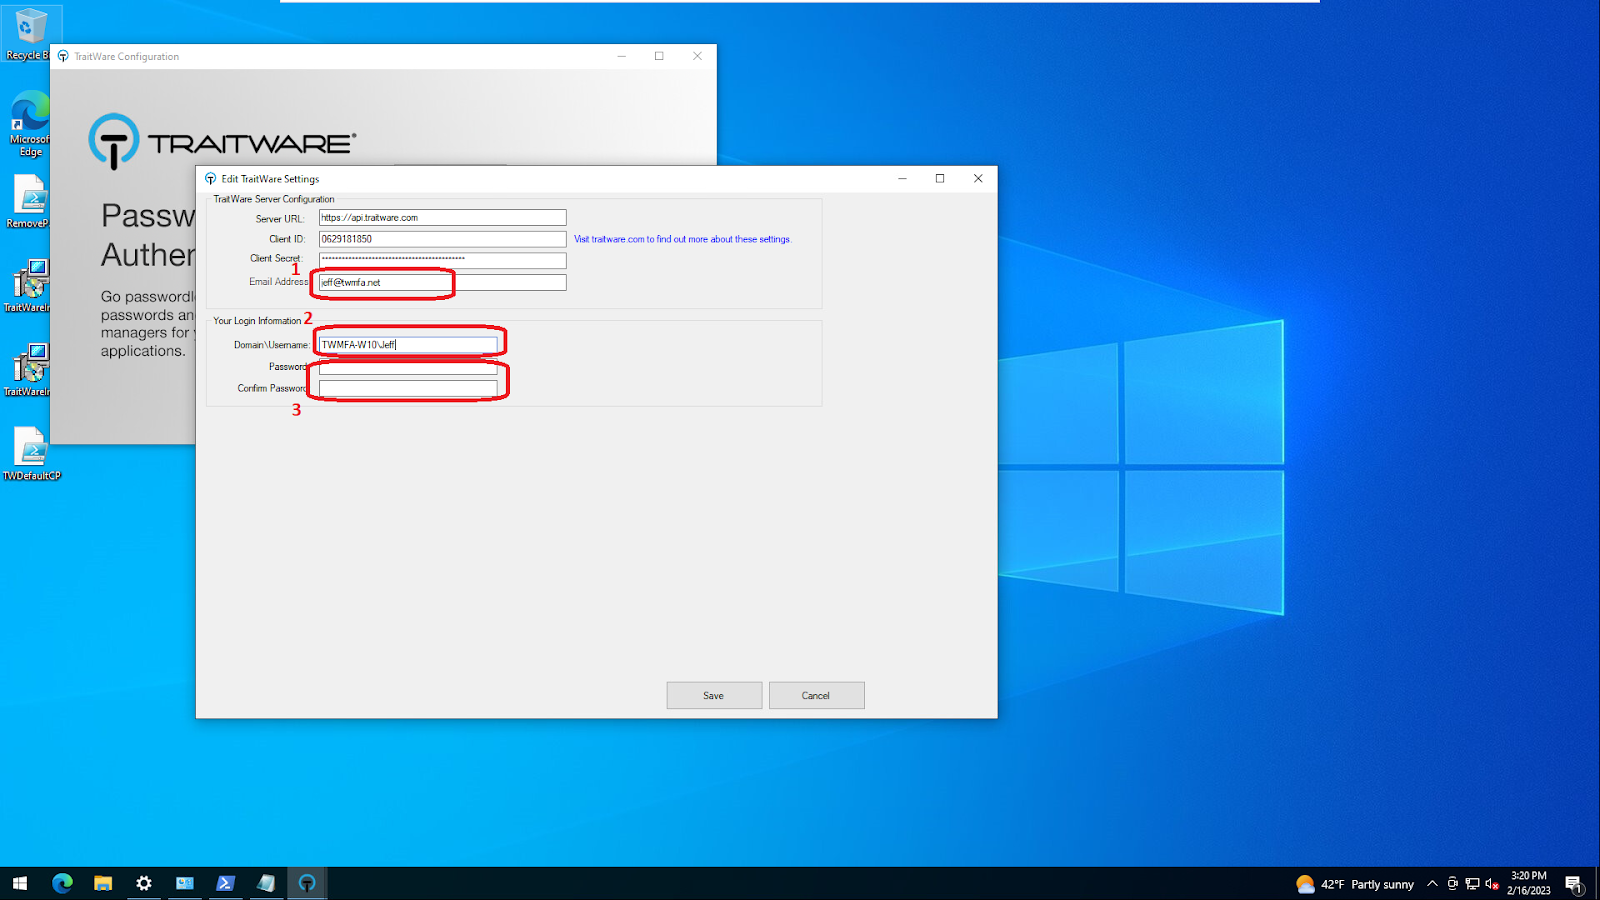
- Enter the email address of the new user in the Email address field (1).
- Enter the Profile name in the Domain\Username field (2).
- Enter the Profile credentials in the Password and Confirm Password fields.
When finished, click Save.
WARNING: Failure to correctly enter the new account email address and profile will overwrite the login data of the primary account which could cause loss of access to the machine.
Troubleshooting
Disable other forms of authentication
Assigning Default Credential Provider
This section will outline how to limit the login options to the TraitWare Windows MFA.
Note: TraitWare MFA Offline access is available to Single User installation only. Multiple user (Alias users) cannot utilize TraitWare Offline access.
Method 1
Windows Registry Editor
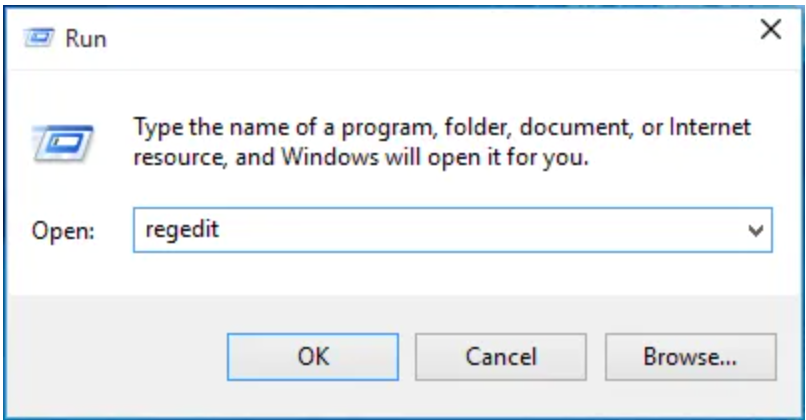
- Press Windows Key + R combination, type regedit in Run dialog box and hit Enter to open the Registry Editor.
- Press the start button, type run in the search bar. Type regedit in the run dialog box. Press enter.
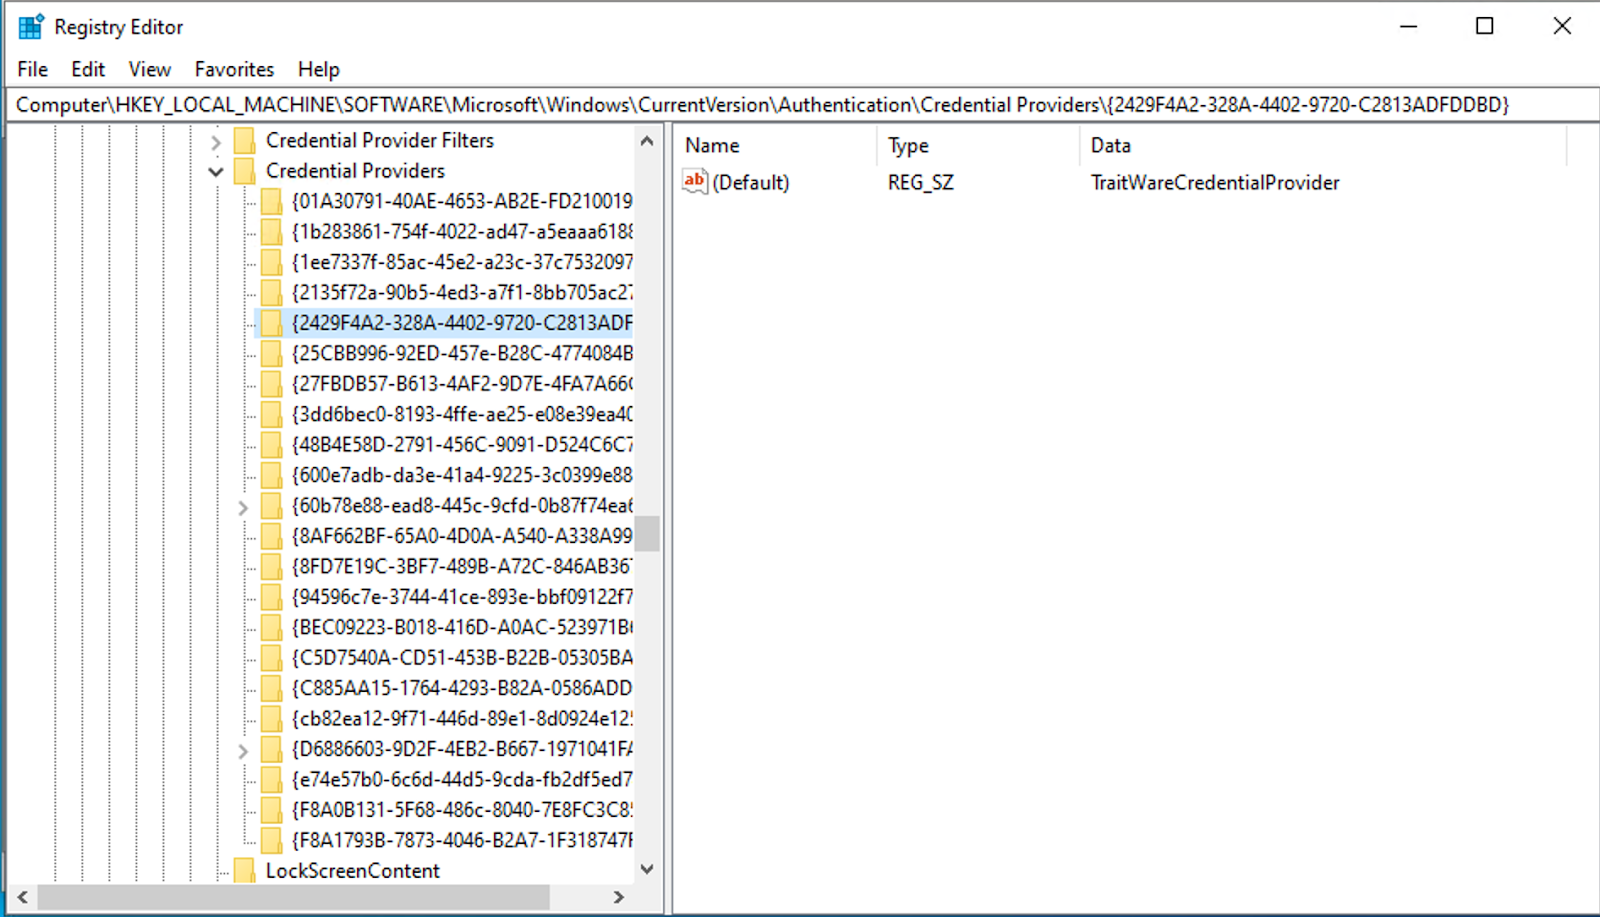
Navigate to the HKEY_LOCAL_MACHINE\SOFTWARE\Microsoft\Windows\CurrentVersion\Authentication\Credential Providers
The list of Credential Providers will be provided. Take note of the CLSID {CLSID} for the PasswordProvider and TraitWareCredentialProvider. These values will be used in the Group Policy Editor section.

Keep the Registry Editor open and proceed to the next step.
Method 2
Powershell
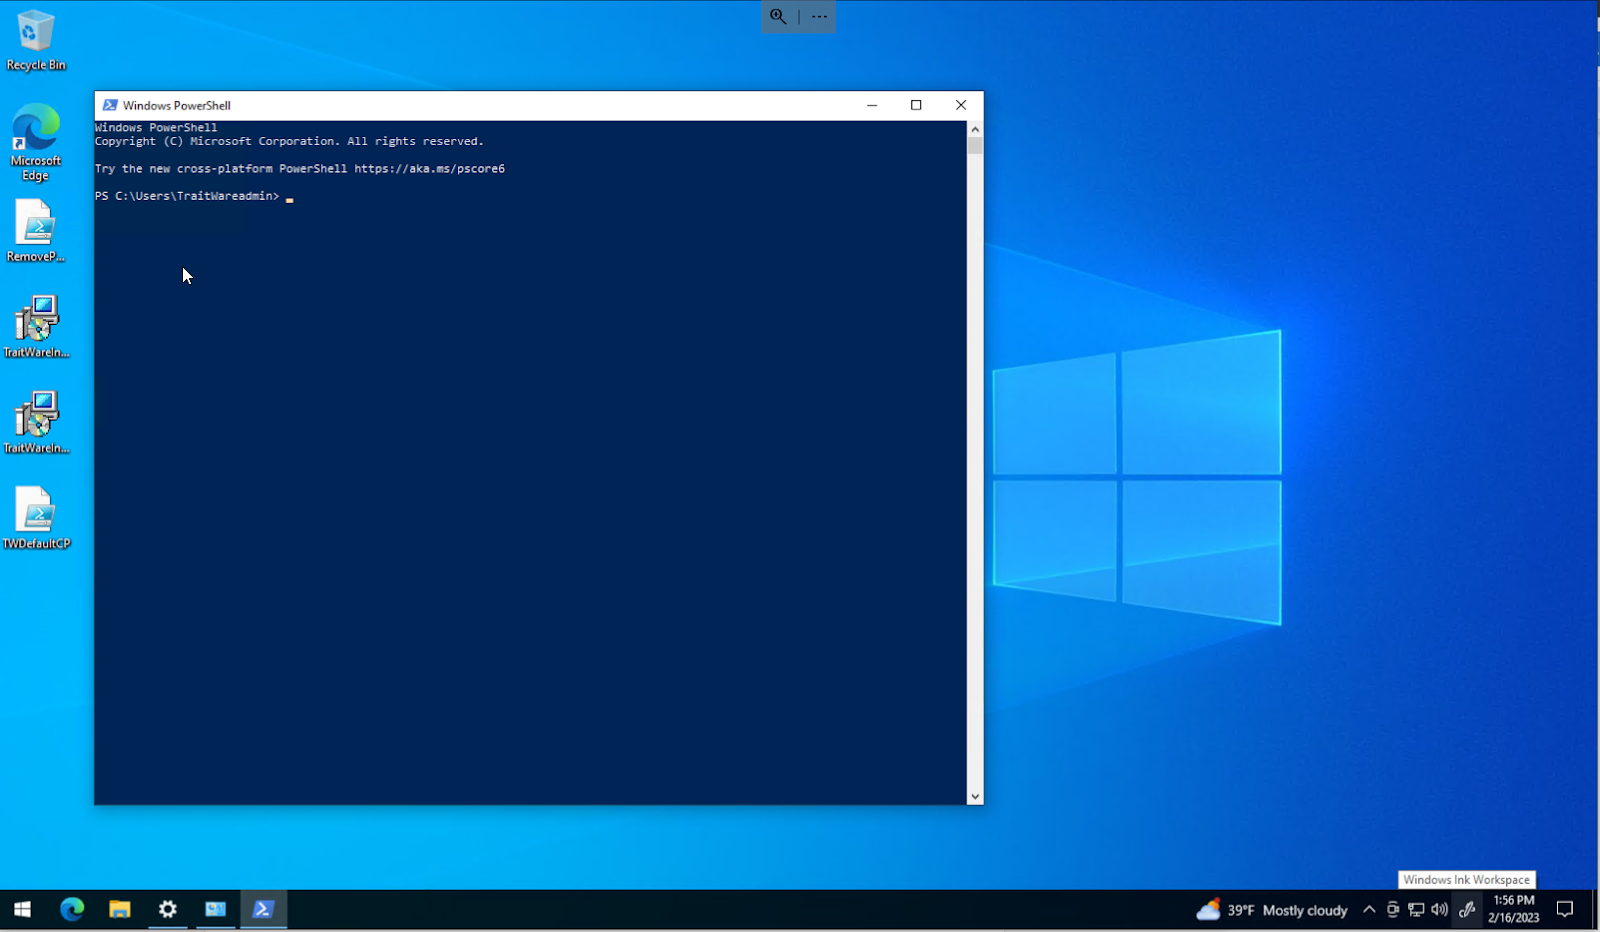
Open a Powershell Command Prompt

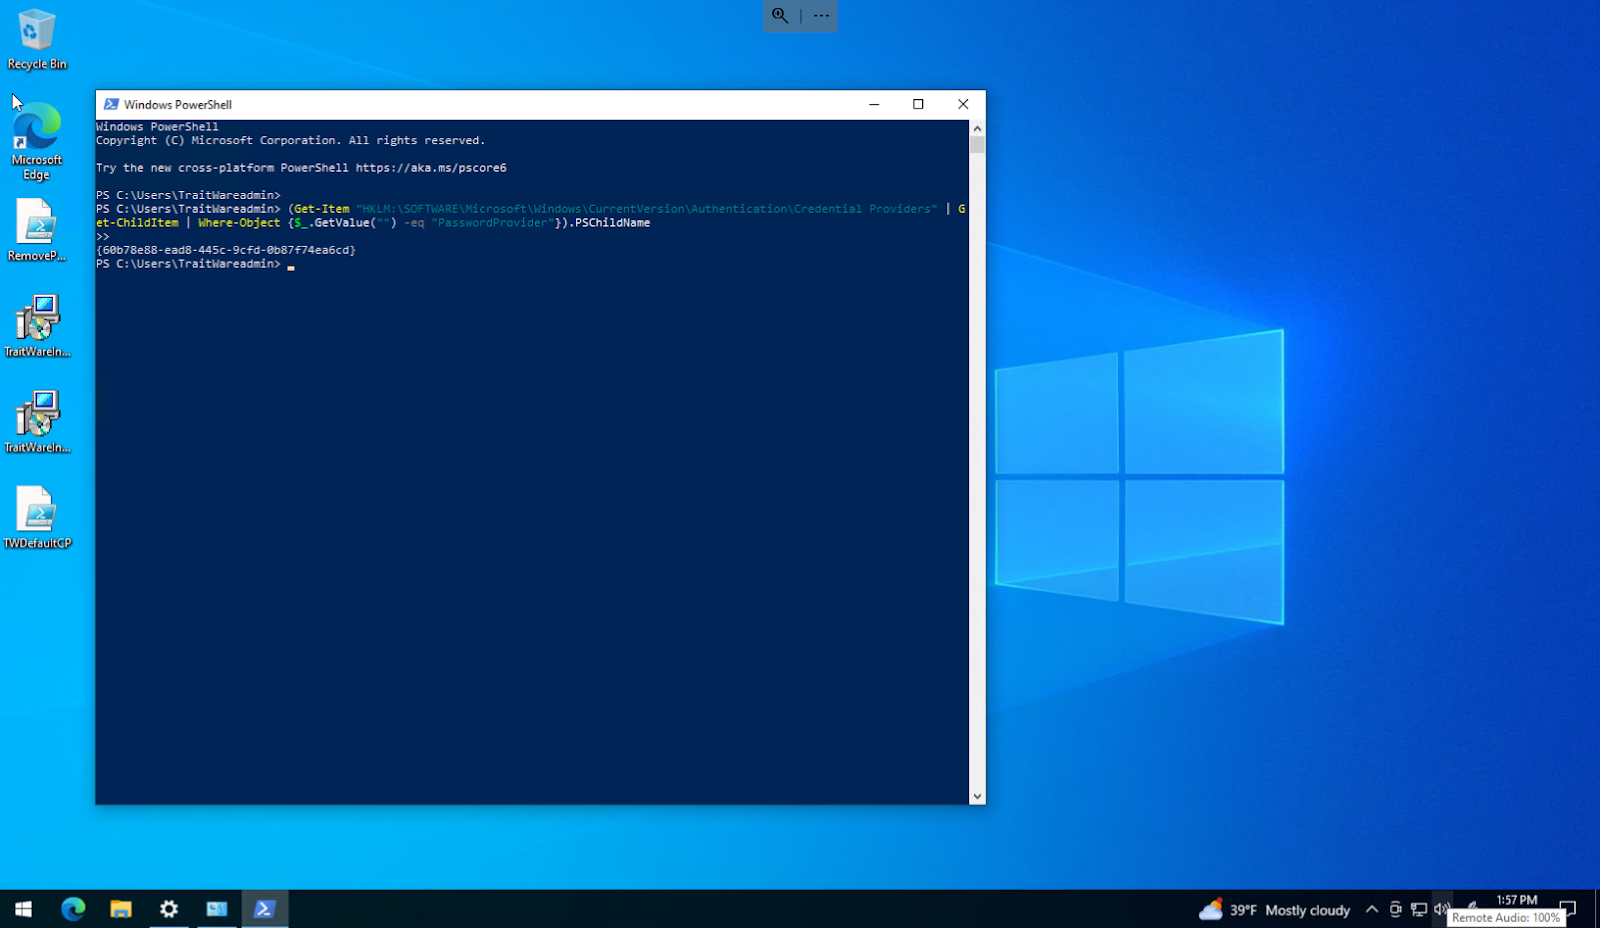
Paste the following command into the prompt and press enter: (Get-Item “HKLM:\SOFTWARE\Microsoft\Windows\CurrentVersion\Authentication\Credential Providers” | Get-ChildItem | Where-Object {$_.GetValue(“”) -eq “PasswordProvider”}).PSChildName
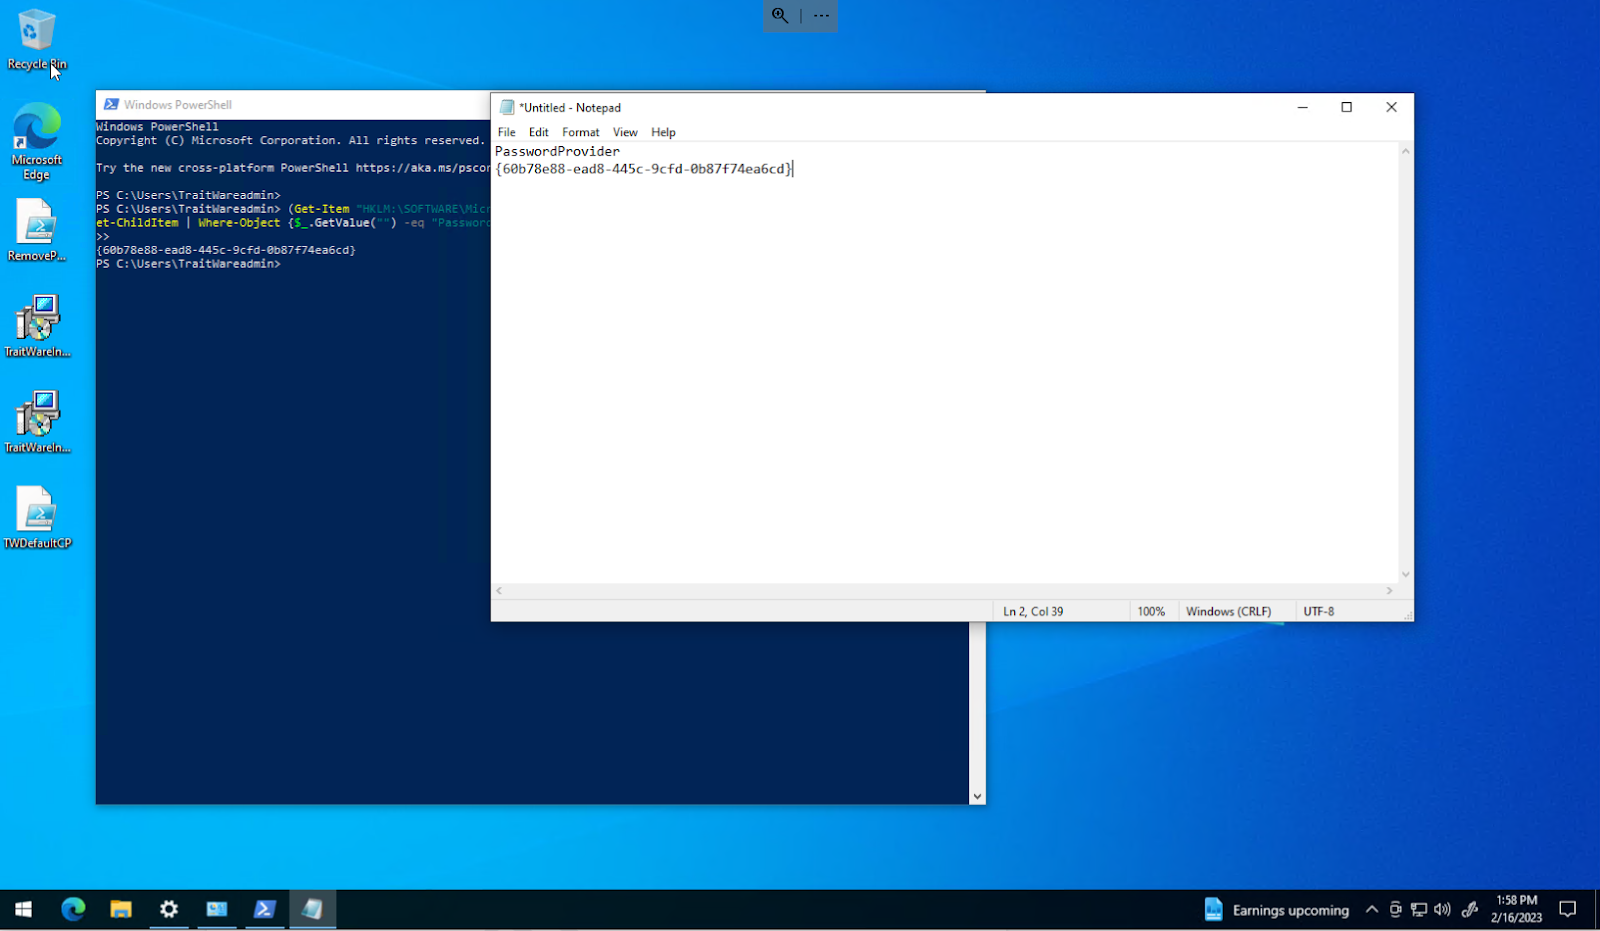
Copy the result to Notepad
Paste the following command into the prompt and press enter:(Get-Item “HKLM:\SOFTWARE\Microsoft\Windows\CurrentVersion\Authentication\Credential Providers” | Get-ChildItem | Where-Object {$_.GetValue(“”) -eq “TraitWareCredentialProvider”}).PSChildName
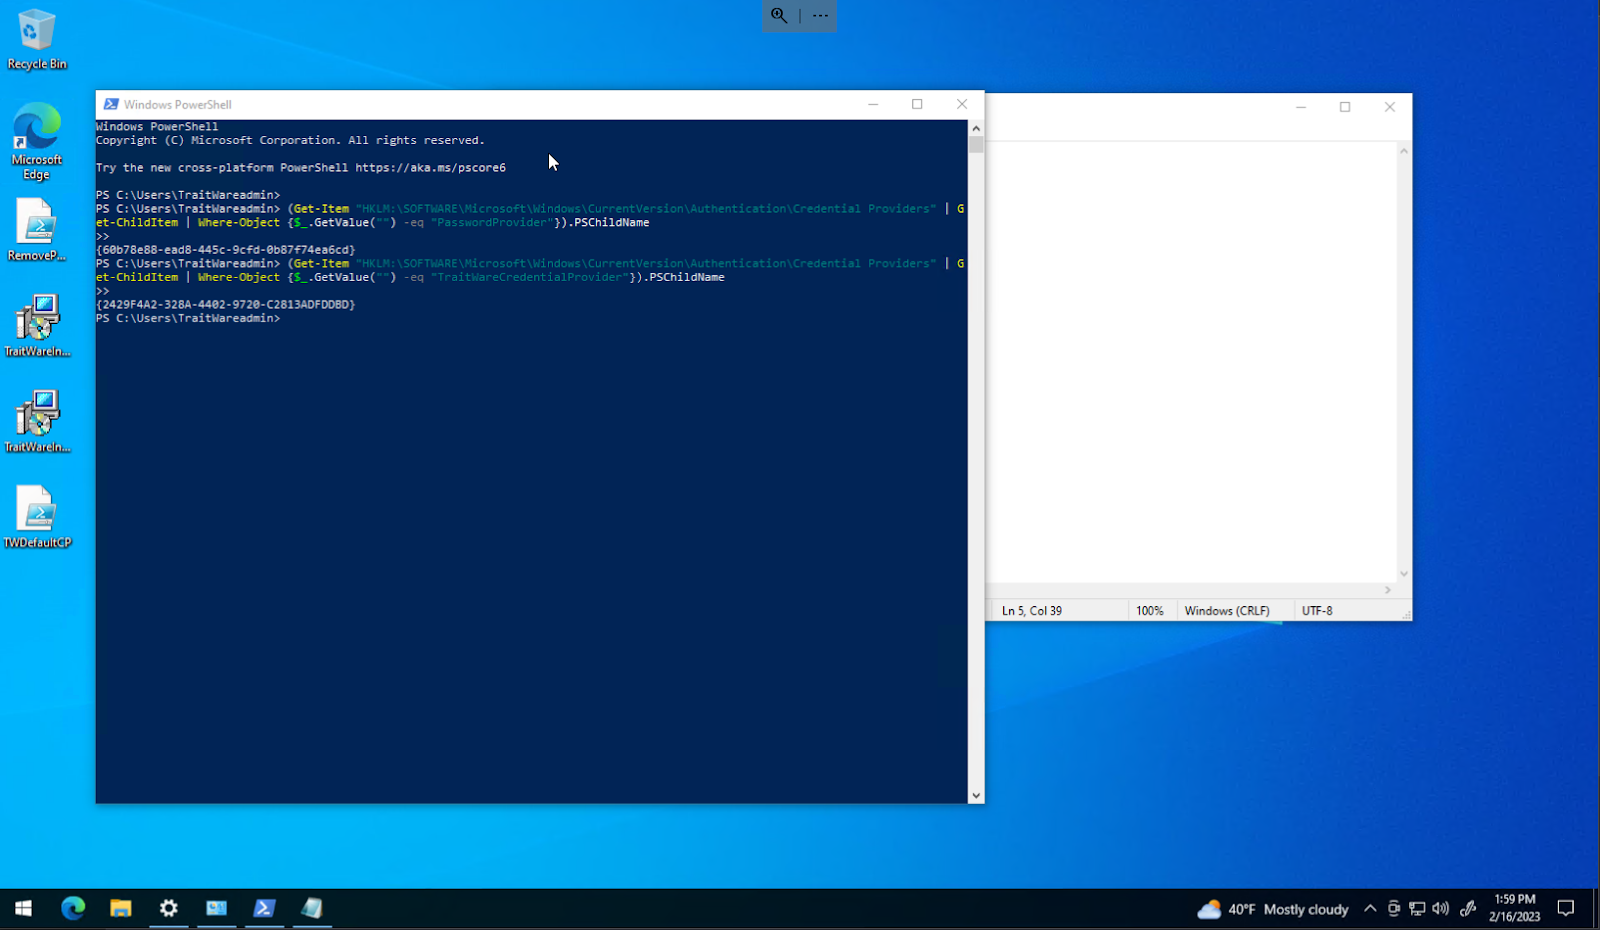
Copy the result to Notepad.
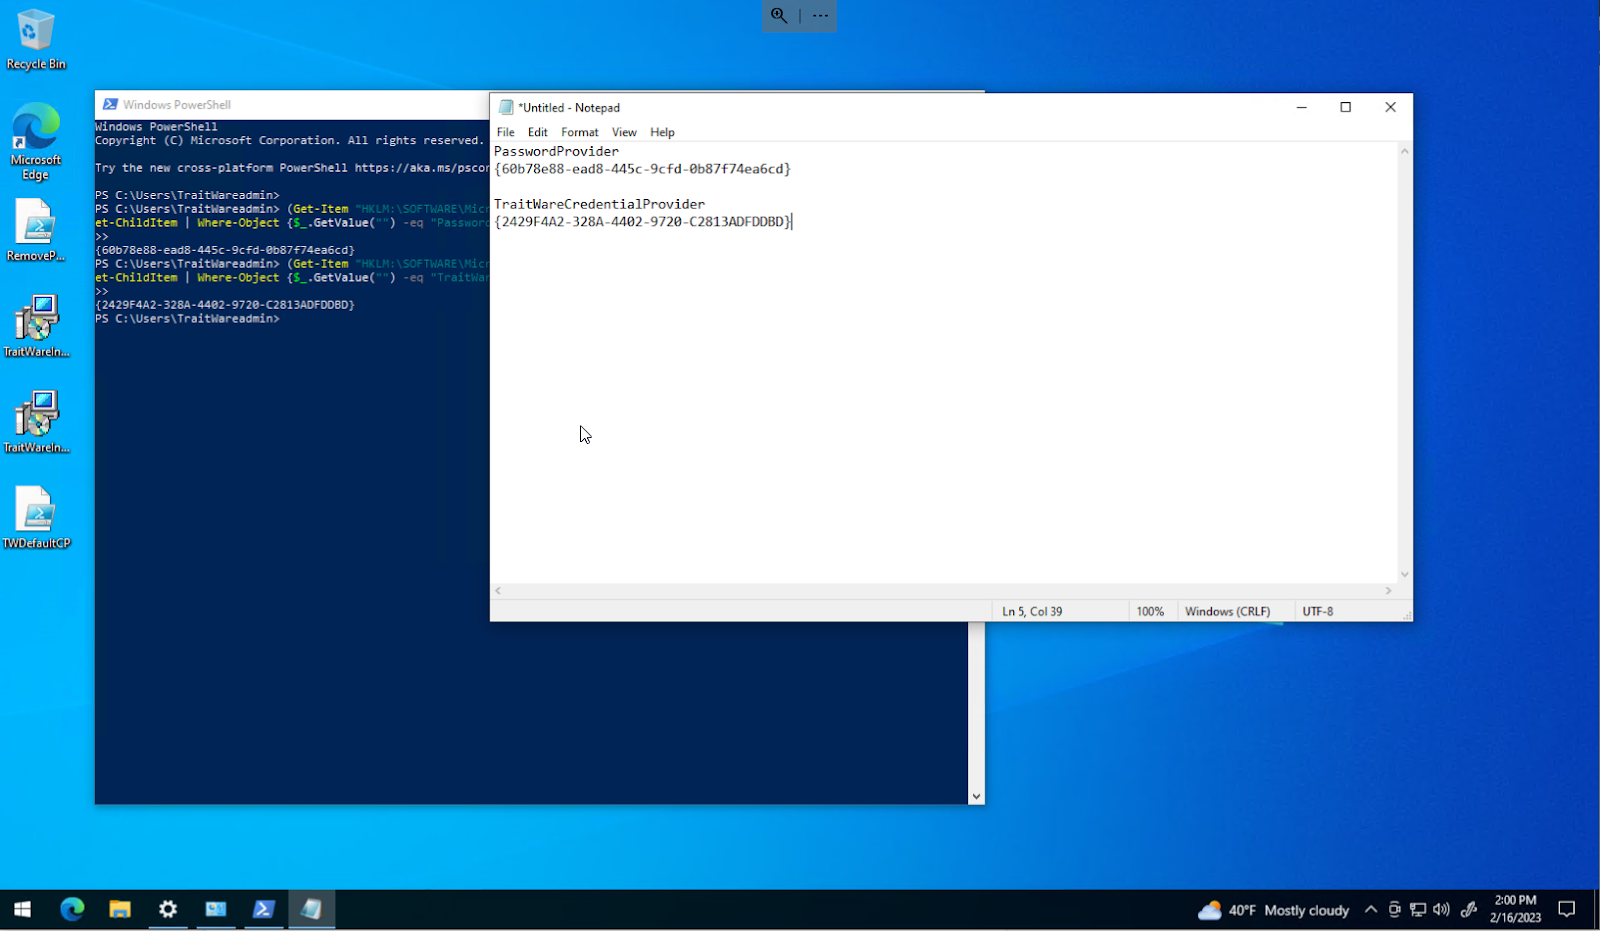
Group Policy Editor
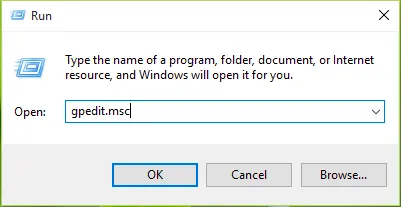
- Press Windows Key + R combination, type gpedit.msc in Run dialog box and hit Enter to open the Registry Editor.
- Press the start button, type run in the search bar. Type gpedit.msc in the run dialog box. Press enter.
In the Local Group Policy Editor, go to Computer Configuration -> Administrative Templates -> System -> Logon

Assigning Default Credential Provider
Locate the Setting Assign a default credential provider and double click it to edit.

Add the CLSID for the TraitWareCredentialProvider {CLSID} and select enable. When finished click Apply and OK.
Disable Password Sign-in
Select Exclude Credential Providers. Double click to open and edit.
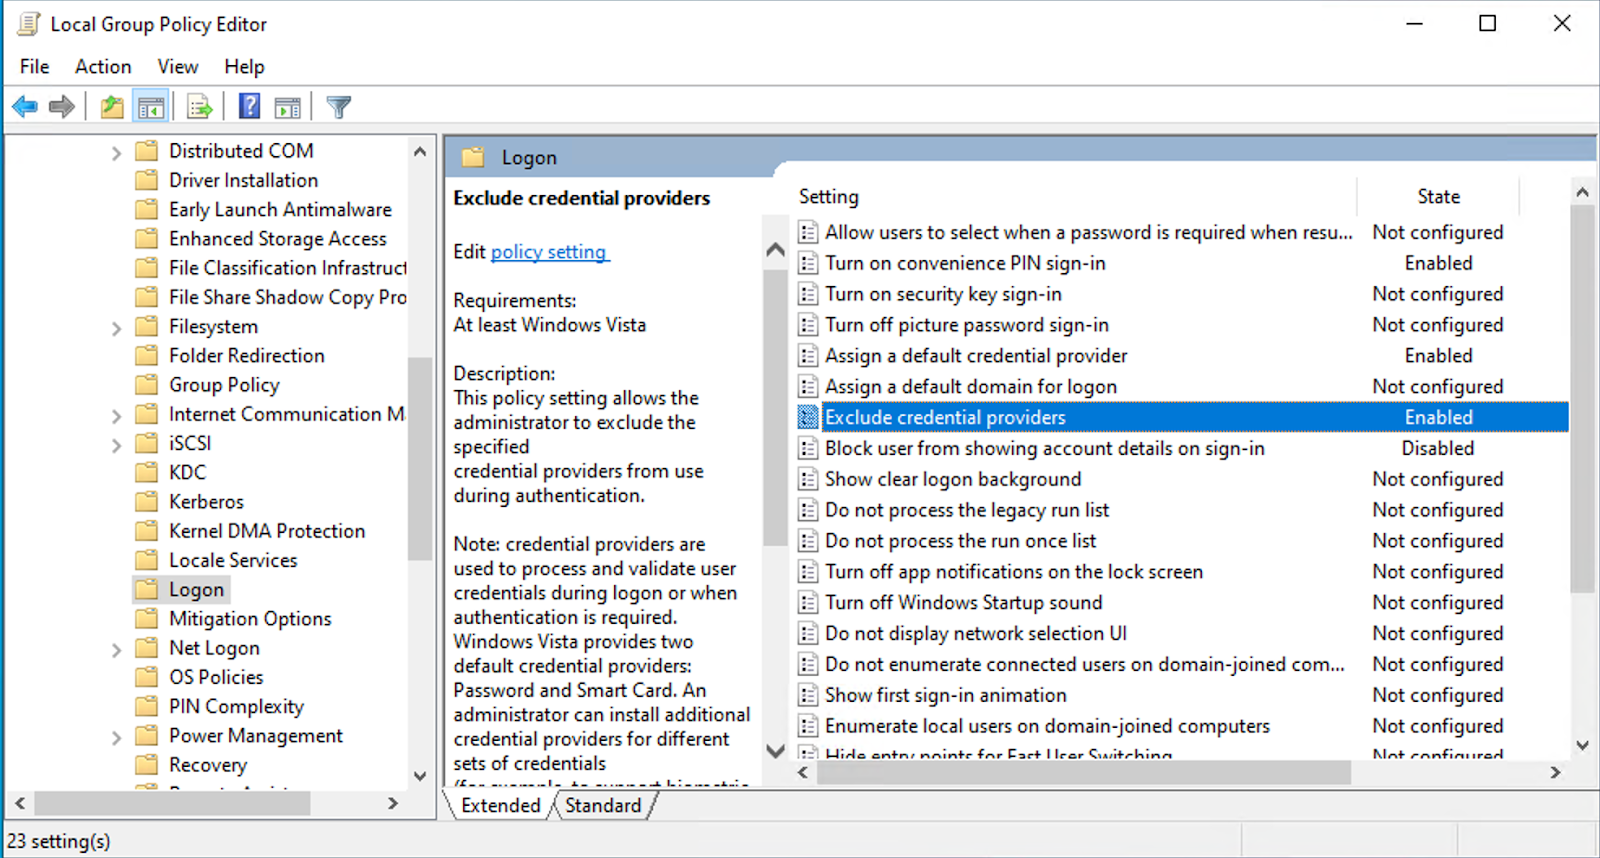

Select Enabled and input the CLSID from PasswordProvider {CLSID} found in the Registry Editor step previously. Click Apply and OK.
Restart computer, TraitWare is now the sole authentication method to the machine
Was this article helpful?
That’s Great!
Thank you for your feedback
Sorry! We couldn't be helpful
Thank you for your feedback
Feedback sent
We appreciate your effort and will try to fix the article


